- What is a Shopify rewards loyalty campaign from KickoffLabs?
- Step 1 - Create an ecommerce rewards campaign on KickoffLabs.
- Step 2 - Install the KickoffLabs Referral and Purchase Tracking script on Shopify
- Step 3 - Edit the signup page for your rewards program.
- Step 4 - Edit the Status Section
- Step 5 - Setup automatic campaign emails
- Step 6 - Make sure people are sharing your store
- Step 7 - Walk through your campaign and verify a referral purchase
- Step 8 - Get your existing customers sharing!
- Step 9 - Other tips and tricks
- Ready to Launch Your Shopify Referral Program?
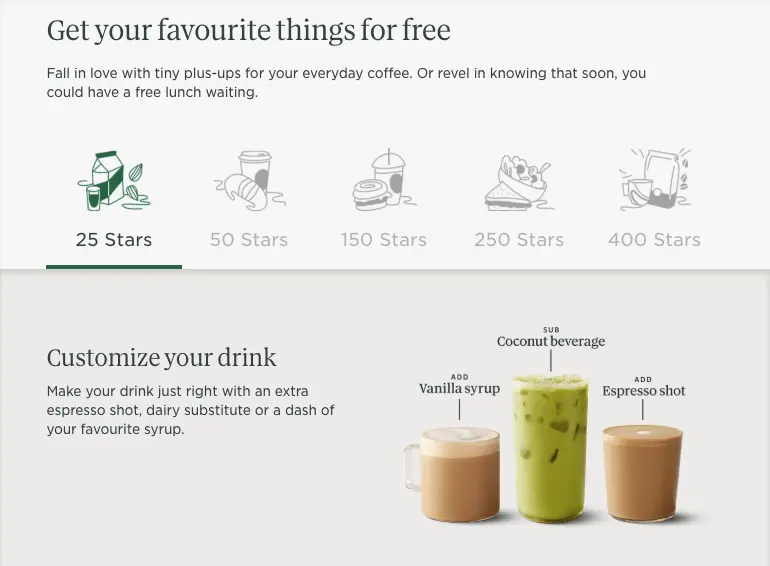
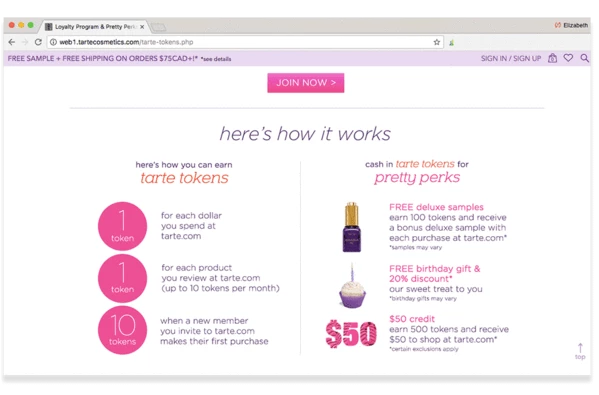
You’ve probably participated in some sort of customer loyalty program that rewards you for coming back to a store and buying more. Maybe you’re a gold member of the Starbucks Points program or perhaps you’ve redeemed a few stamp cards from the local sub shop.

This article is going to walk you through the process of creating a more social loyalty program for your Shopify store using a Shopify Rewards campaign from KickoffLabs. If you’re new to referral programs, check out our guide on what is a referral program first.
What is a Shopify rewards loyalty campaign from KickoffLabs?
We’ve discussed the concept of a points program (ala Starbuck) and also the traditional punchcards. Any loyalty style campaign starts with the concept of rewarding people for purchases made at your store.
A “Social” rewards campaign from KickoffLabs add the concept of word of mouth to basic loyalty. Your customers can earn points for their purchases and purchases made by their friends in addition to points earned for following you online or even just new leads your way. This creates a powerful referral tracking system for your Shopify store.

Step 1 - Create an ecommerce rewards campaign on KickoffLabs.
In addition to a Shopify store you’ll also need an account at KickoffLabs. You can start with a free account, but you’ll need at least a Premium level account to use build a Shopify Rewards campaign.
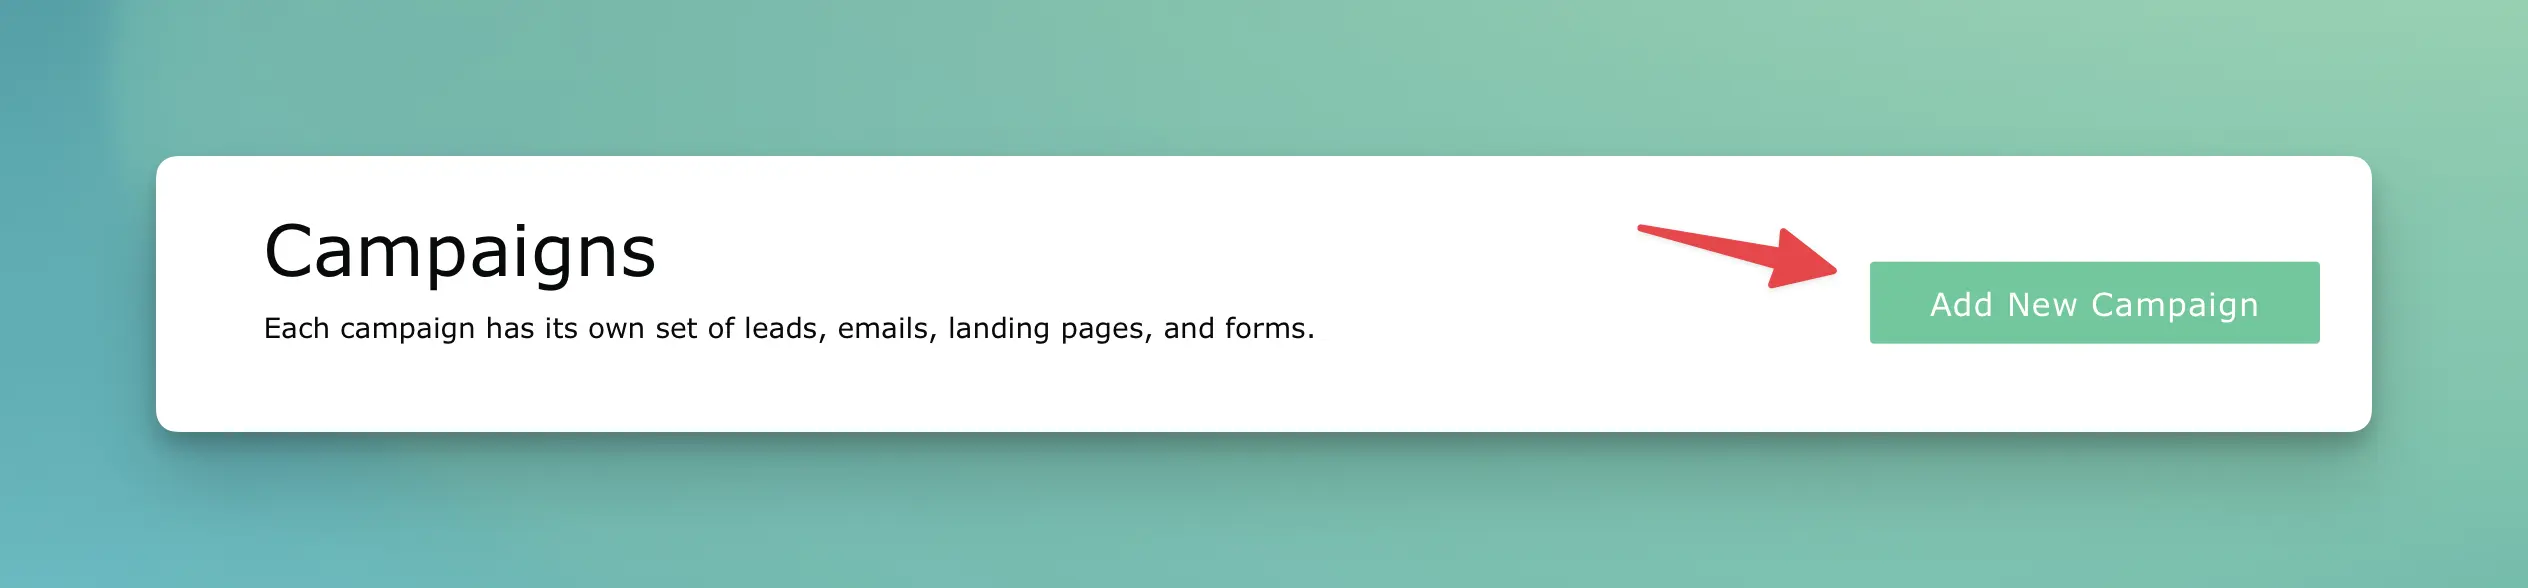
Start the Ecommerce Campaign Setup Once inside your KickoffLabs account you’ll want to create a new campaign.
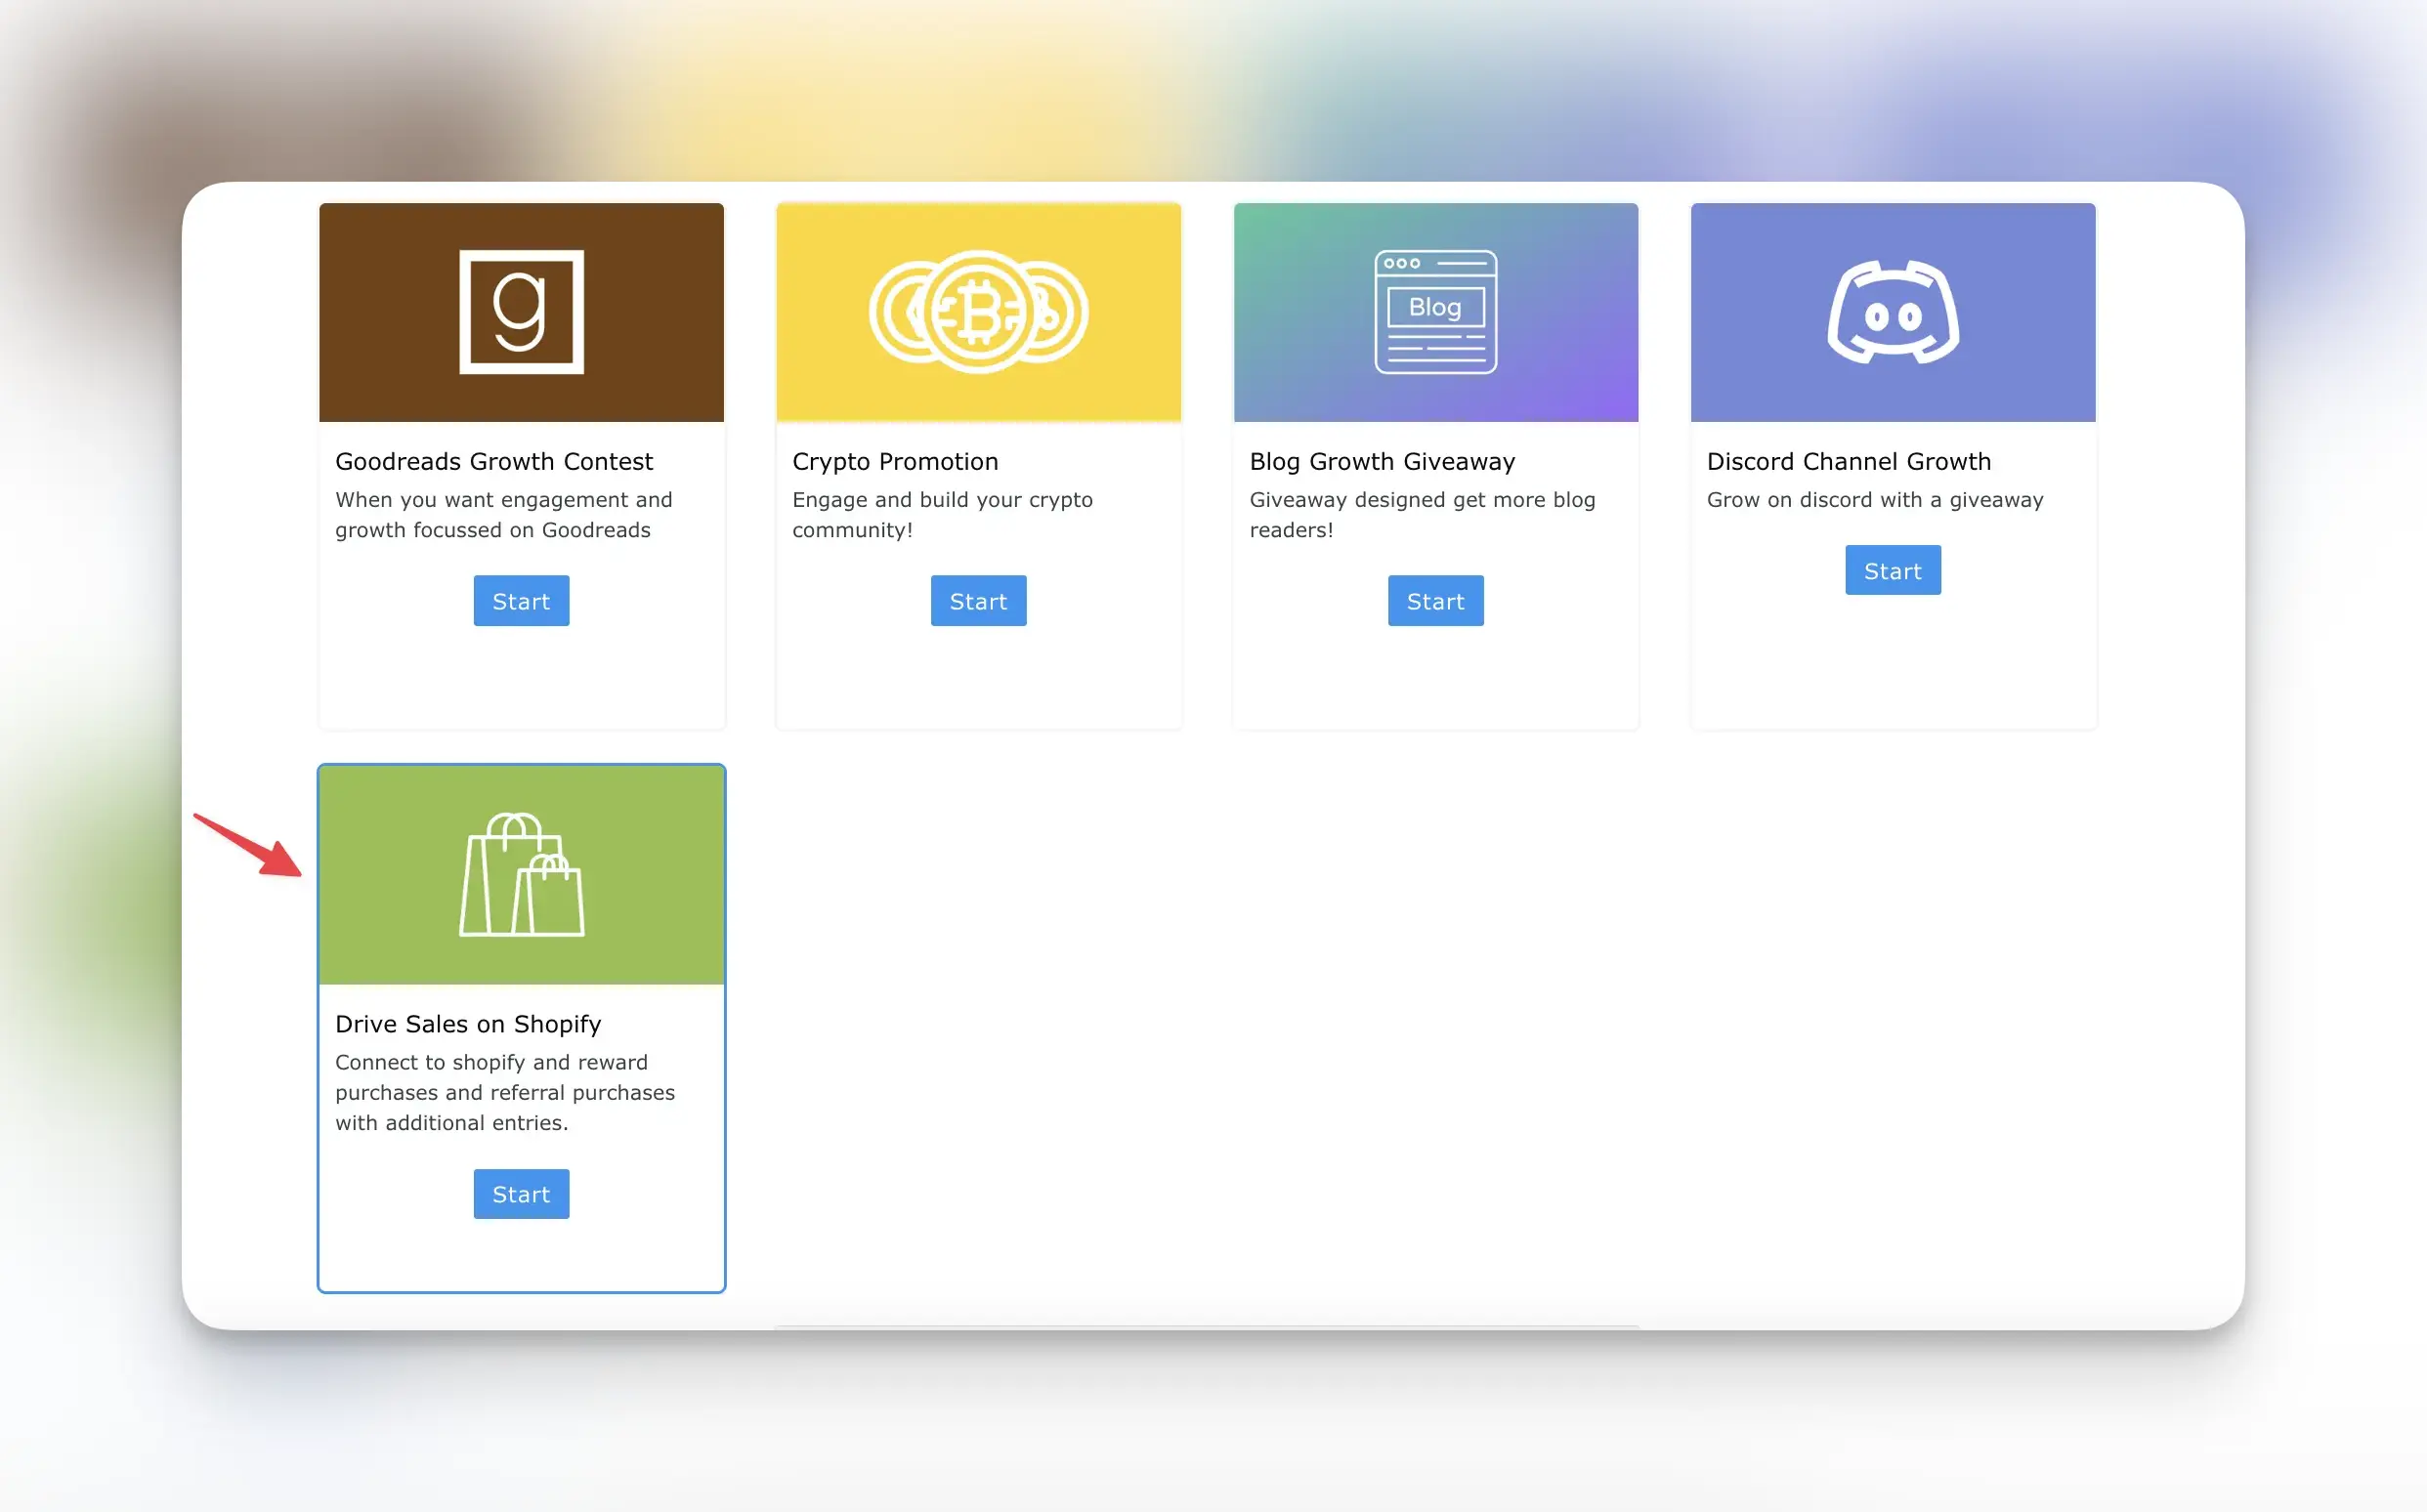
Next, select the “Drive Sales on Shopify” campaign type
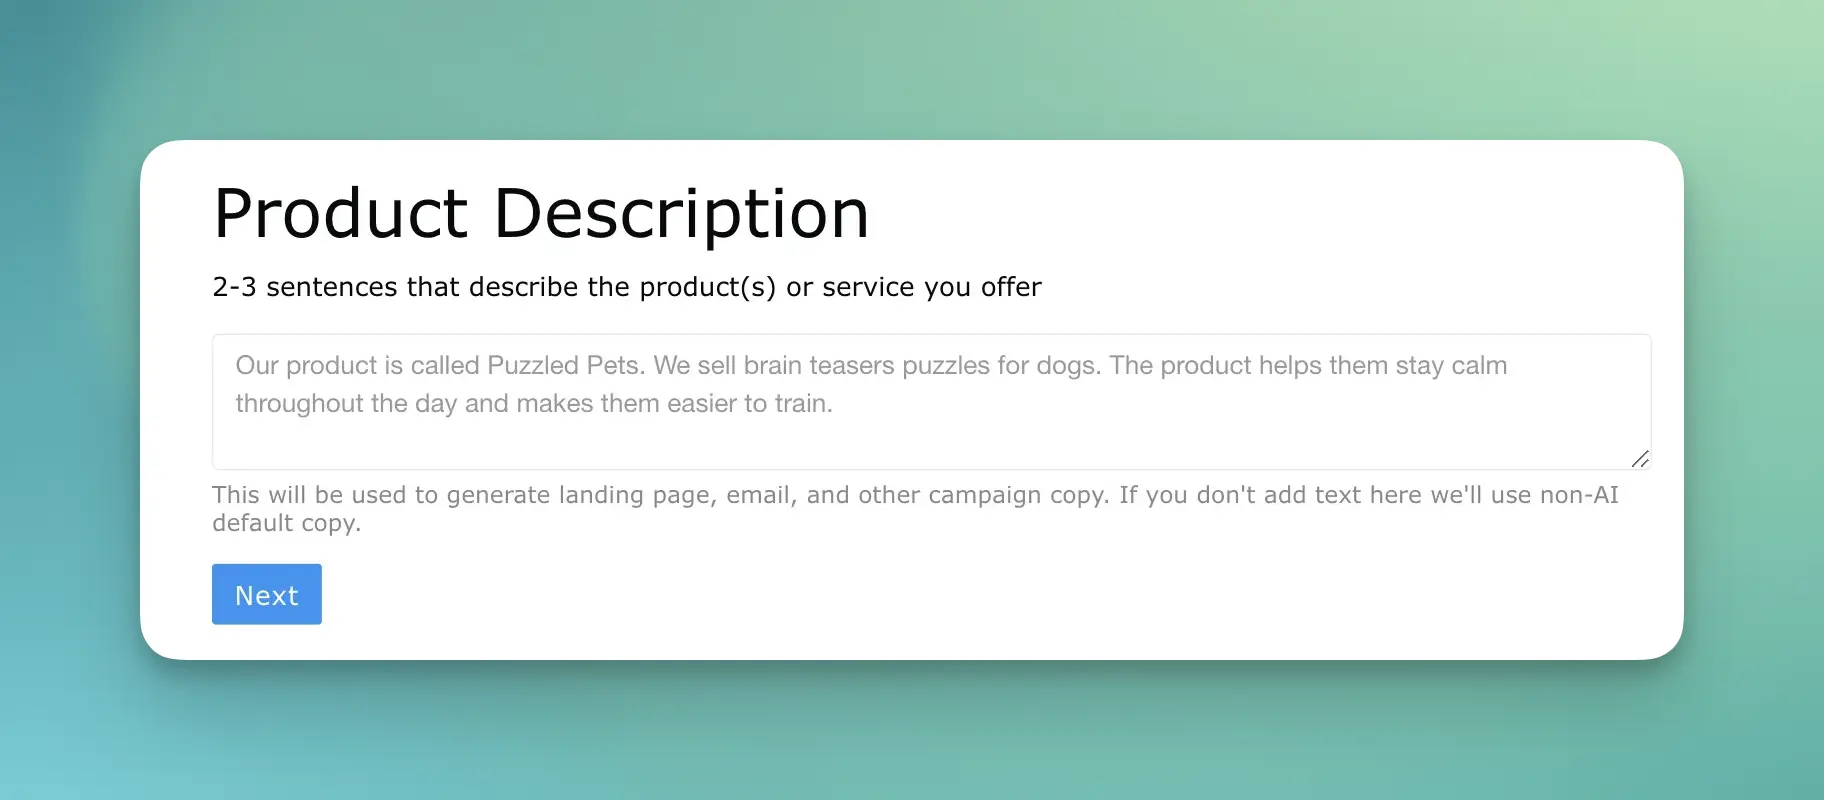
You’ll be asked if you want AI help with the campaign
Enter a few sentences about your brand and let AI do the work for you! The AI builder will generate a landing page with copy, share descriptions, rewards, and even contest rules examples. If you don’t want AI, simply leave the field blank and click the “next” button.
Decide how leads should sign-up to your campaign
This is how new rewards program members (who are not already on your list) will signup for the program and view their stats. Typically most campaigns start with a landing page that you can link to from your store.
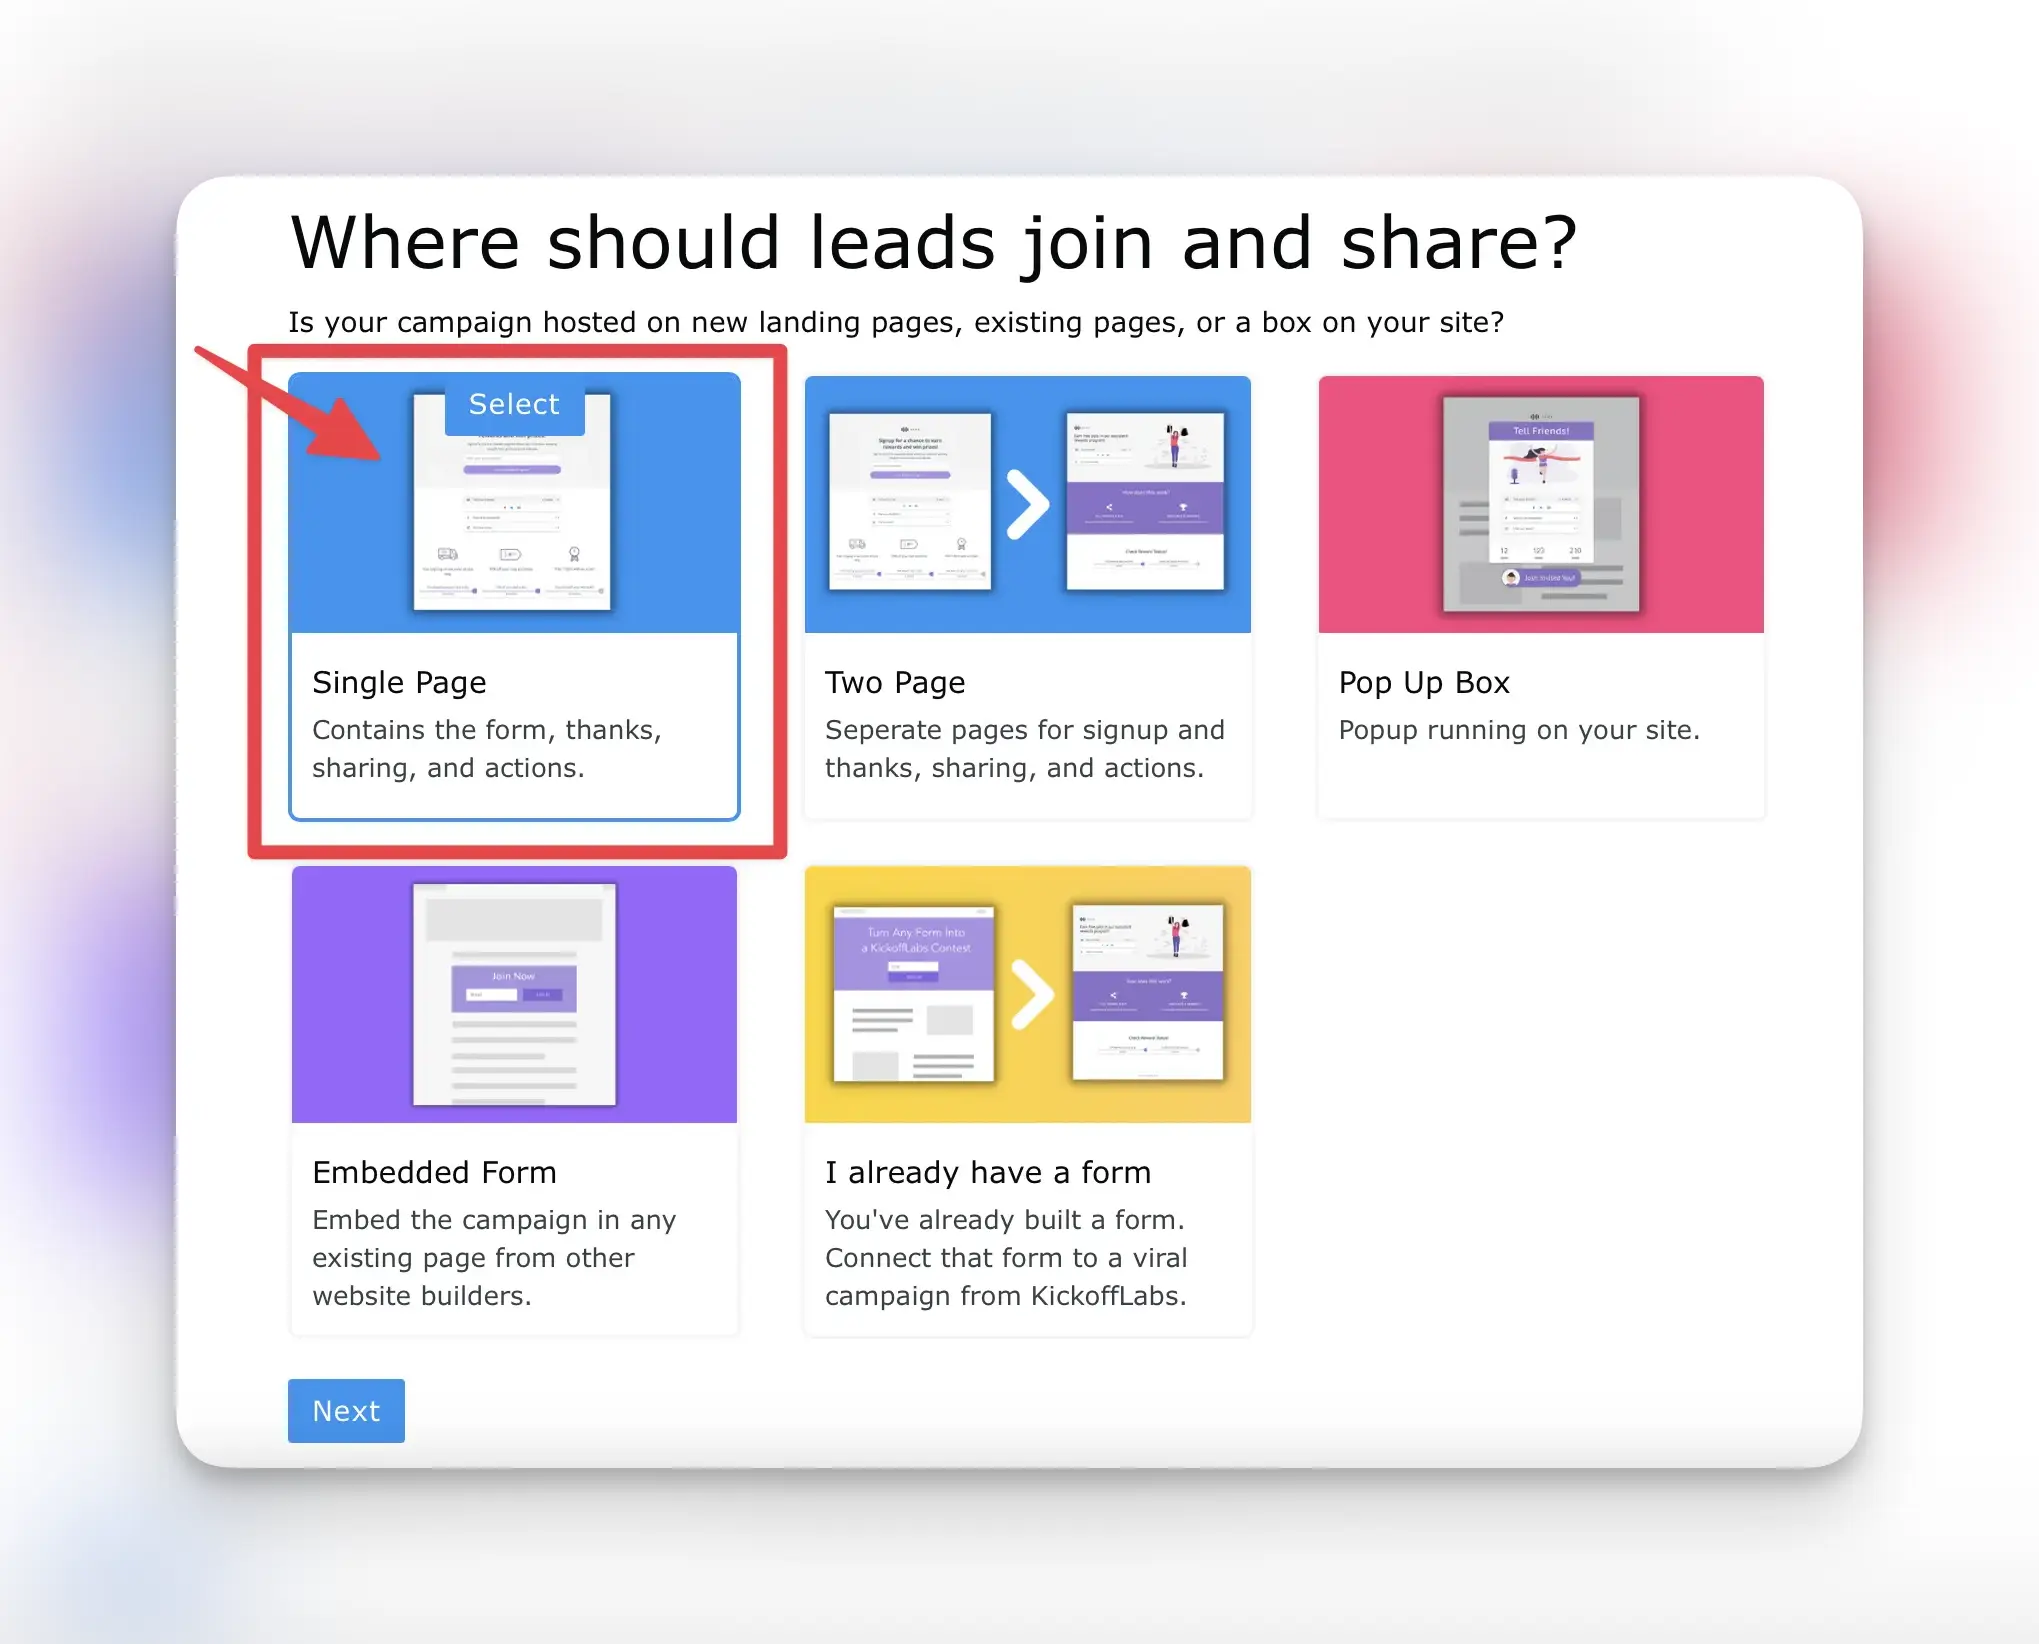
You could also setup a widget on your store with a KickoffLabs Embed, Popup, OR a custom form if you’ve got a whole lot of extra developers lying around using our Anyform script. No worries here. You can add or remove signup mechanisms later to any campaign. Learn more about all of the options we offer here
Choose a page design to start.
Assuming you picked a KickoffLabs page we’ll give a few popular design templates. There are options for two main types of reward campaigns people run. You can always mix and match widgets in the KickoffLabs editor. Just a few options below to get some ideas!
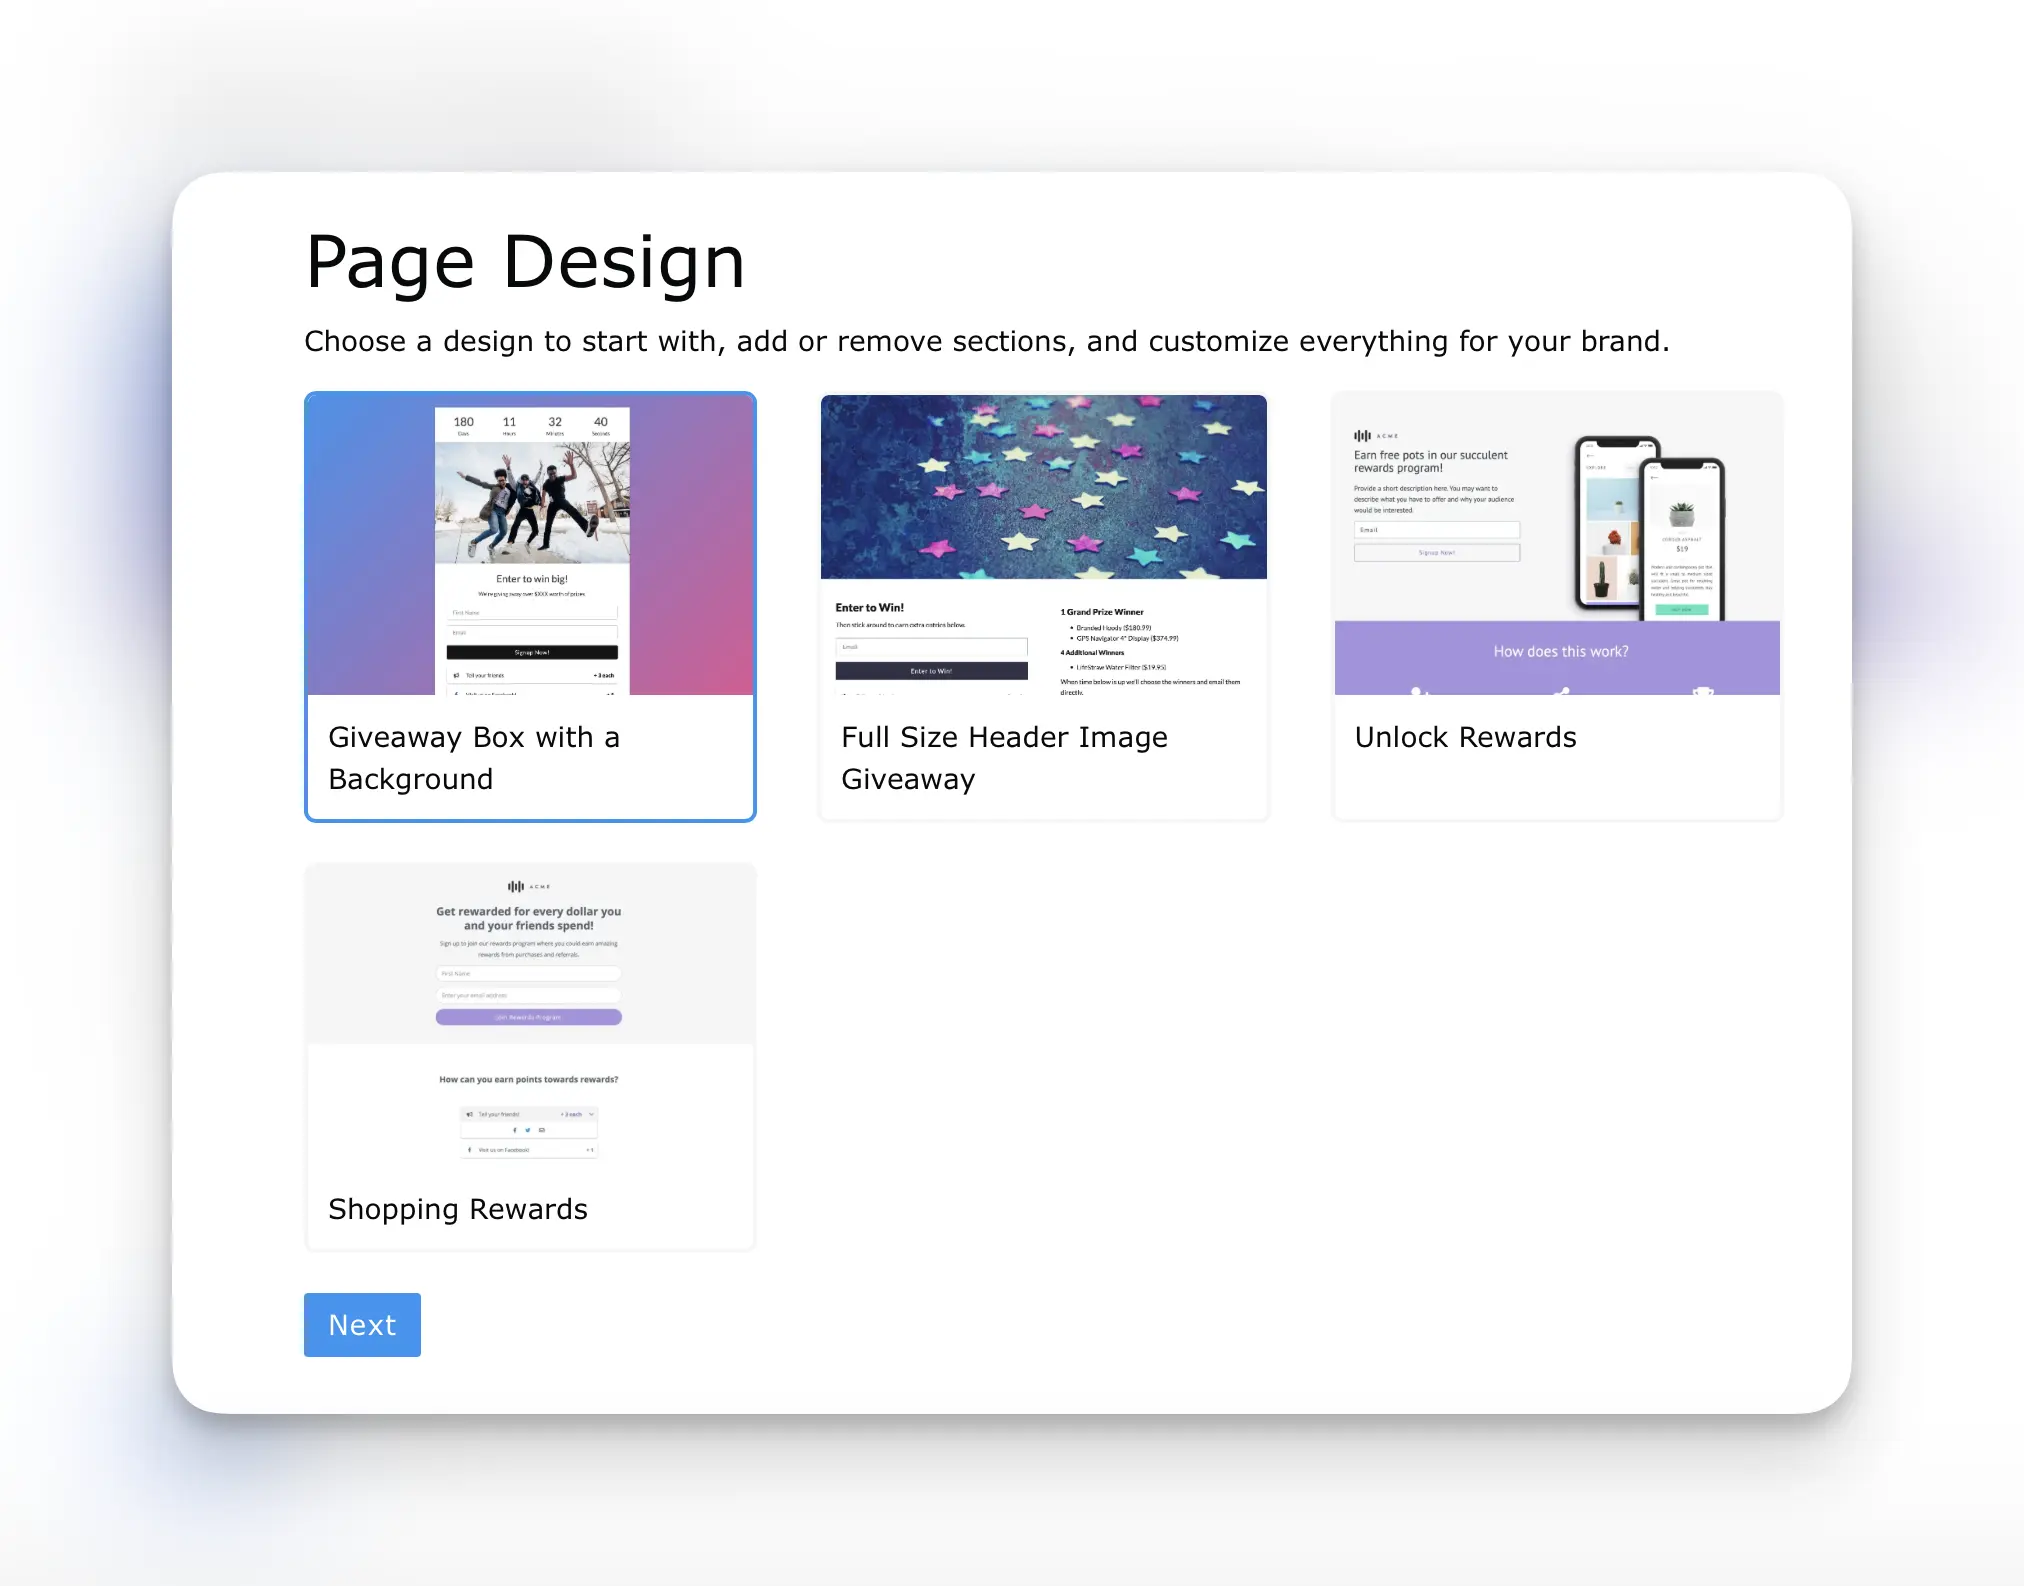
- Bonus Entry Giveaway - Imagine each point earned increases your customers chance of winning at the end the contest.
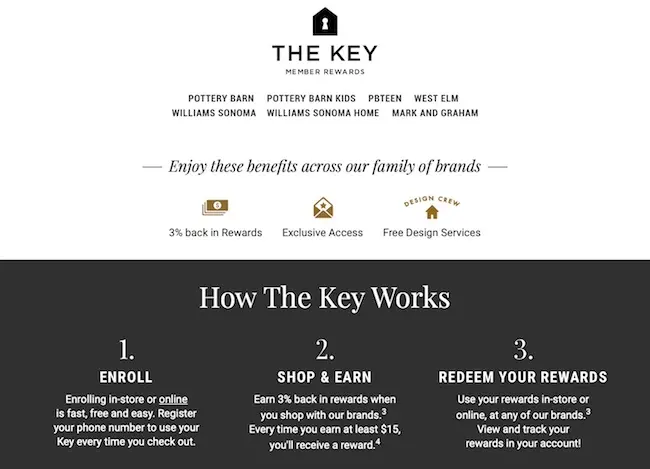
- Reward Levels - Similar to the Starbucks example above. Customers earn rewards for themselves as they achieve new point levels. Maybe free shipping at 50 points and a $20 gift card for having reached 200 points.
Review your selections and generate the campaign
We’ve automatically selected the scoring/referrals based on the campaign type that you chose. In this case, the Shopify Rewards campaign awards points for both referrals + actions taken. This can ofcourse be customized later to fit your needs. If all looks good, make the robot dance!
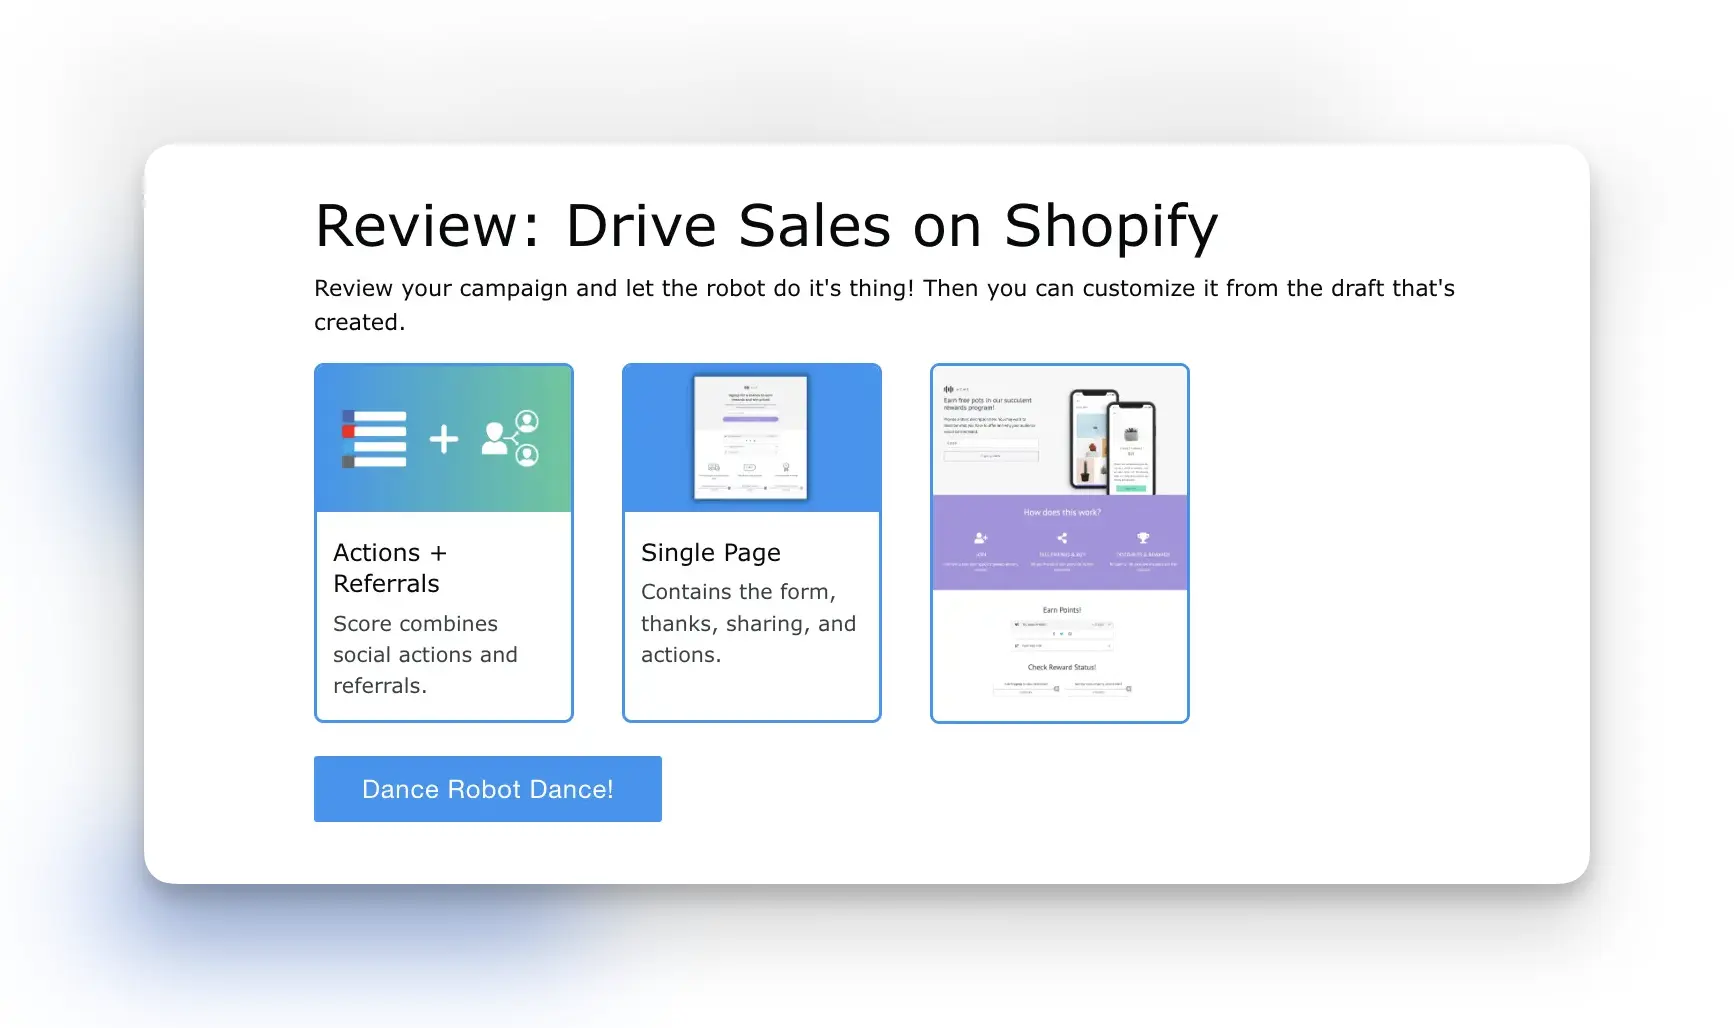
For this tutorial we’ll walk through the Reward Levels campaign as it’s been the most popular type at KickoffLabs although you can always change a campaign after it’s been created by adding a different status page.
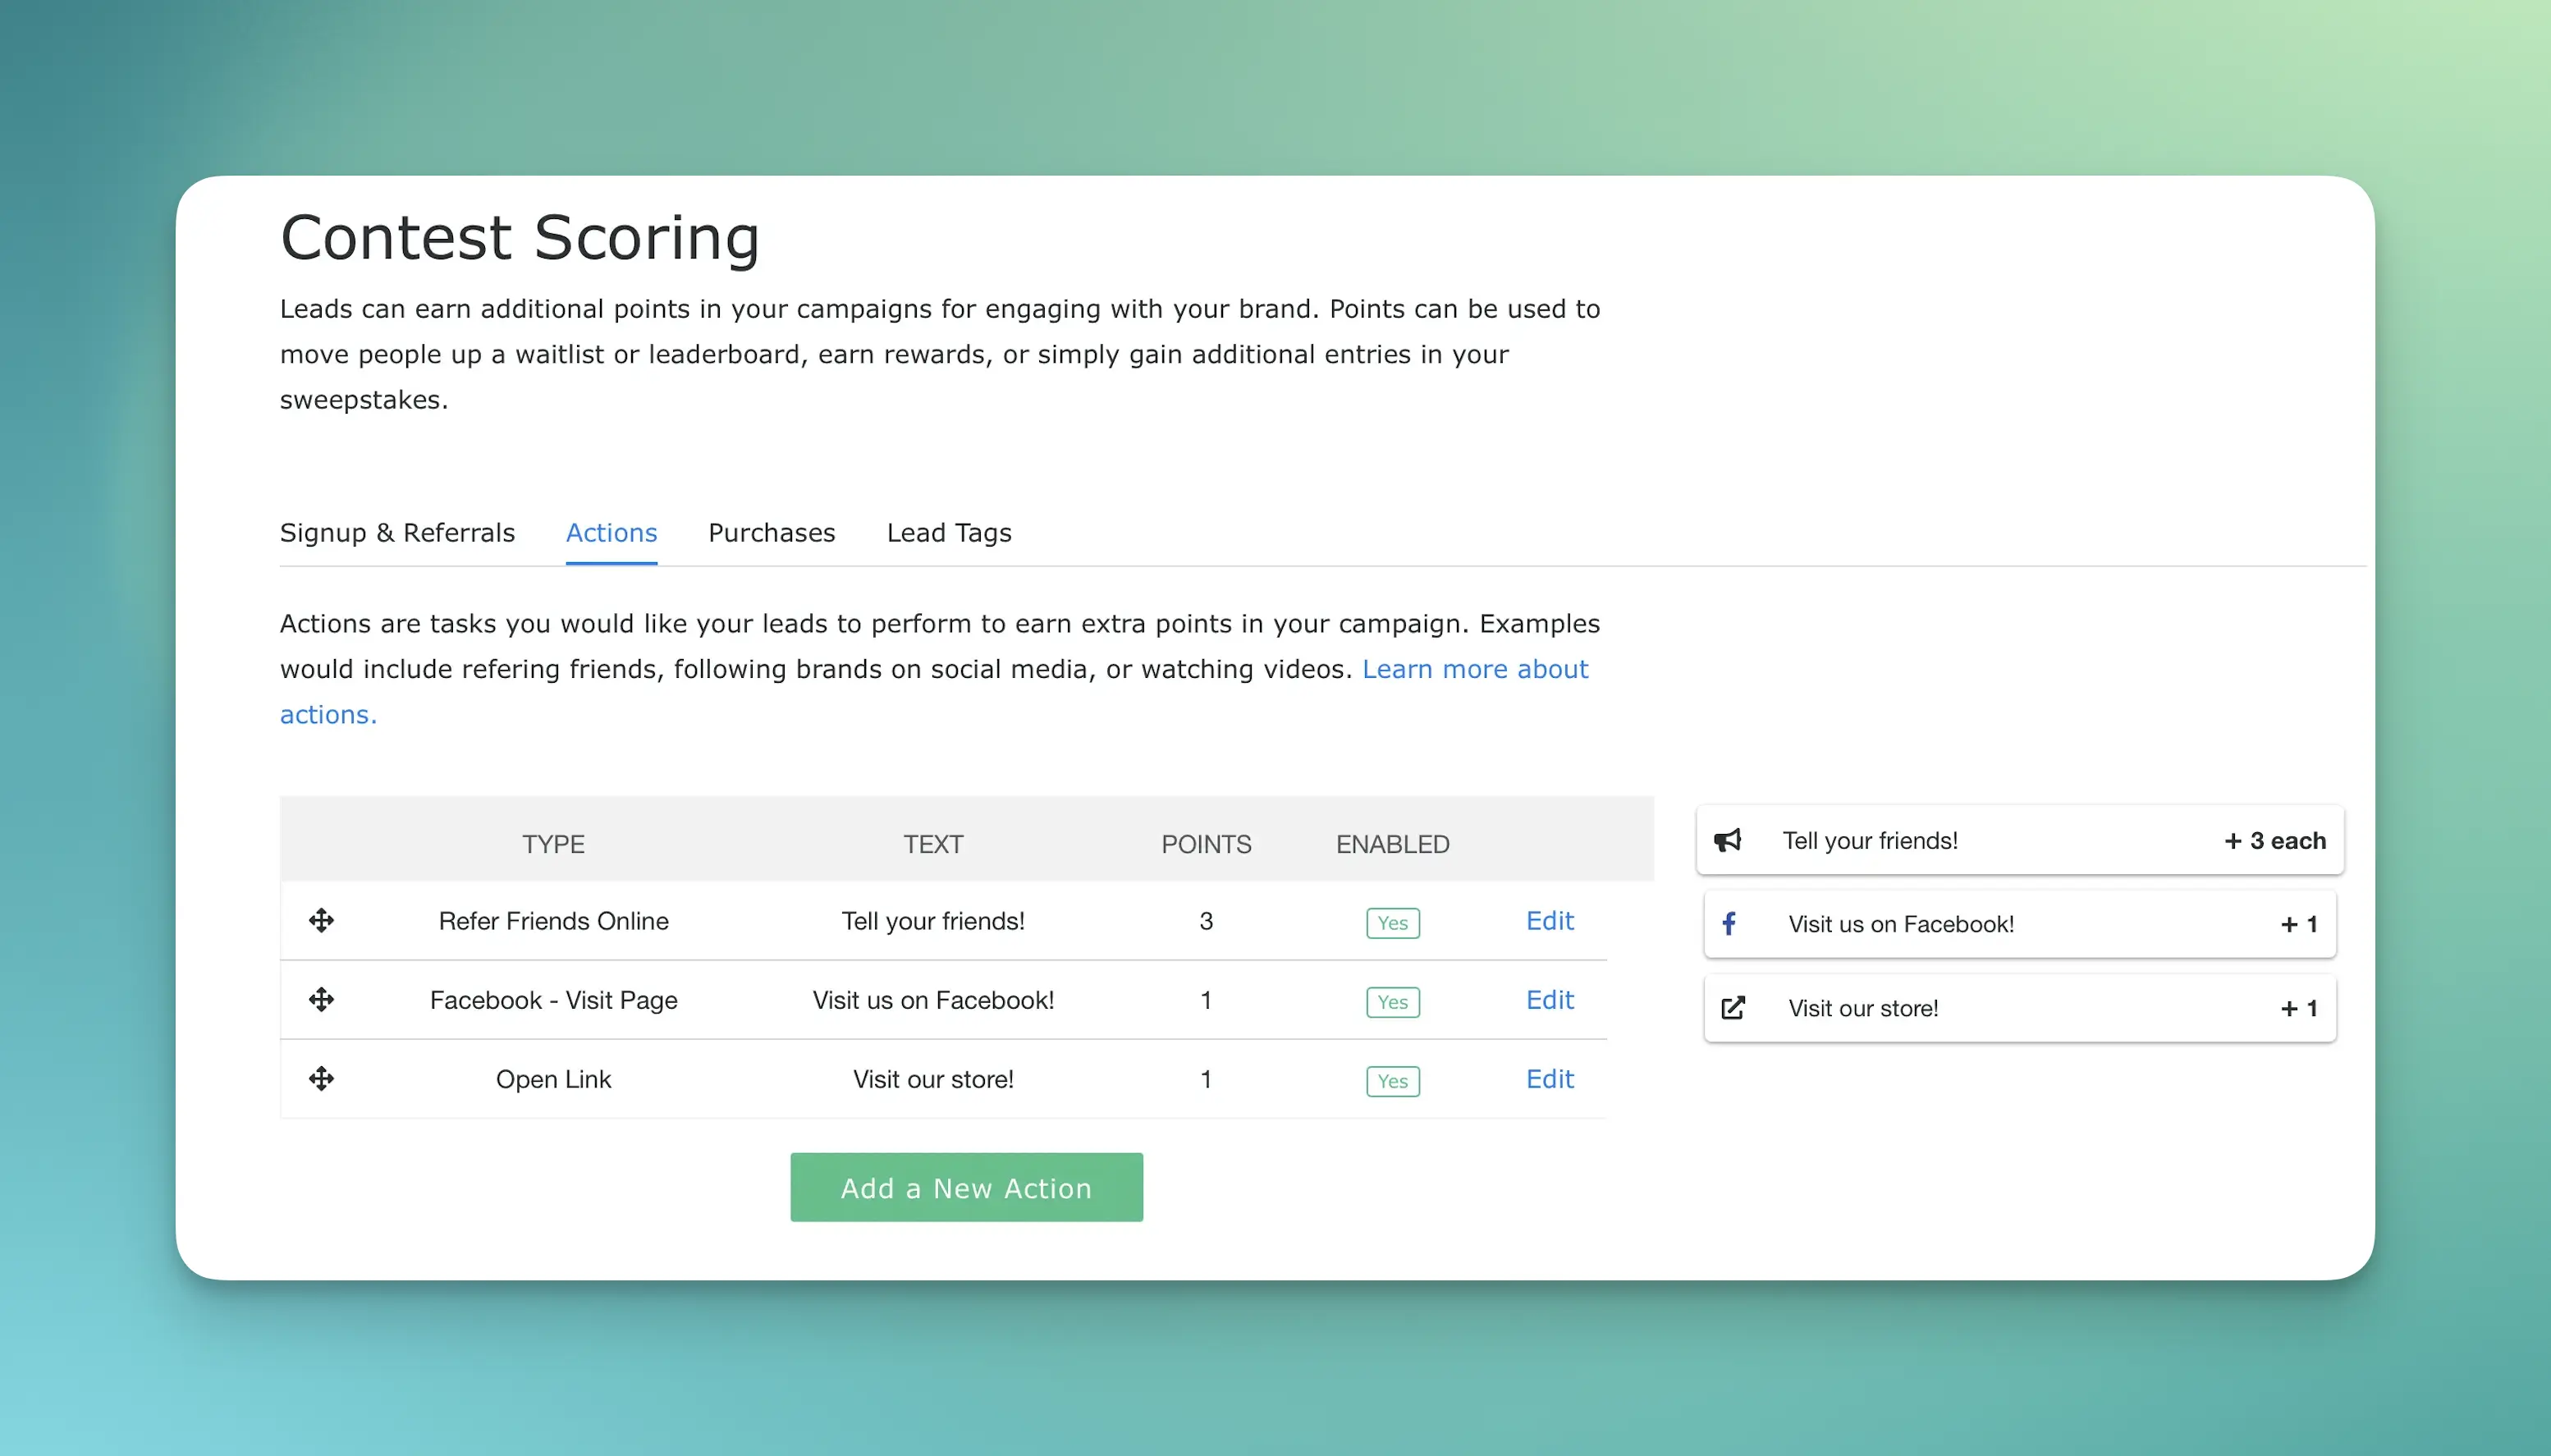
Set-up Campaign Scoring and Actions

Select the “scoring” section from your camppaign dashboard. Here you can customize how you want to award points to leads. We have many options such as making a purchase, referring a friend, or completing an external action.
Step 2 - Install the KickoffLabs Referral and Purchase Tracking script on Shopify
Lets get the purchase tracking setup ASAP so the rest of the campaign will work once you publish it. From the “Scoring” settings, select the “Purchases” tab and scroll to the Shopify installation.
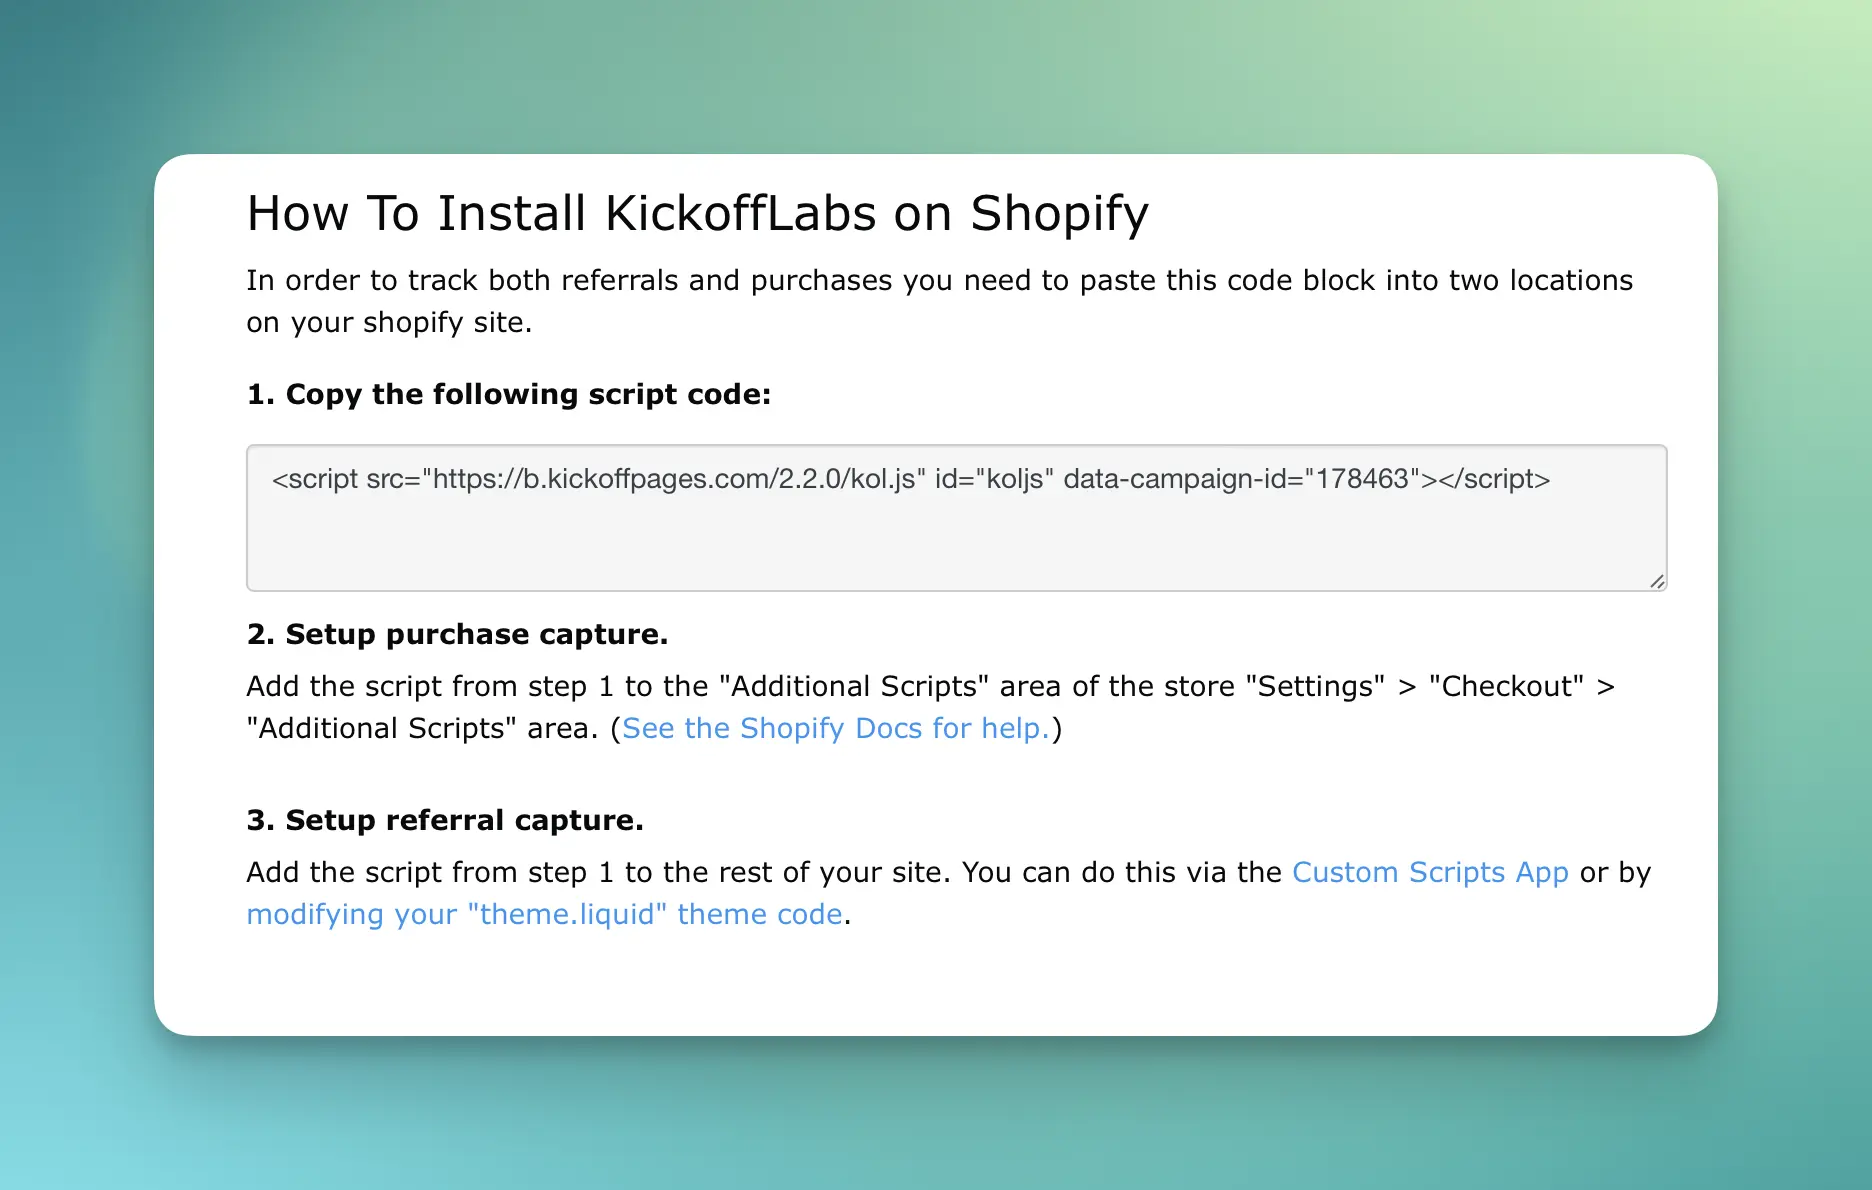
Follow the steps on that settings page in order to paste the script into the two required locations.
Tagging leads and awarding points for purchases
Note that on this page you’ll find settings for what Tag we’ll apply to people who purchase something or refer a buyer. These tags make it easier to identify leads in these buckets later.
You can also control if points are awarded per dollar spent in each of these cases.

Verify Script Install Tracks Orders
You can verify the scripts have been installed properly by completing a test checkout and then a referral on your store.
Once you’ve checked out click the “Leads” tab. The person who completed the order should be there.
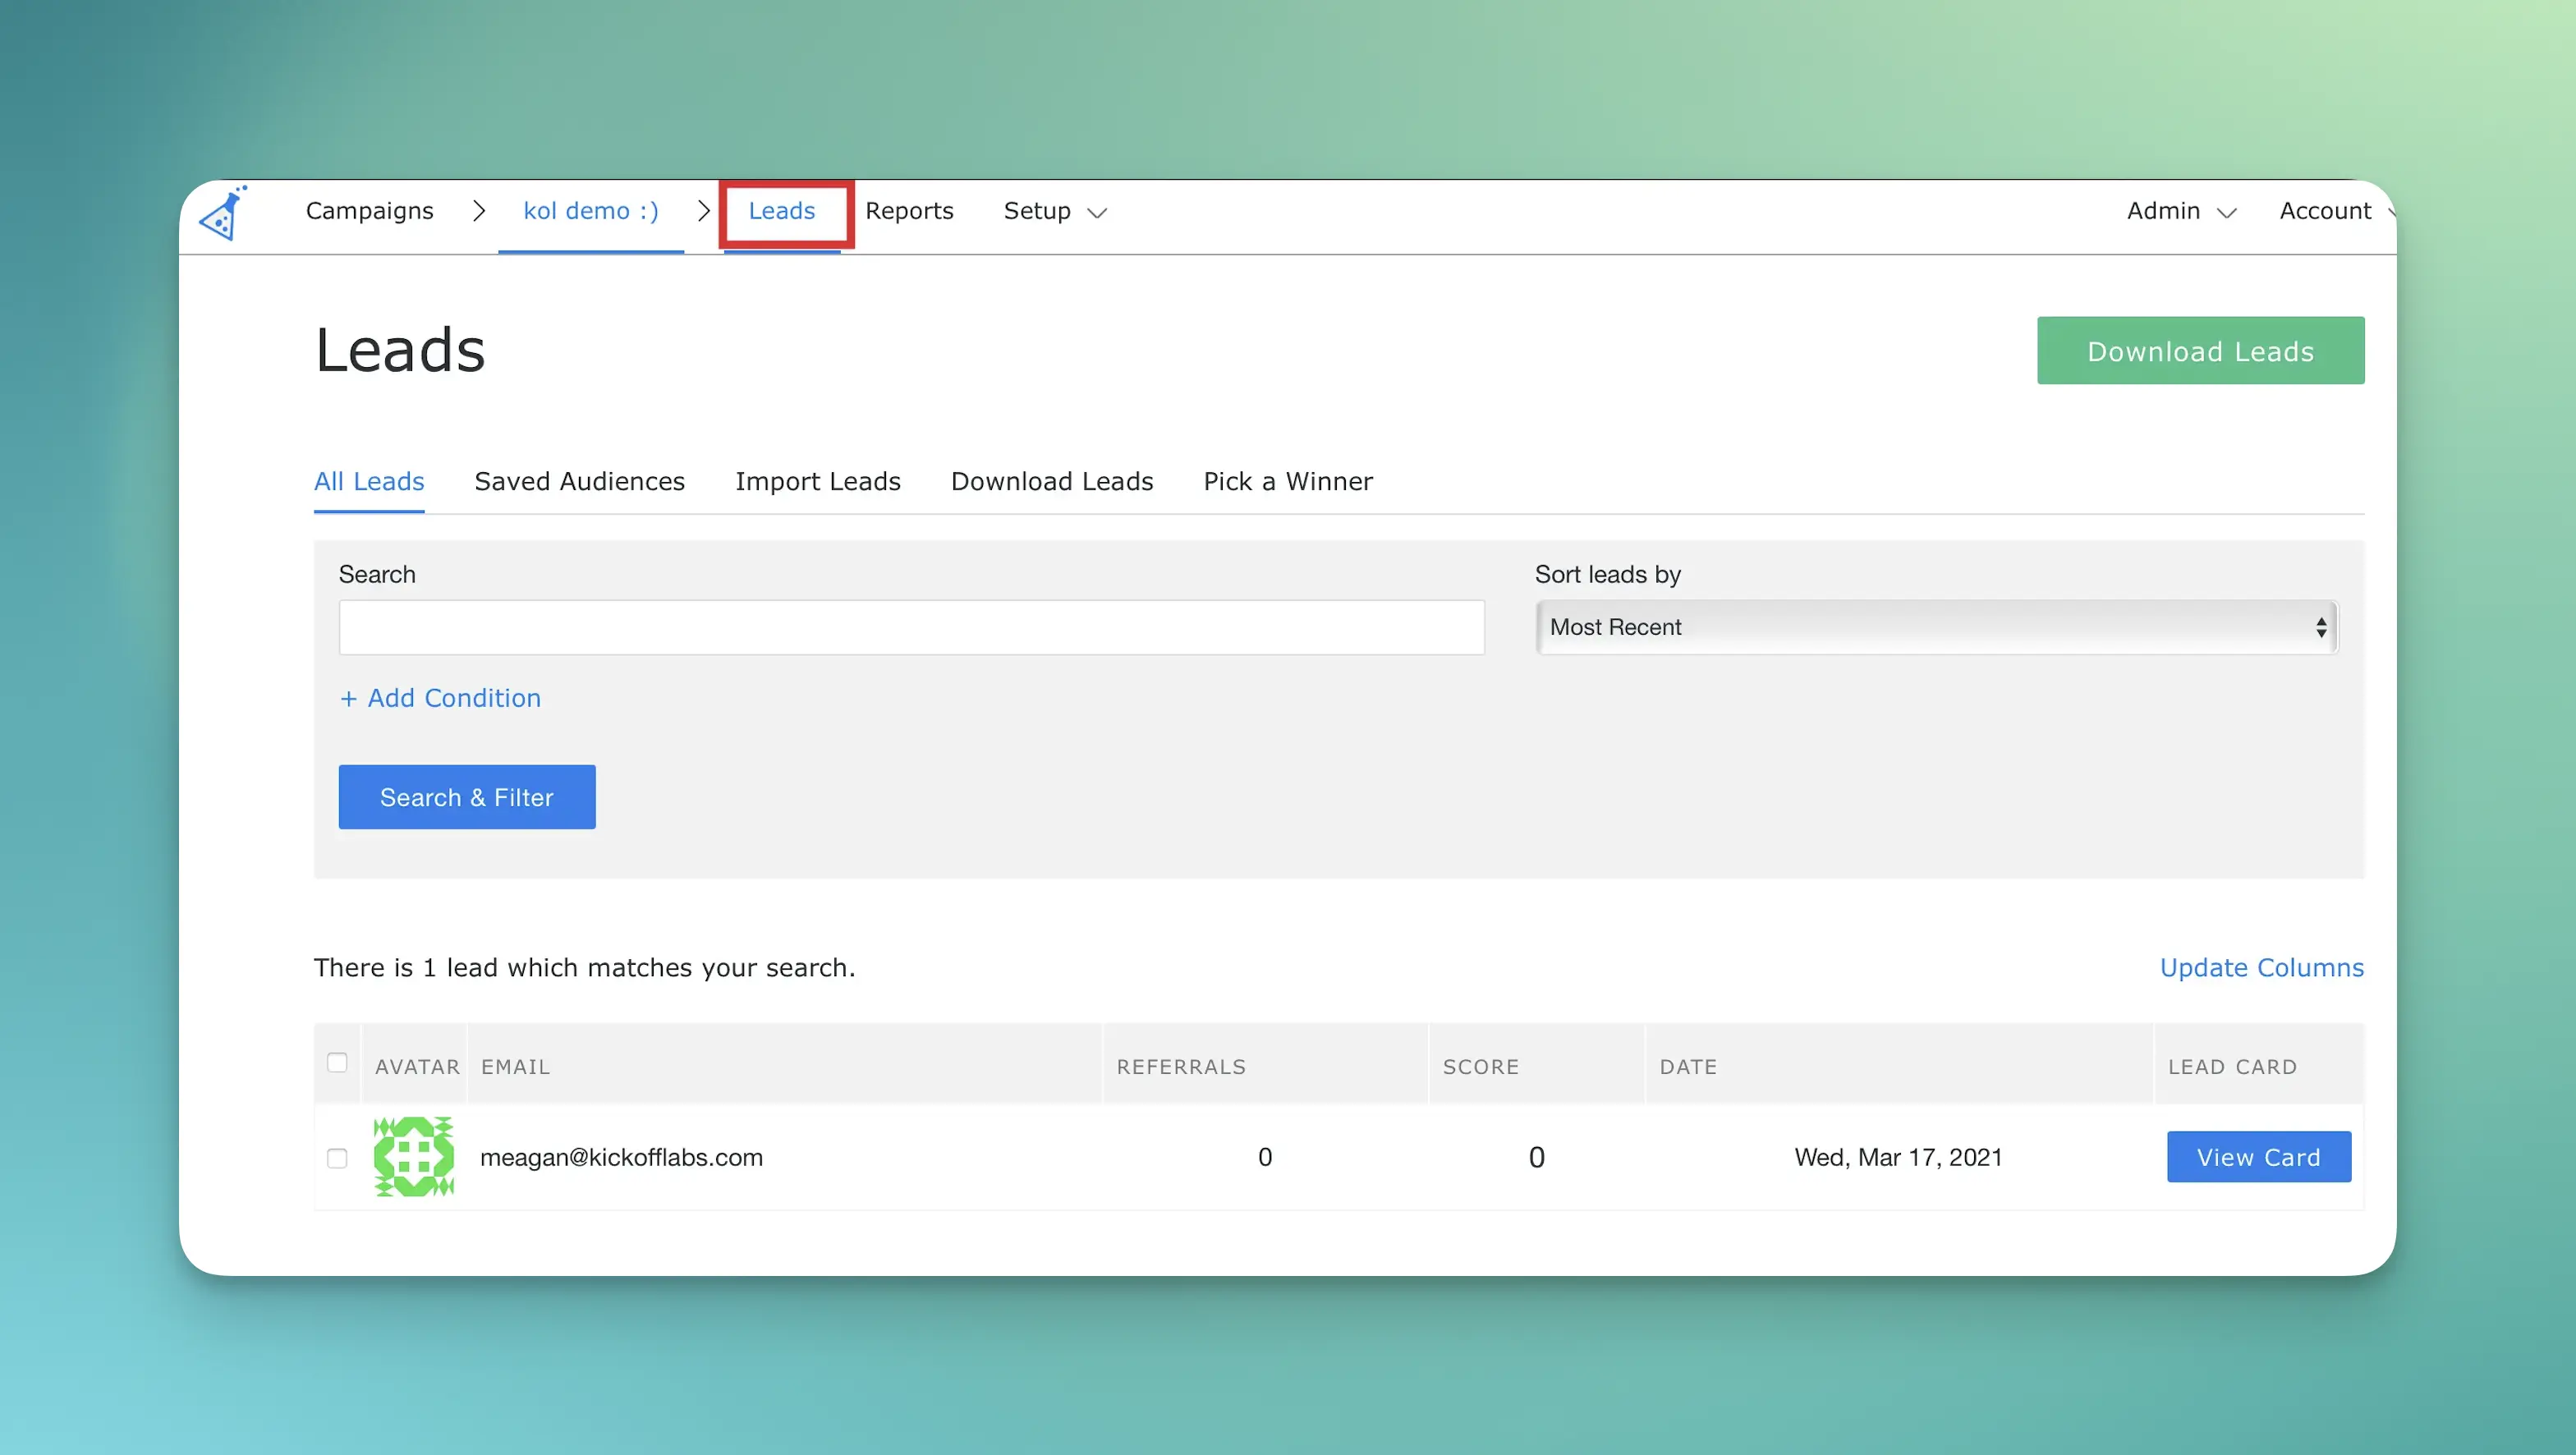
Later we’ll verify that the referral tracking is working as well.
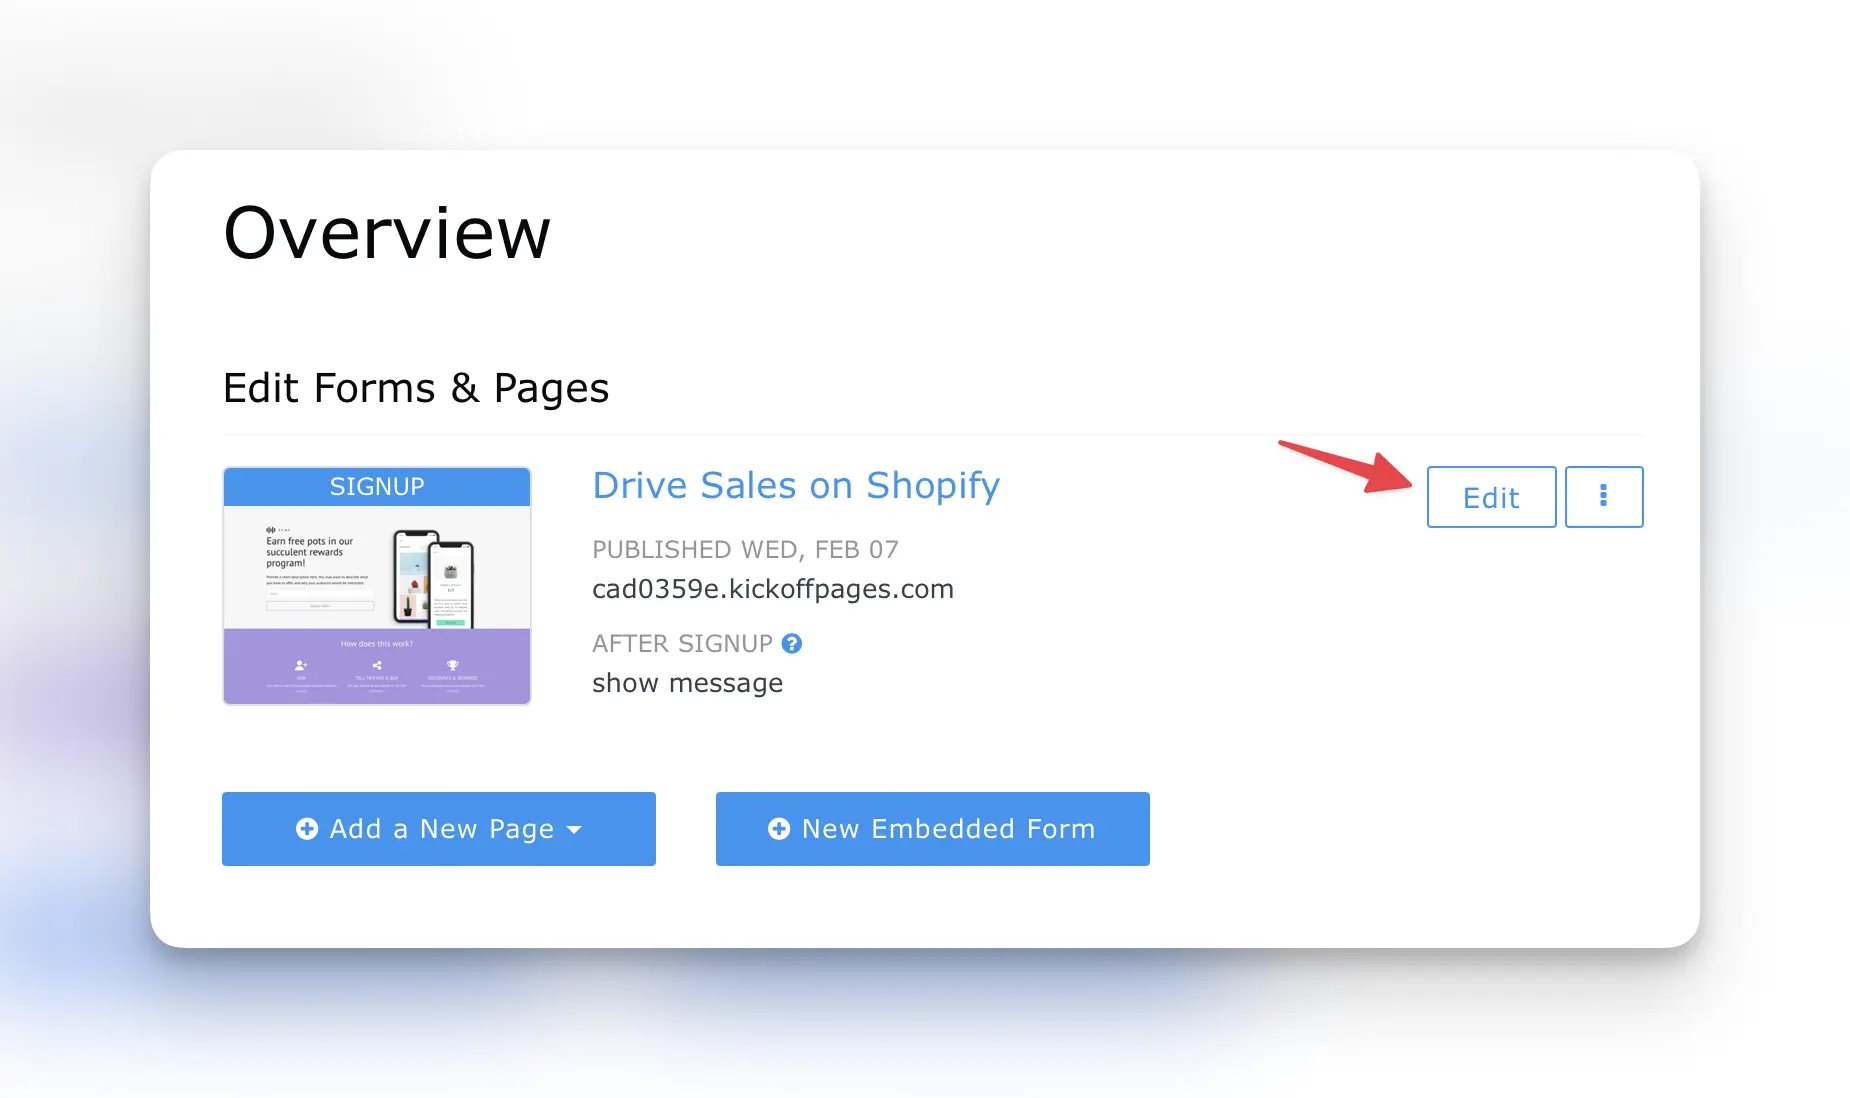
Step 3 - Edit the signup page for your rewards program.
From the campaign overview page choose to “Edit” the signup page for your reward program. It’s possible this is a popup or widget on your site as well.
The goal is simply to have a place where people could join the rewards program who have not yet bought something and are not already on your list. It’s also not required… just recommended.
Learn about editing landing pages
Read our getting started guide for editing landing pages.
Add an incentive for people to join.
Even if it’s as simple as a universal 10% off coupon code you can send out through an automated reply when people join.
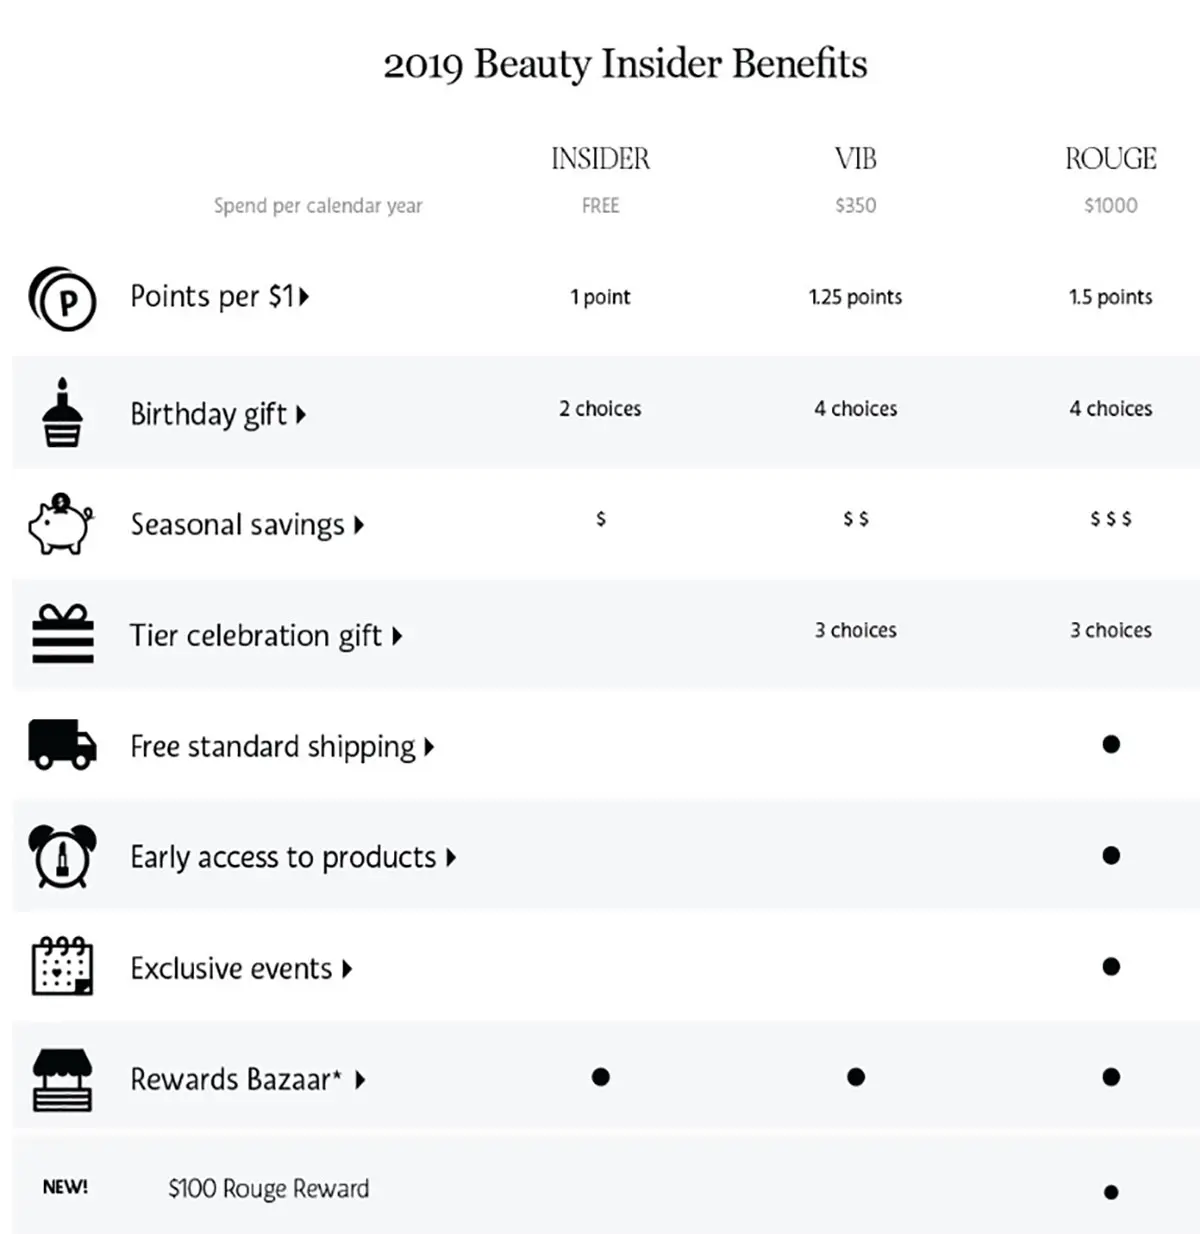
Tease the rewards
This is where you’d explain the benefits of joining a program. Here are some good examples:
A quick and easy way to do this may be to use our new all in one sign-up experience. This would keep the lead on the same page and display the rewards.
Step 4 - Edit the Status Section
After someone is added to your rewards program we’ll display their unique stats that outlines the rewards, their progress towards them, and links they should be sharing. In the landing page editor, select the “Thanks & Status” section to edit. This step may vary if you’re instead using a two page setup, KickoffLabs embeds, or the popup experience. In that case, you can skip this step.
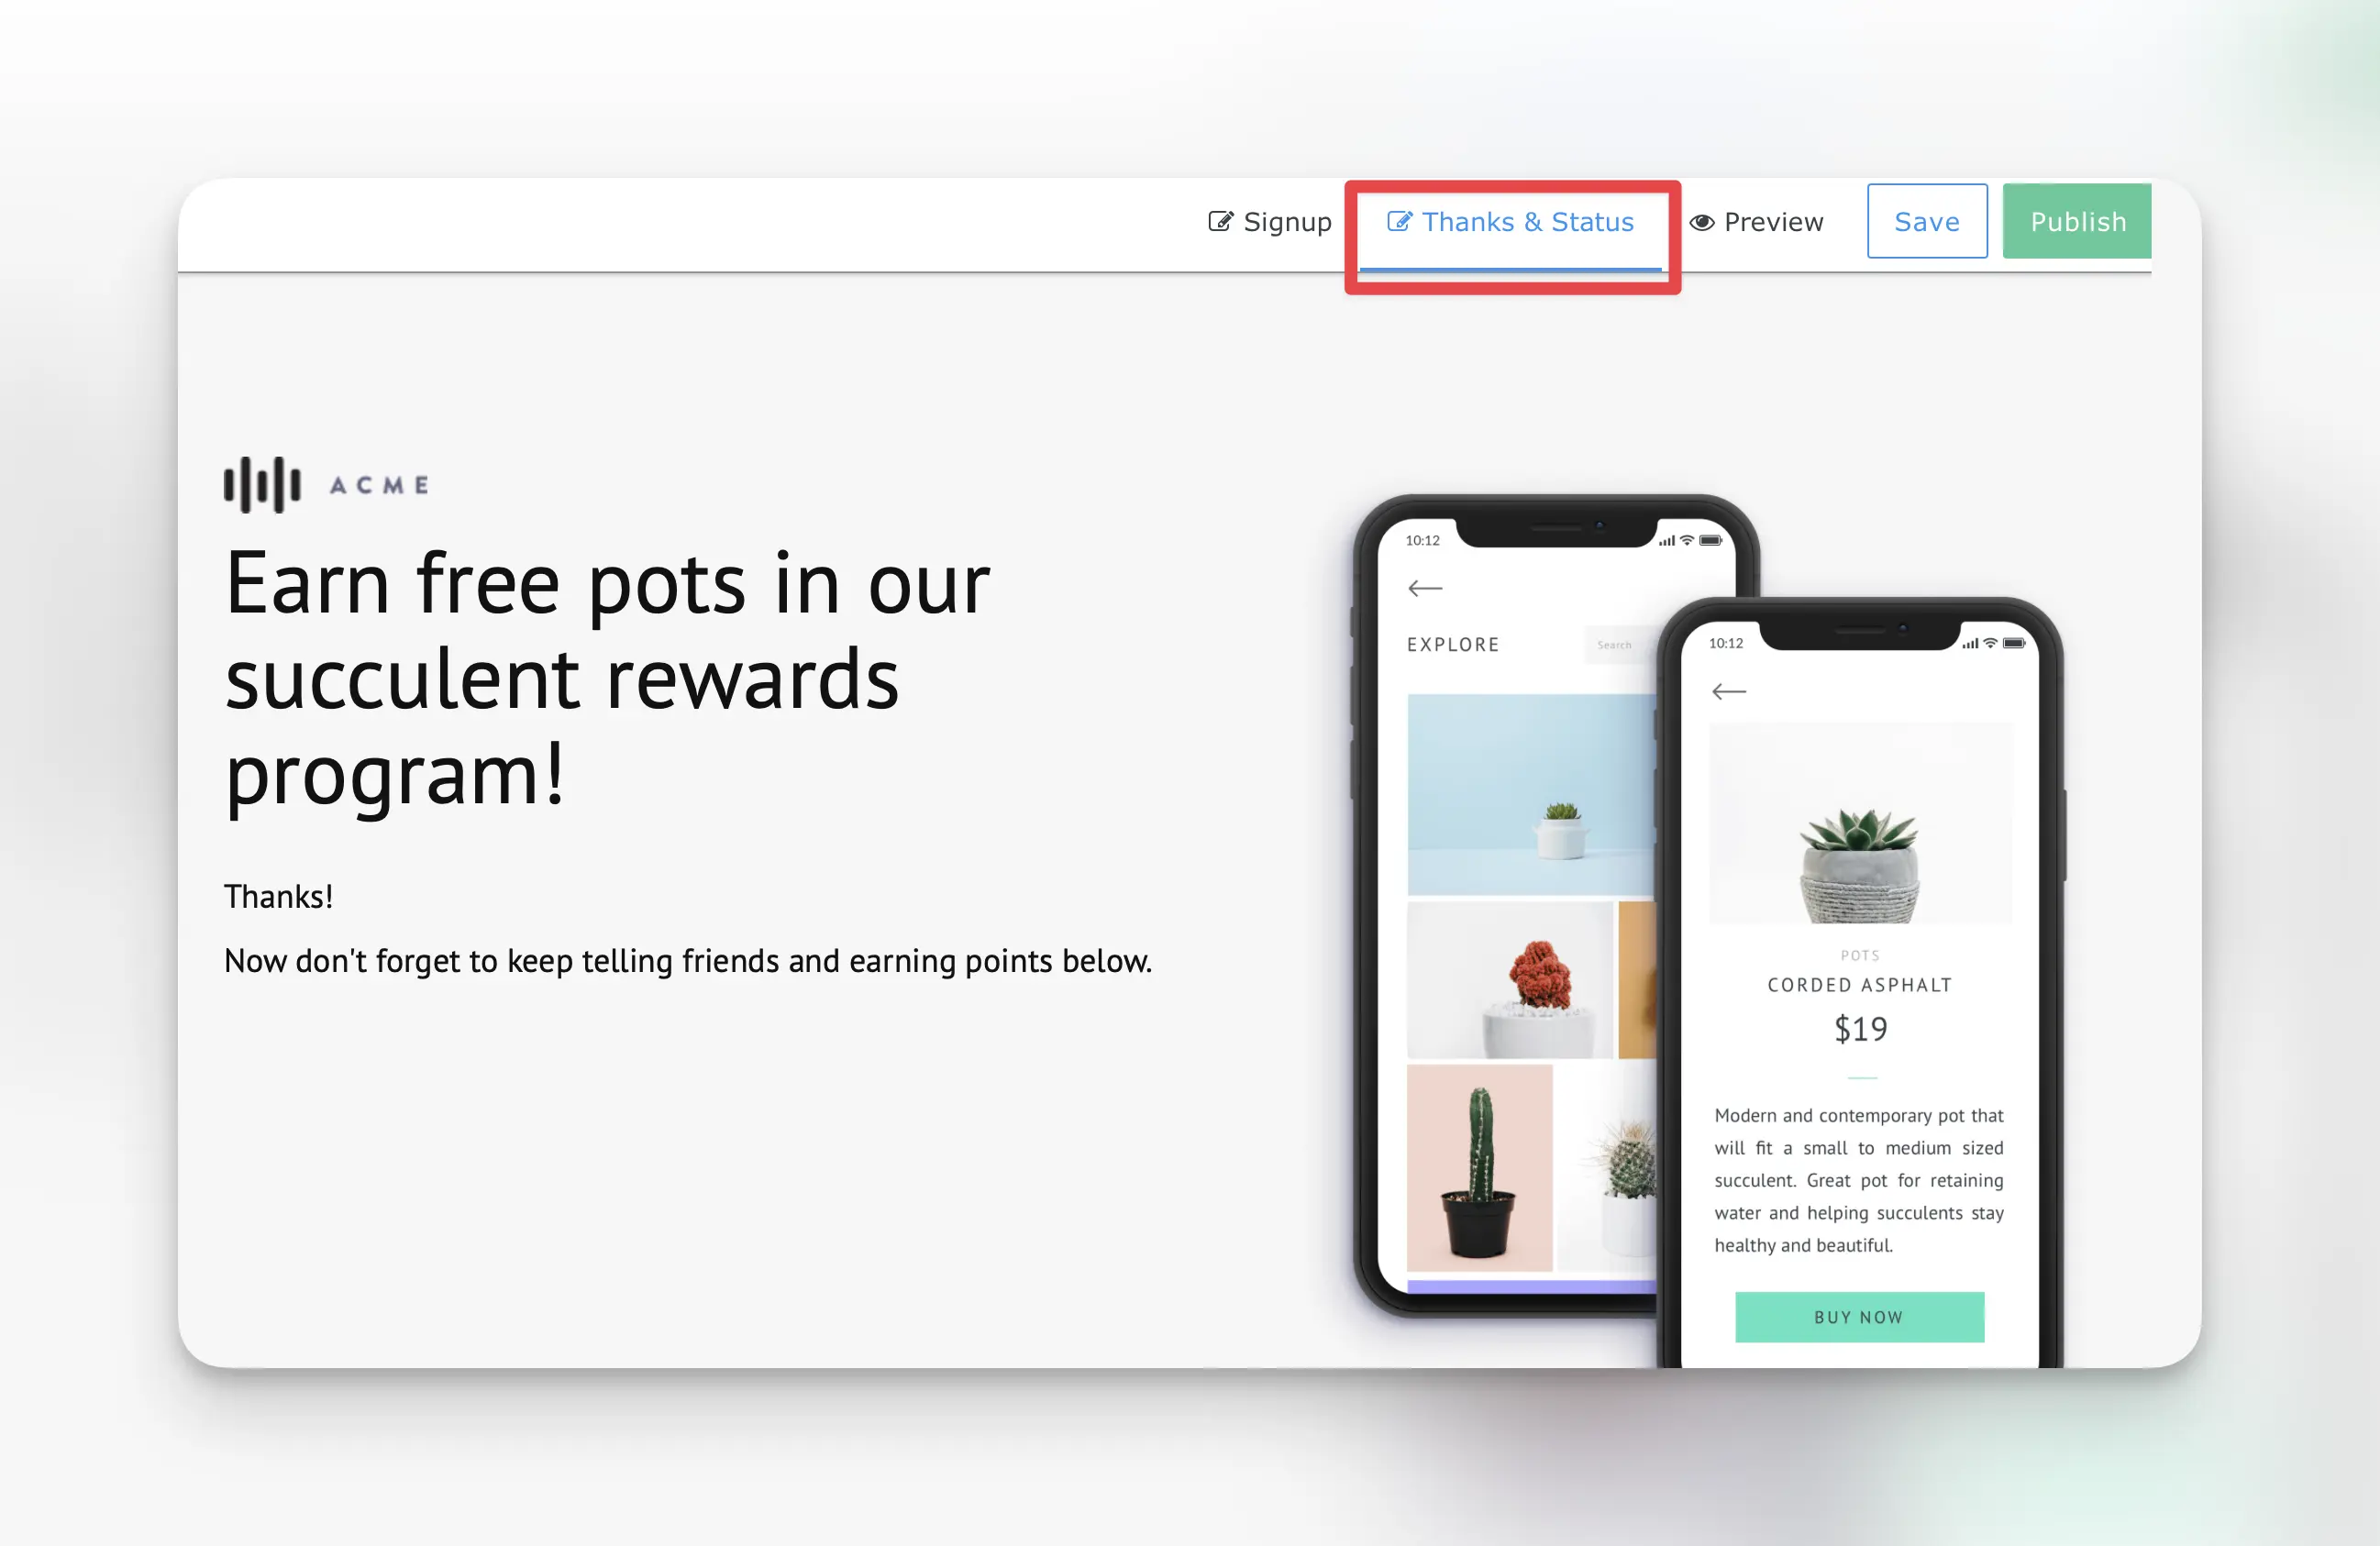
The goal of this page is to make it easy for people to share, clearly explain why they should be sharing, and to show them their current progress towards your rewards.
Don’t forget to:
- Include basic brand information like your name/logo
- Remind people about the rewards program
- Explain the primary call to action… sharing for word of mouth.
- Customize the actions to include social networks that are important to your customers.
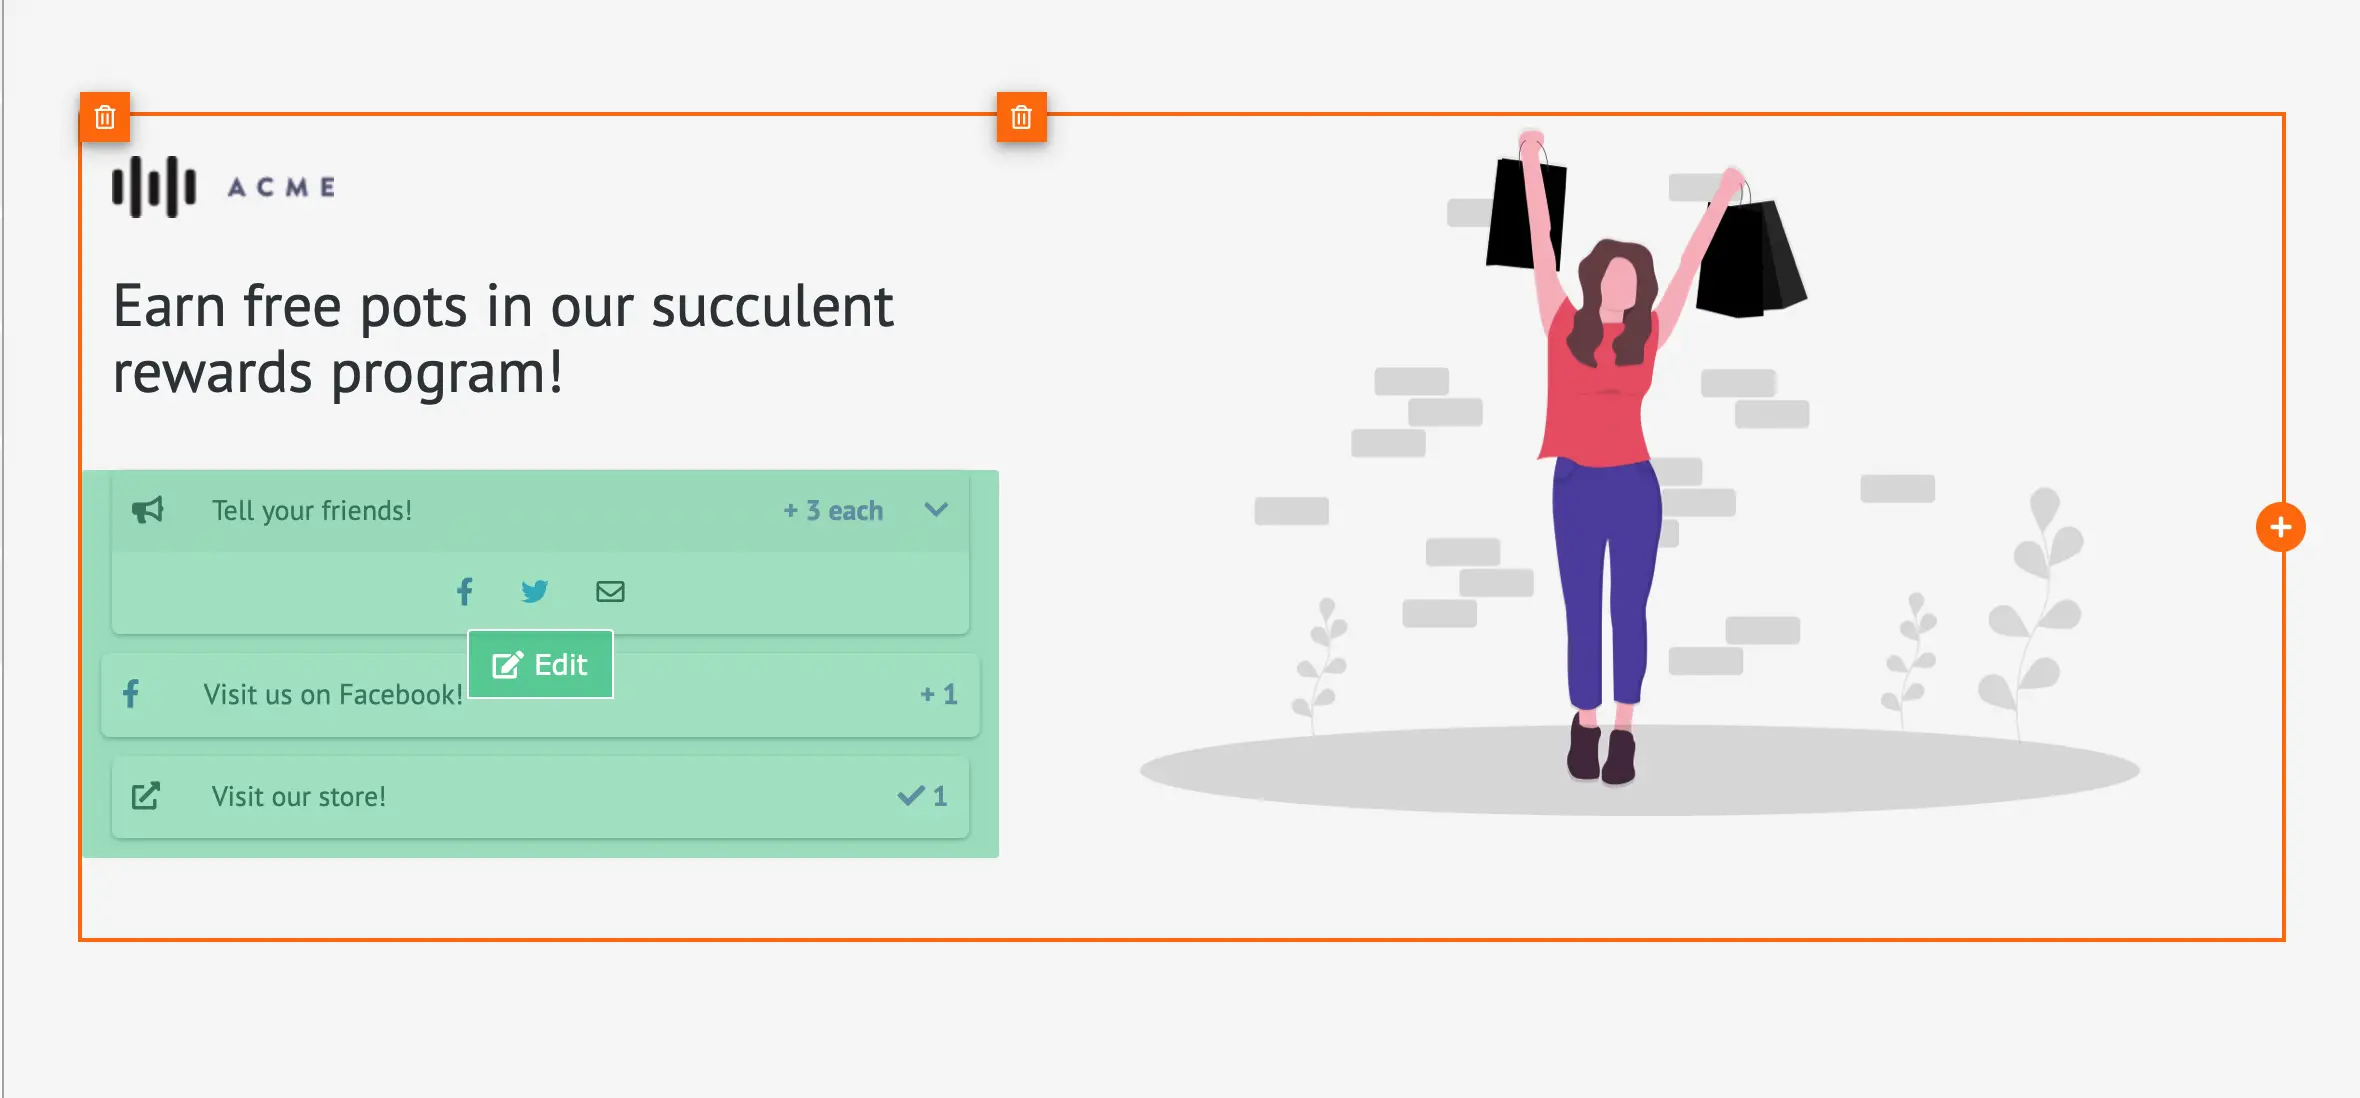
- Edit the reward tracking tools (depending on your campaign type) to showcase their progress towards rewards.

For a leaderboard style campaign don’t forget to explain what someone would get for topping the leaderboard.
For a bonus entry giveaway campaign you just need to show people how many points they’ve earned and explain what’s at stake in the giveaway.
Publish this page once you are finished.
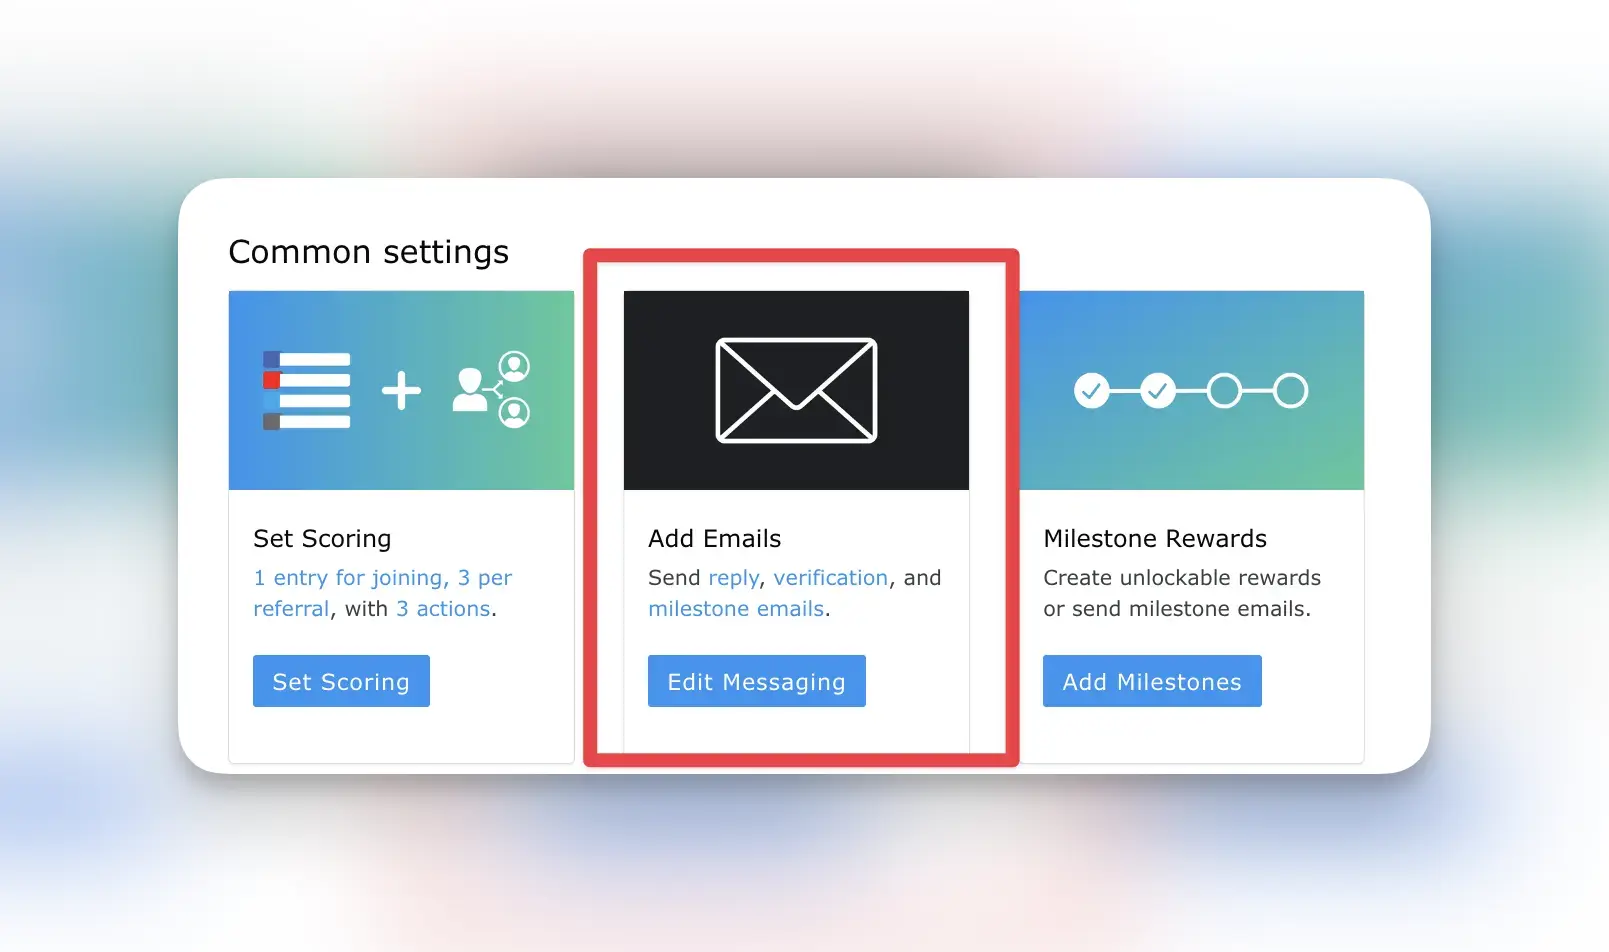
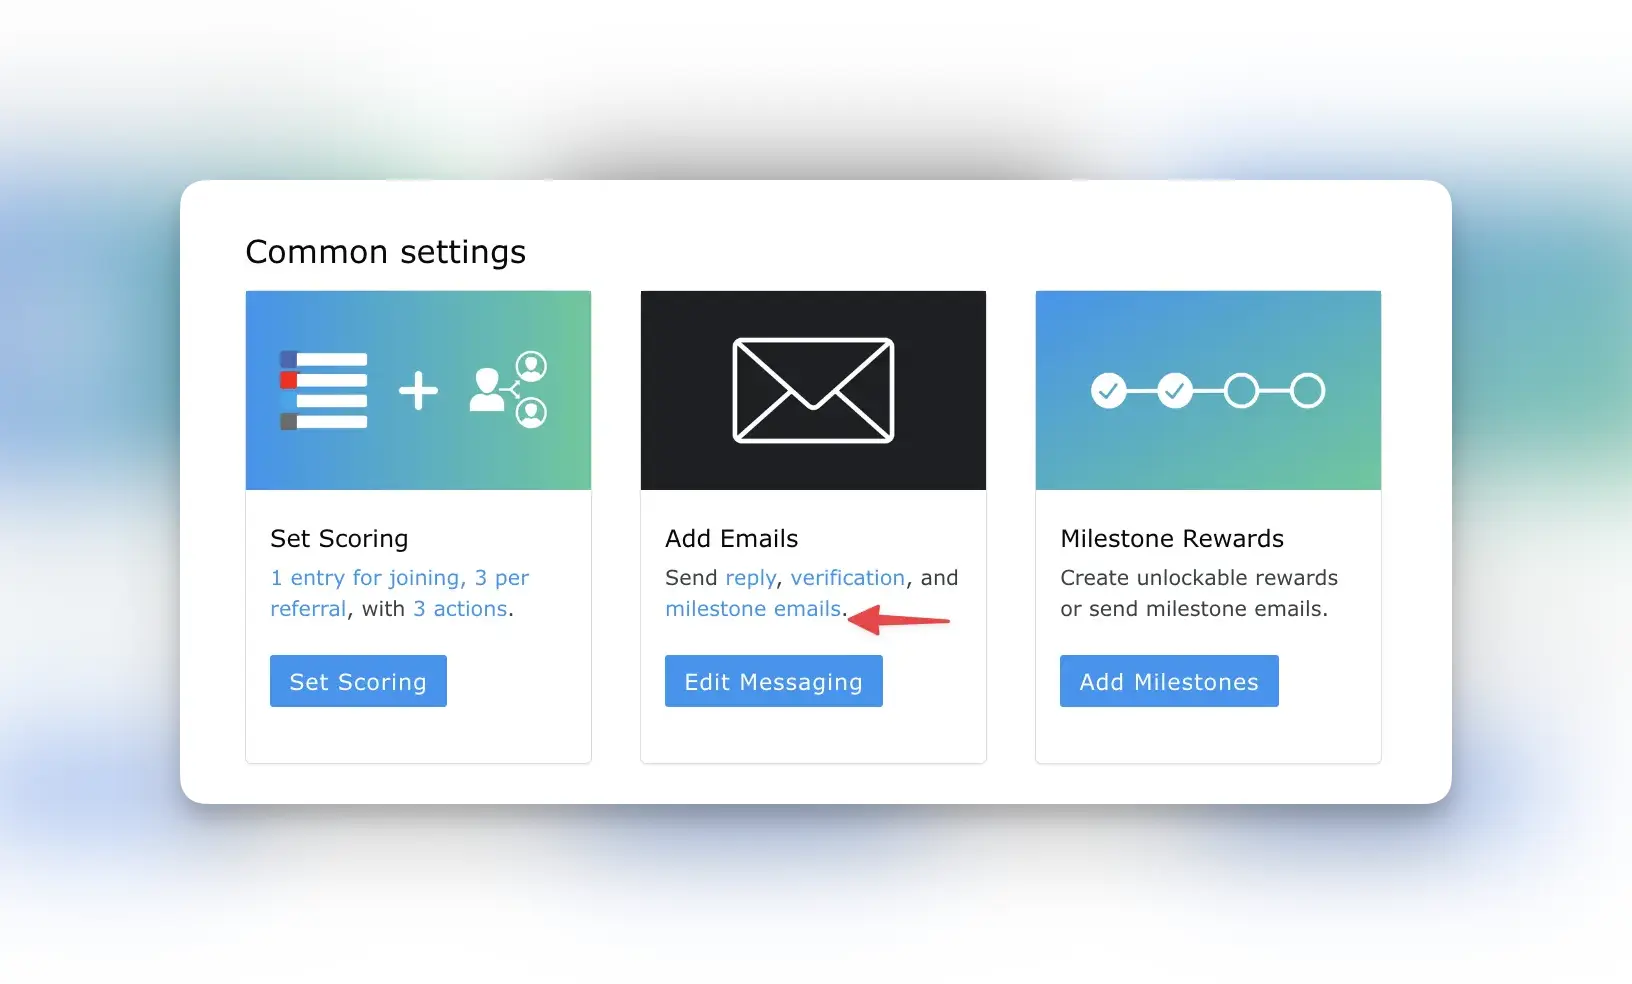
Step 5 - Setup automatic campaign emails
From your campaign overview page you’ll see the 4th block that defines the emails you can setup for this campaign. KickoffLabs is not a bulk email provider. You’ll still want to use MailChimp (or another email service provider) for that, but we make setting up these reward program emails easy.
Start with the Automatic reply email.
This is the email that’s sent out after someone first becomes involved in your reward program. Meaning they have signed up, clicked to join as an existing customer, or purchased something on your store.
When you are configuring the Automatic reply email remember to:
- Set it to send “every time a lead signs up” to turn the auto-reply on. Otherwise, the auto-reply will remain off.
- Personalize the subject line so that it reminds people why they got it and why they should open it.
- Avoid filling it with lot of graphics and links. Try to keep it simple to improve the odds it ends up in the inbox.
- Focus on the link back to the thank you page as the call to action.
- Imagine this email is meant to be the text version of your thank you/rewards page, encourages them to start sharing, and reminds them about the rewards you’ve setup for them as a reason.
- Sign it as from a person to personalize it. Too many smaller stores try and look bigger than they are by leaving “Our Team”. Make it feel like it’s from someone on your team.
- If you were offering a discount or other incentive for someone joining the rewards program this is where you might add a “10% off at Checkout” coupon to the email. It could easily be a generic (multi-use) code or you can generate specific codes for each lead and deliver them with our Coupon Code feature. Learn more here.
Once you’ve tested the email you can save it and click back to the “Emails” tab on the top of the dashboard.
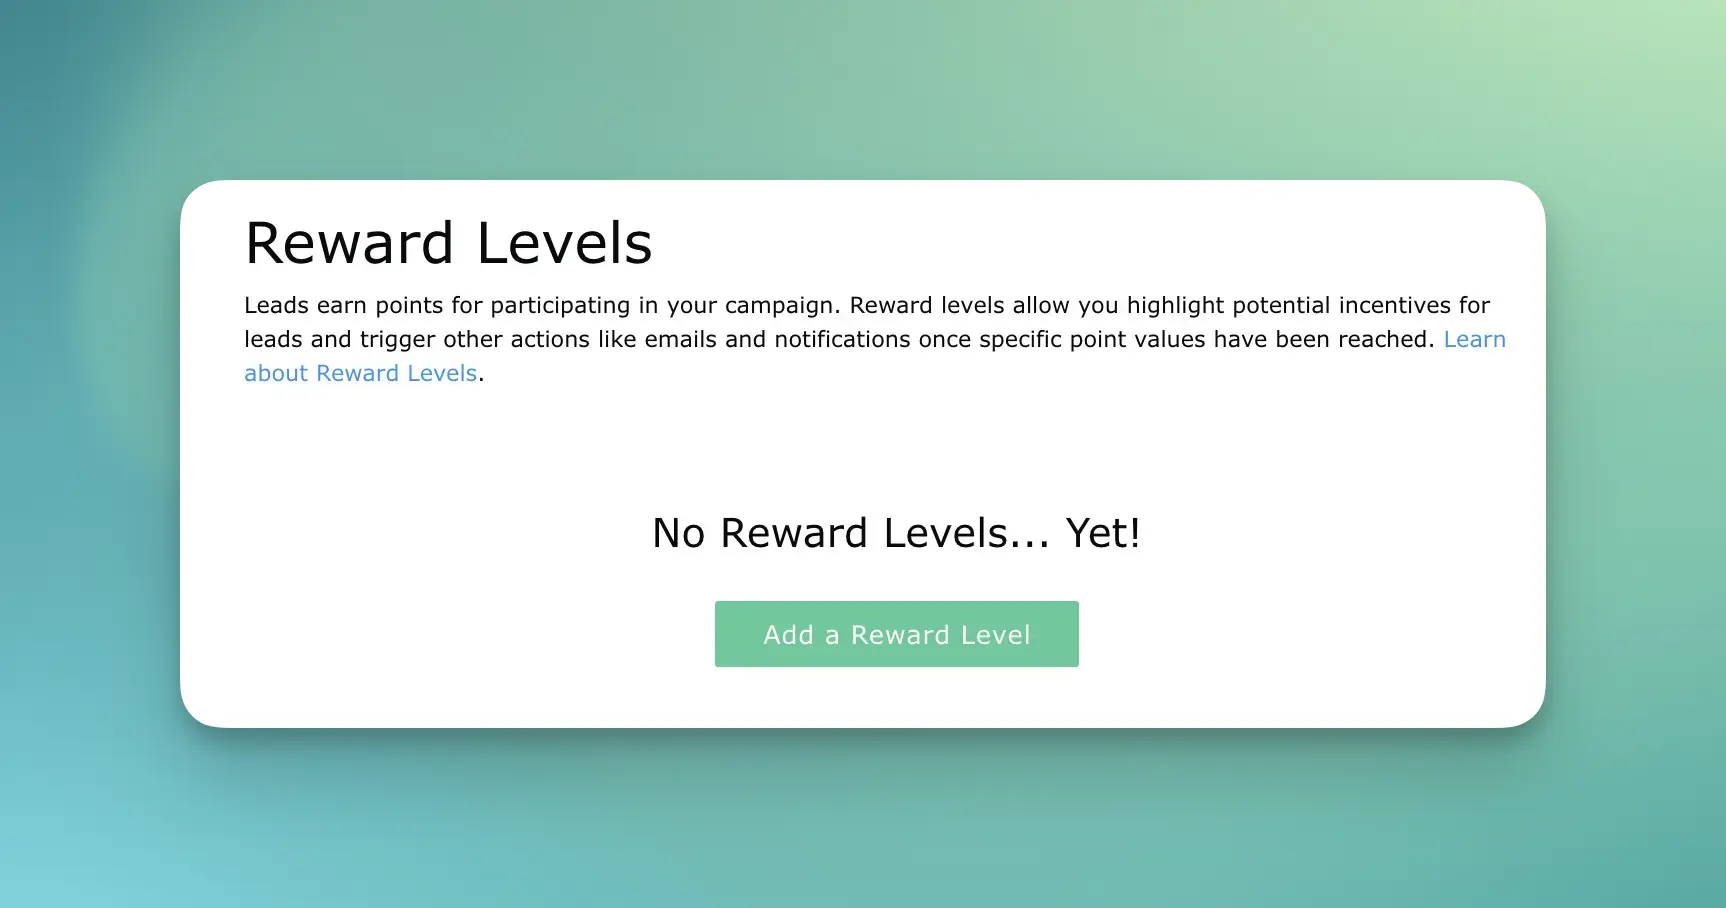
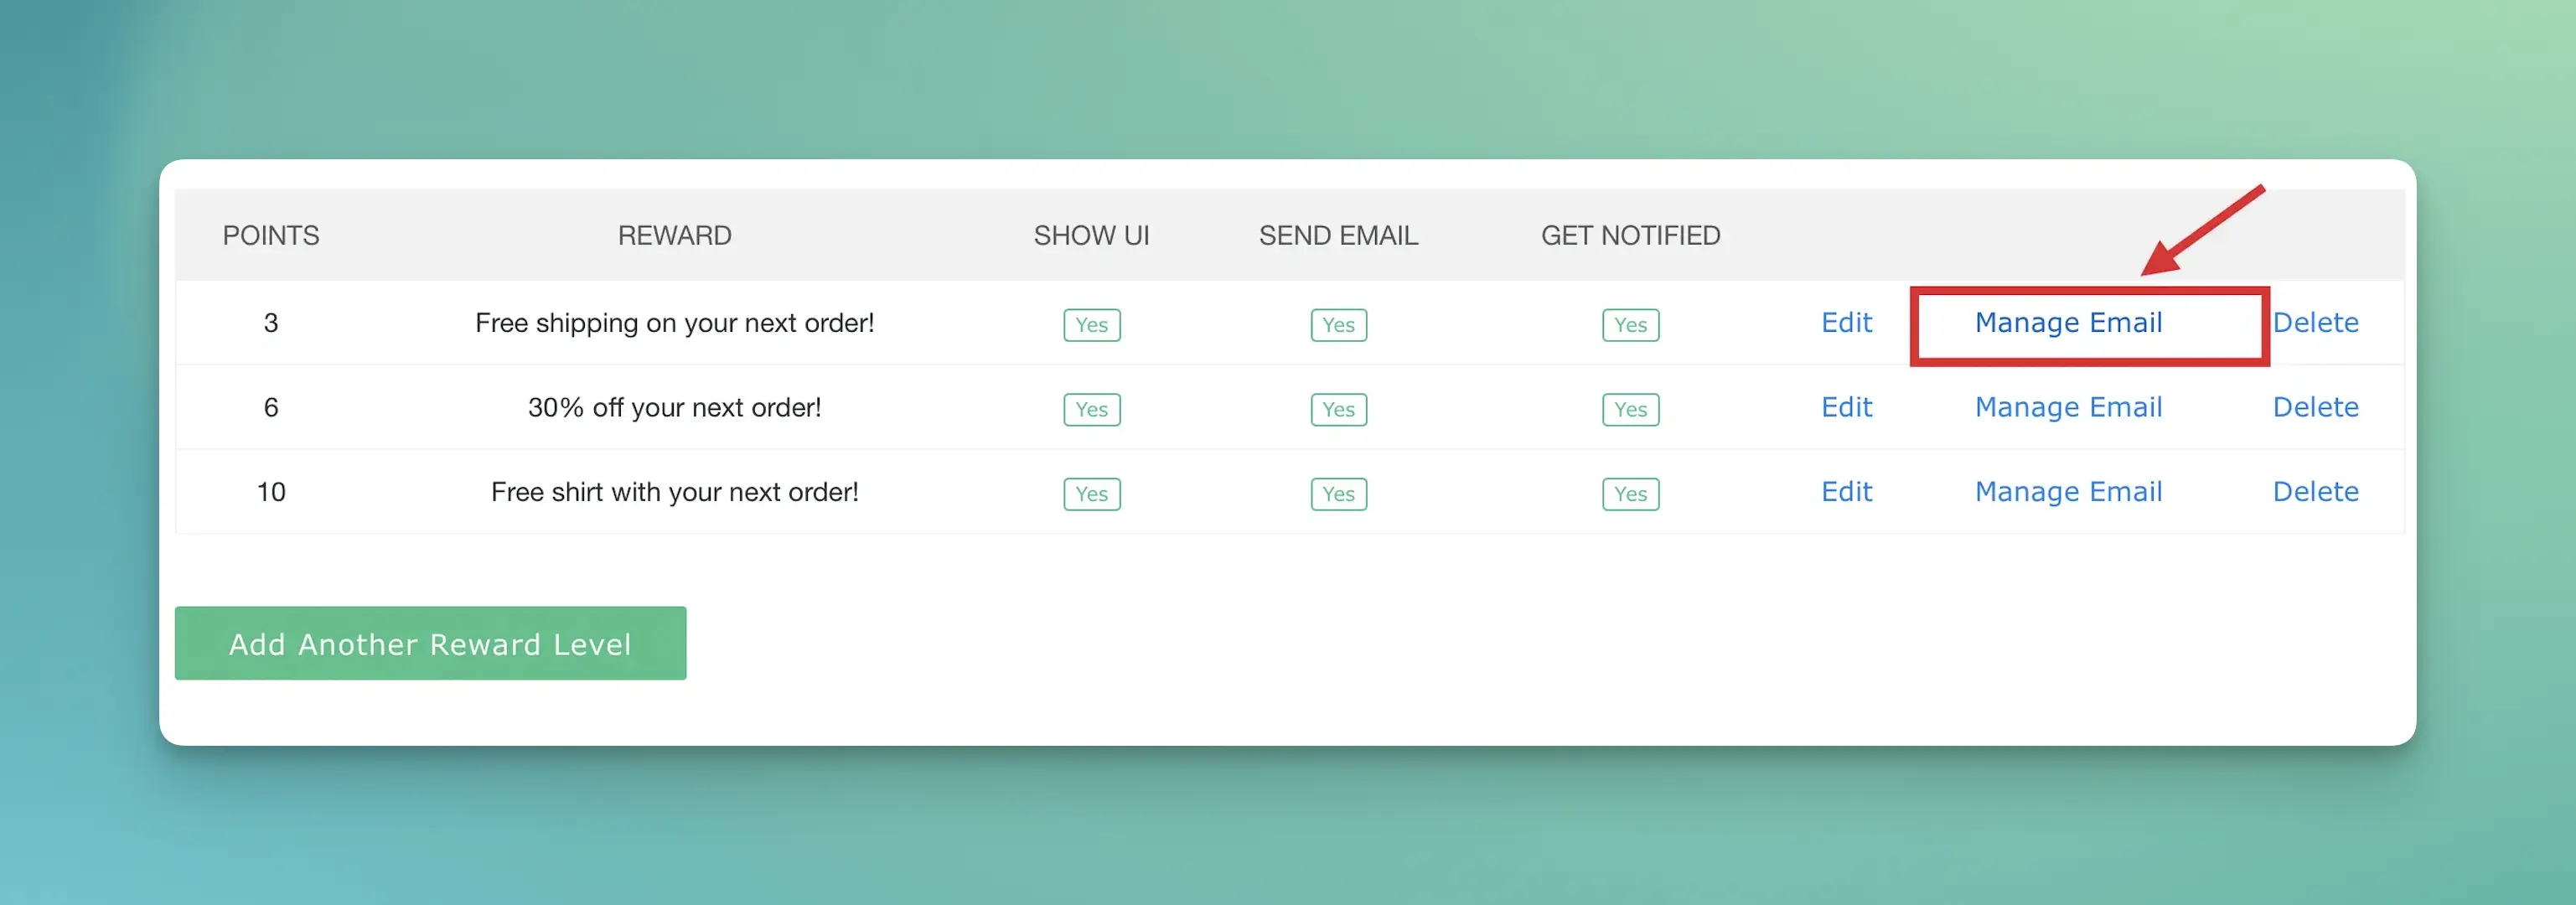
Setup reward level emails
Reward level emails are sent to a customer once they reach specific point totals in your campaign.
If you haven’t already, set-up your first reward milestone. Make sure to check the box in the reward settings to enable email.
Next, you’ll want to add your first reward level email.
The two tokens we’ve injected already are the leads current score as well as a link back to their status page with the share links.
As you add more reward level emails you’ll at least match these up to what’s been setup on your status page. A good best practice is to add some emails in between levels that recognize and encourage more progress towards their next goal.
So if you’re first reward is set at 100 points maybe you set a reward level email to send at 50 points so that they know they are 50% of the way towards the reward you’ve configured for 50 points.
Similar to the automatic reply emails you can directly insert a coupon code or specific reward links.
At higher levels you may want to personally handle reward distribution. to make this easier we’ve added the ability to setup a notification with each email on the settings side of the email setup.
Step 6 - Make sure people are sharing your store
Right now if you open the status/rewards page for testing you’ll notice that we’ll be asking them to share the rewards program signup page. That’s interesting, but you probably want them to share the URL of your store with their friends instead.
To do this you need to update the default sharing URL for the campaign. Open “Setup” > “All Settings”> and “Default URLS” for your campaign.
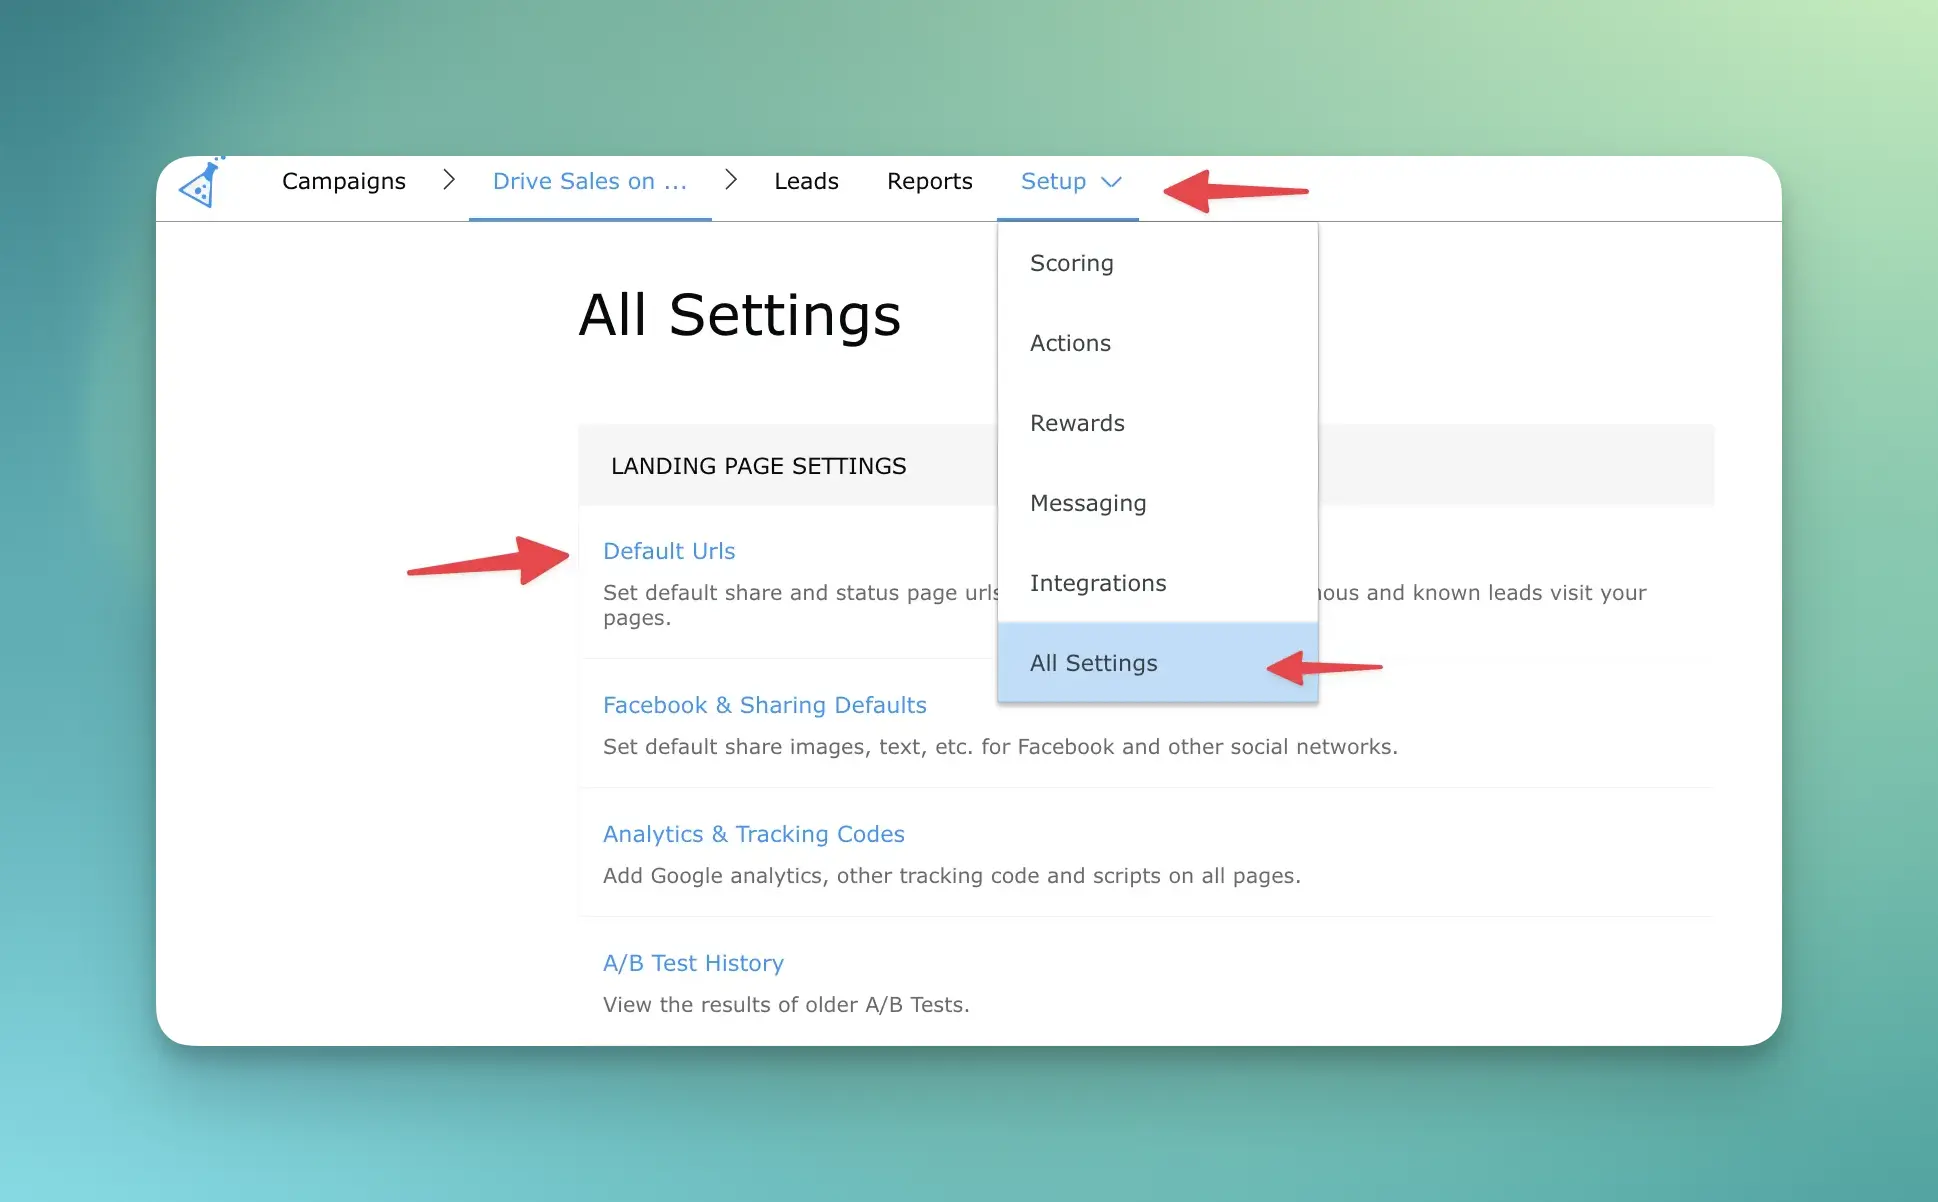
On this page you want to update the default page to “Custom Signup URL” and then add the URL to your Shopify store.
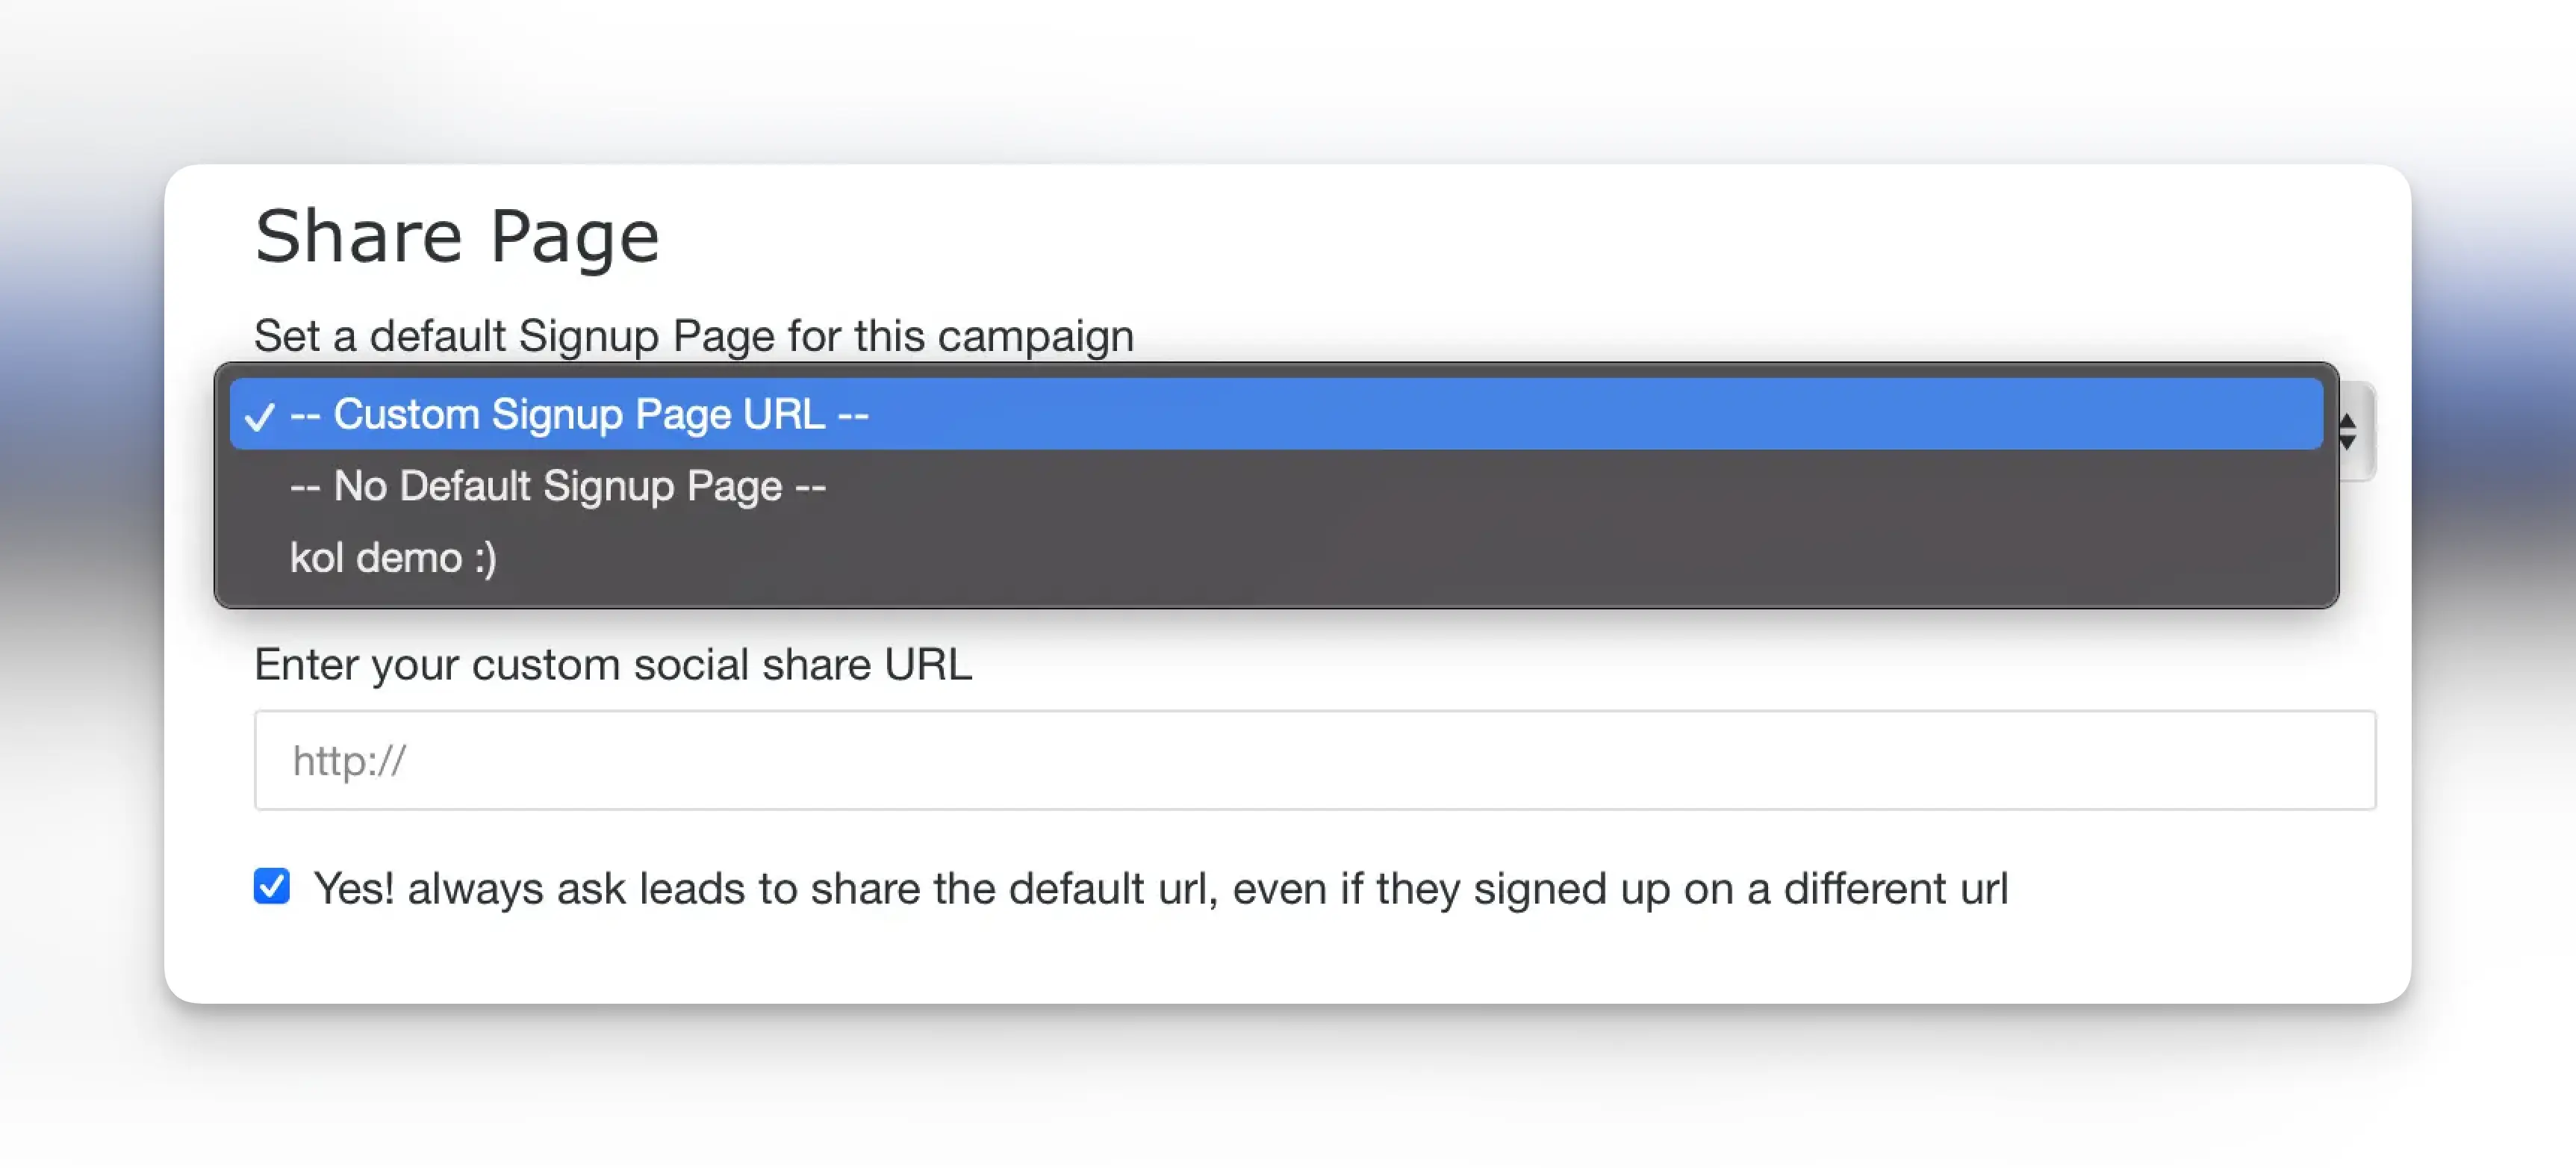
Save your settings. Now you can open your status/rewards page from the dashboard and you’ll see it sharing the page you’ve set on social networks.
Step 7 - Walk through your campaign and verify a referral purchase
Your campaign is almost ready to go, but it’s worth seeing it work end to end. Start by opening the signup page for your campaign.
After you sign up click one of the share links to copy the URL this lead has been asked to share.
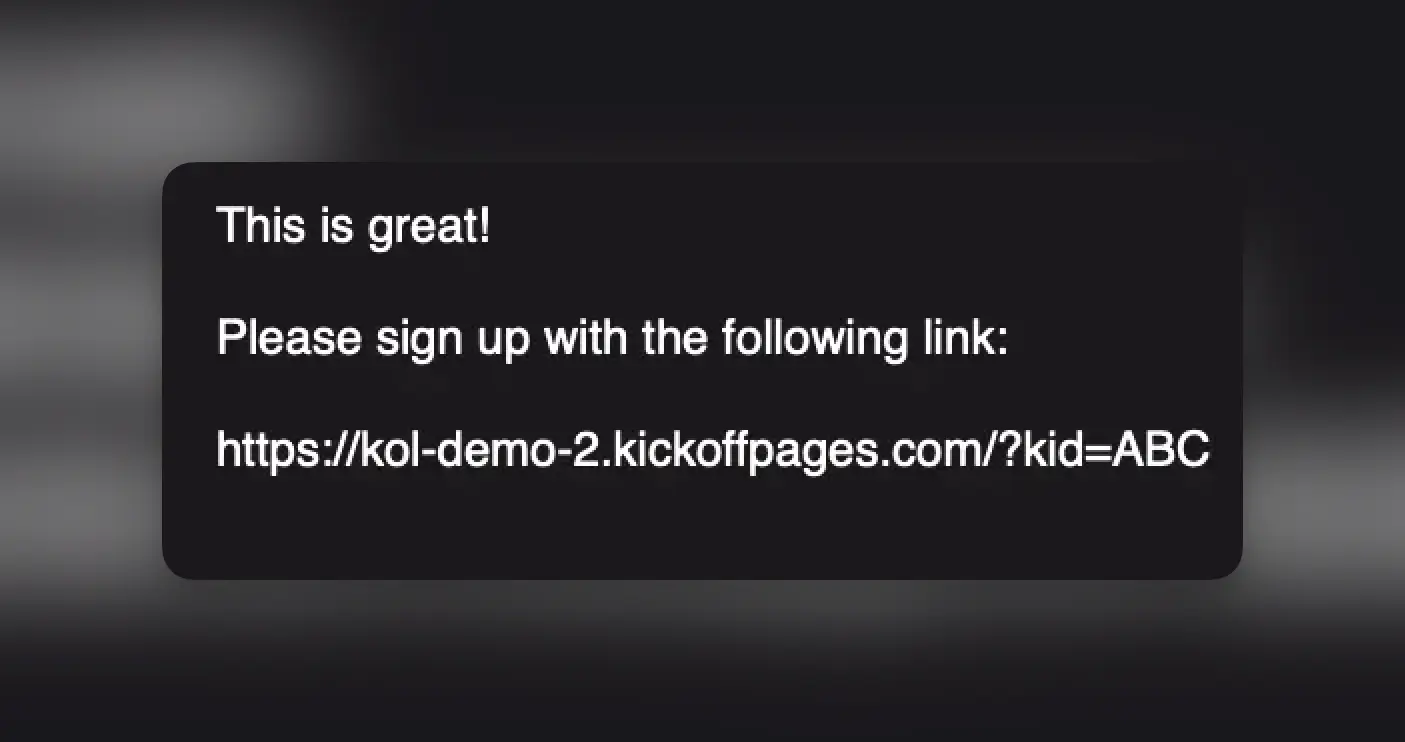
Paste that URL into a different browser window and go through a test purchase from your store. Here is a guide to running a test transaction if you don’t already have a way to do this.
Once you’ve completed an order from another email address. You should be able to verify the following.
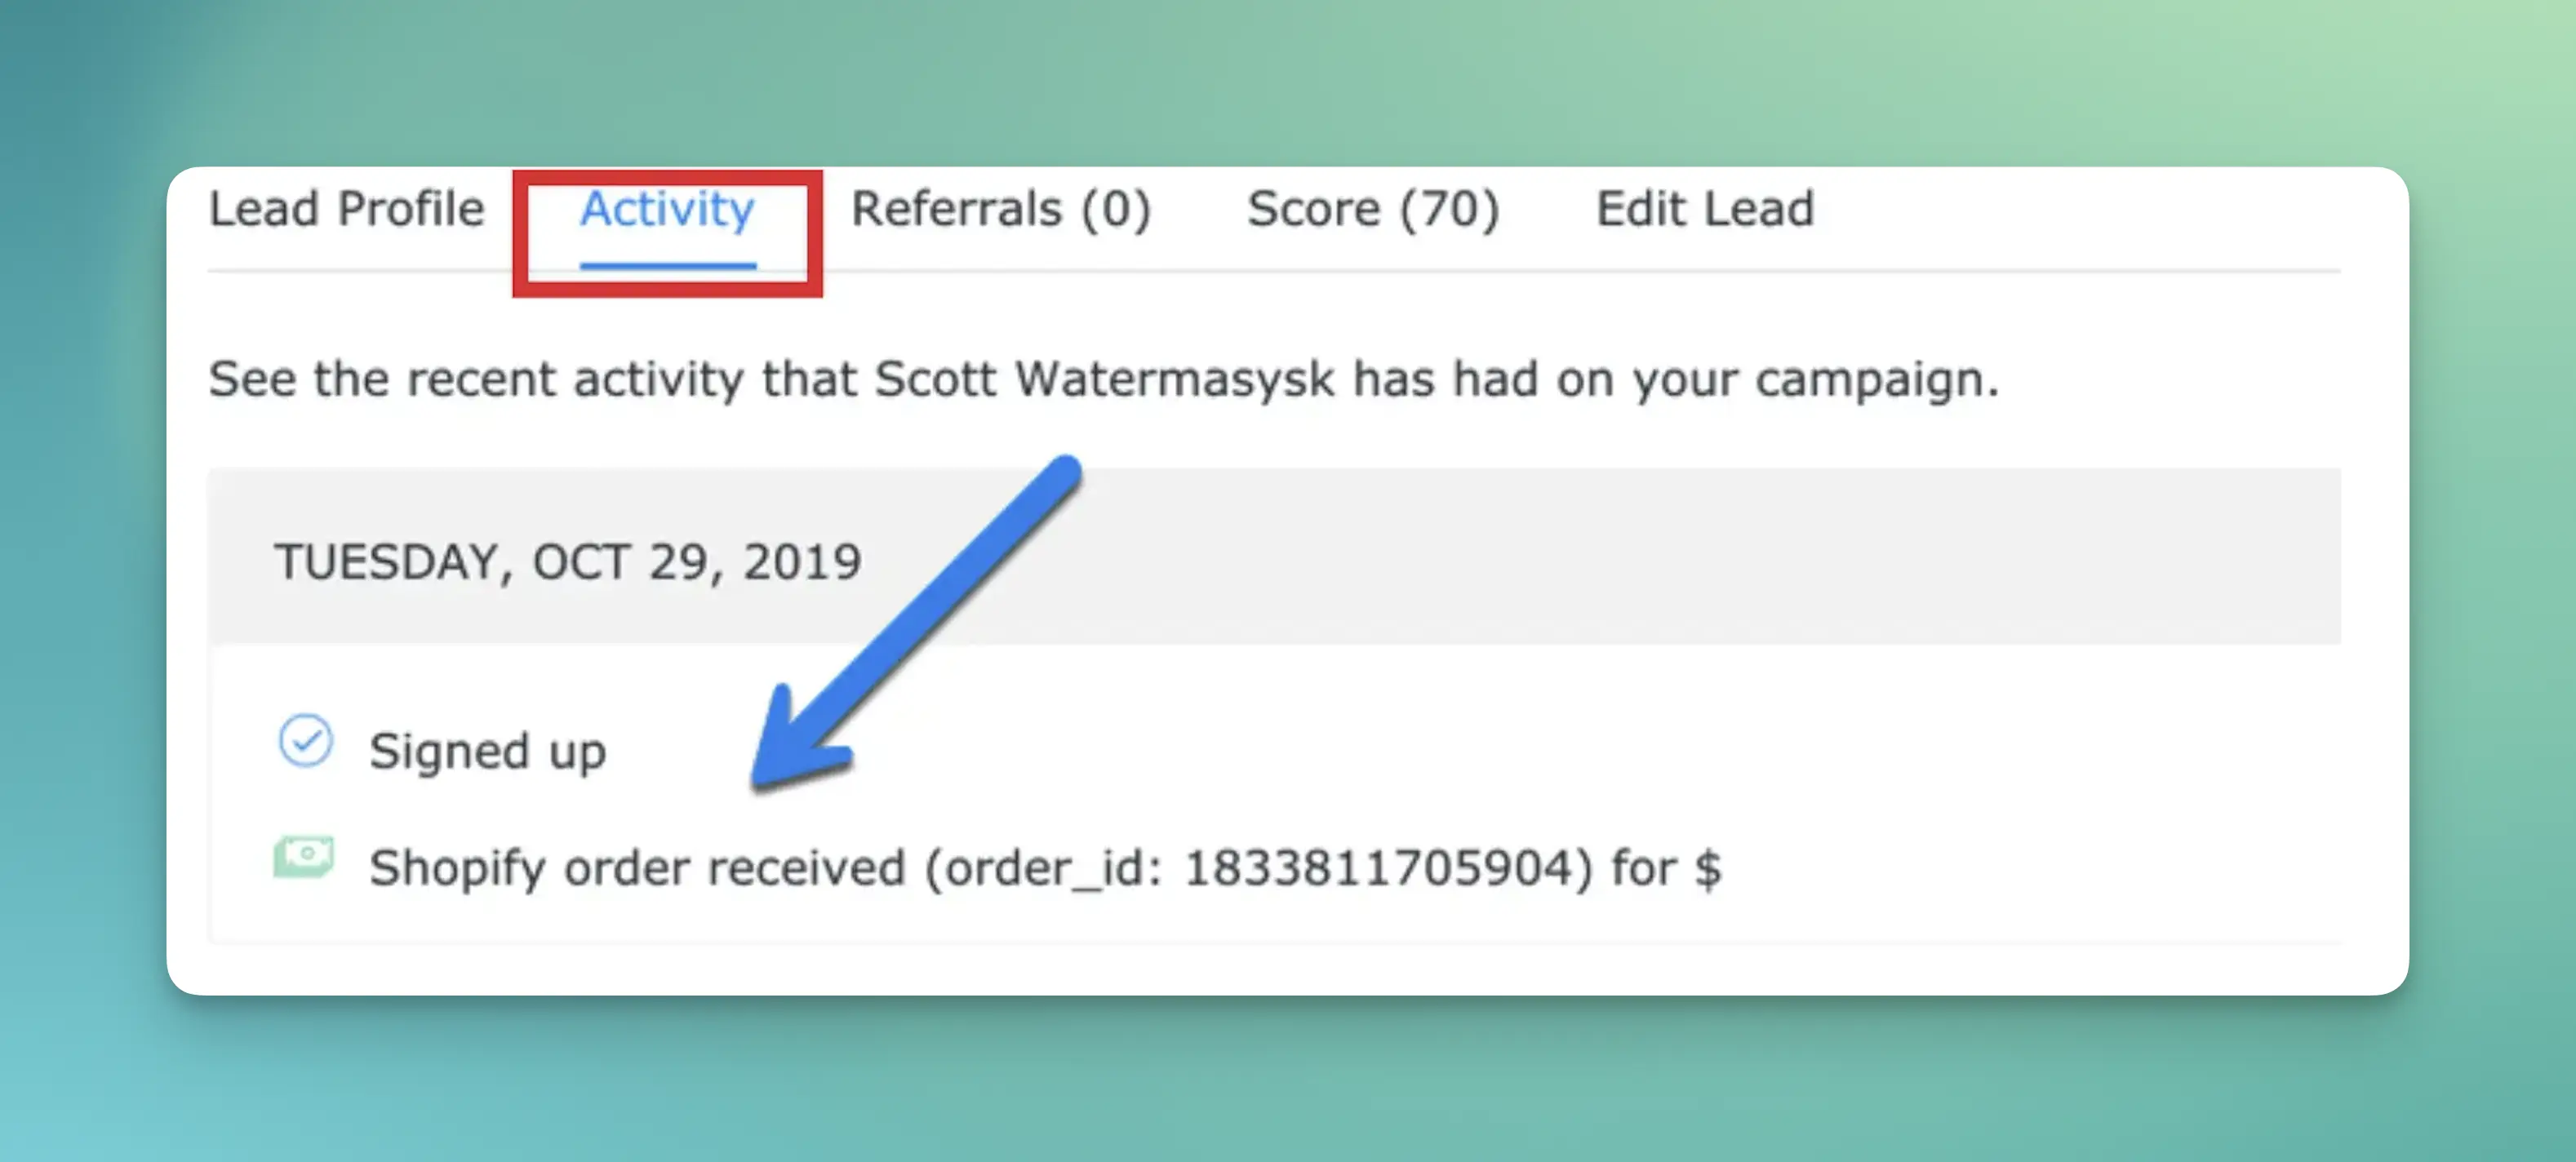
The lead that placed the order should now be in your lead list. When you open their lead card you should see the order in their activity feed.
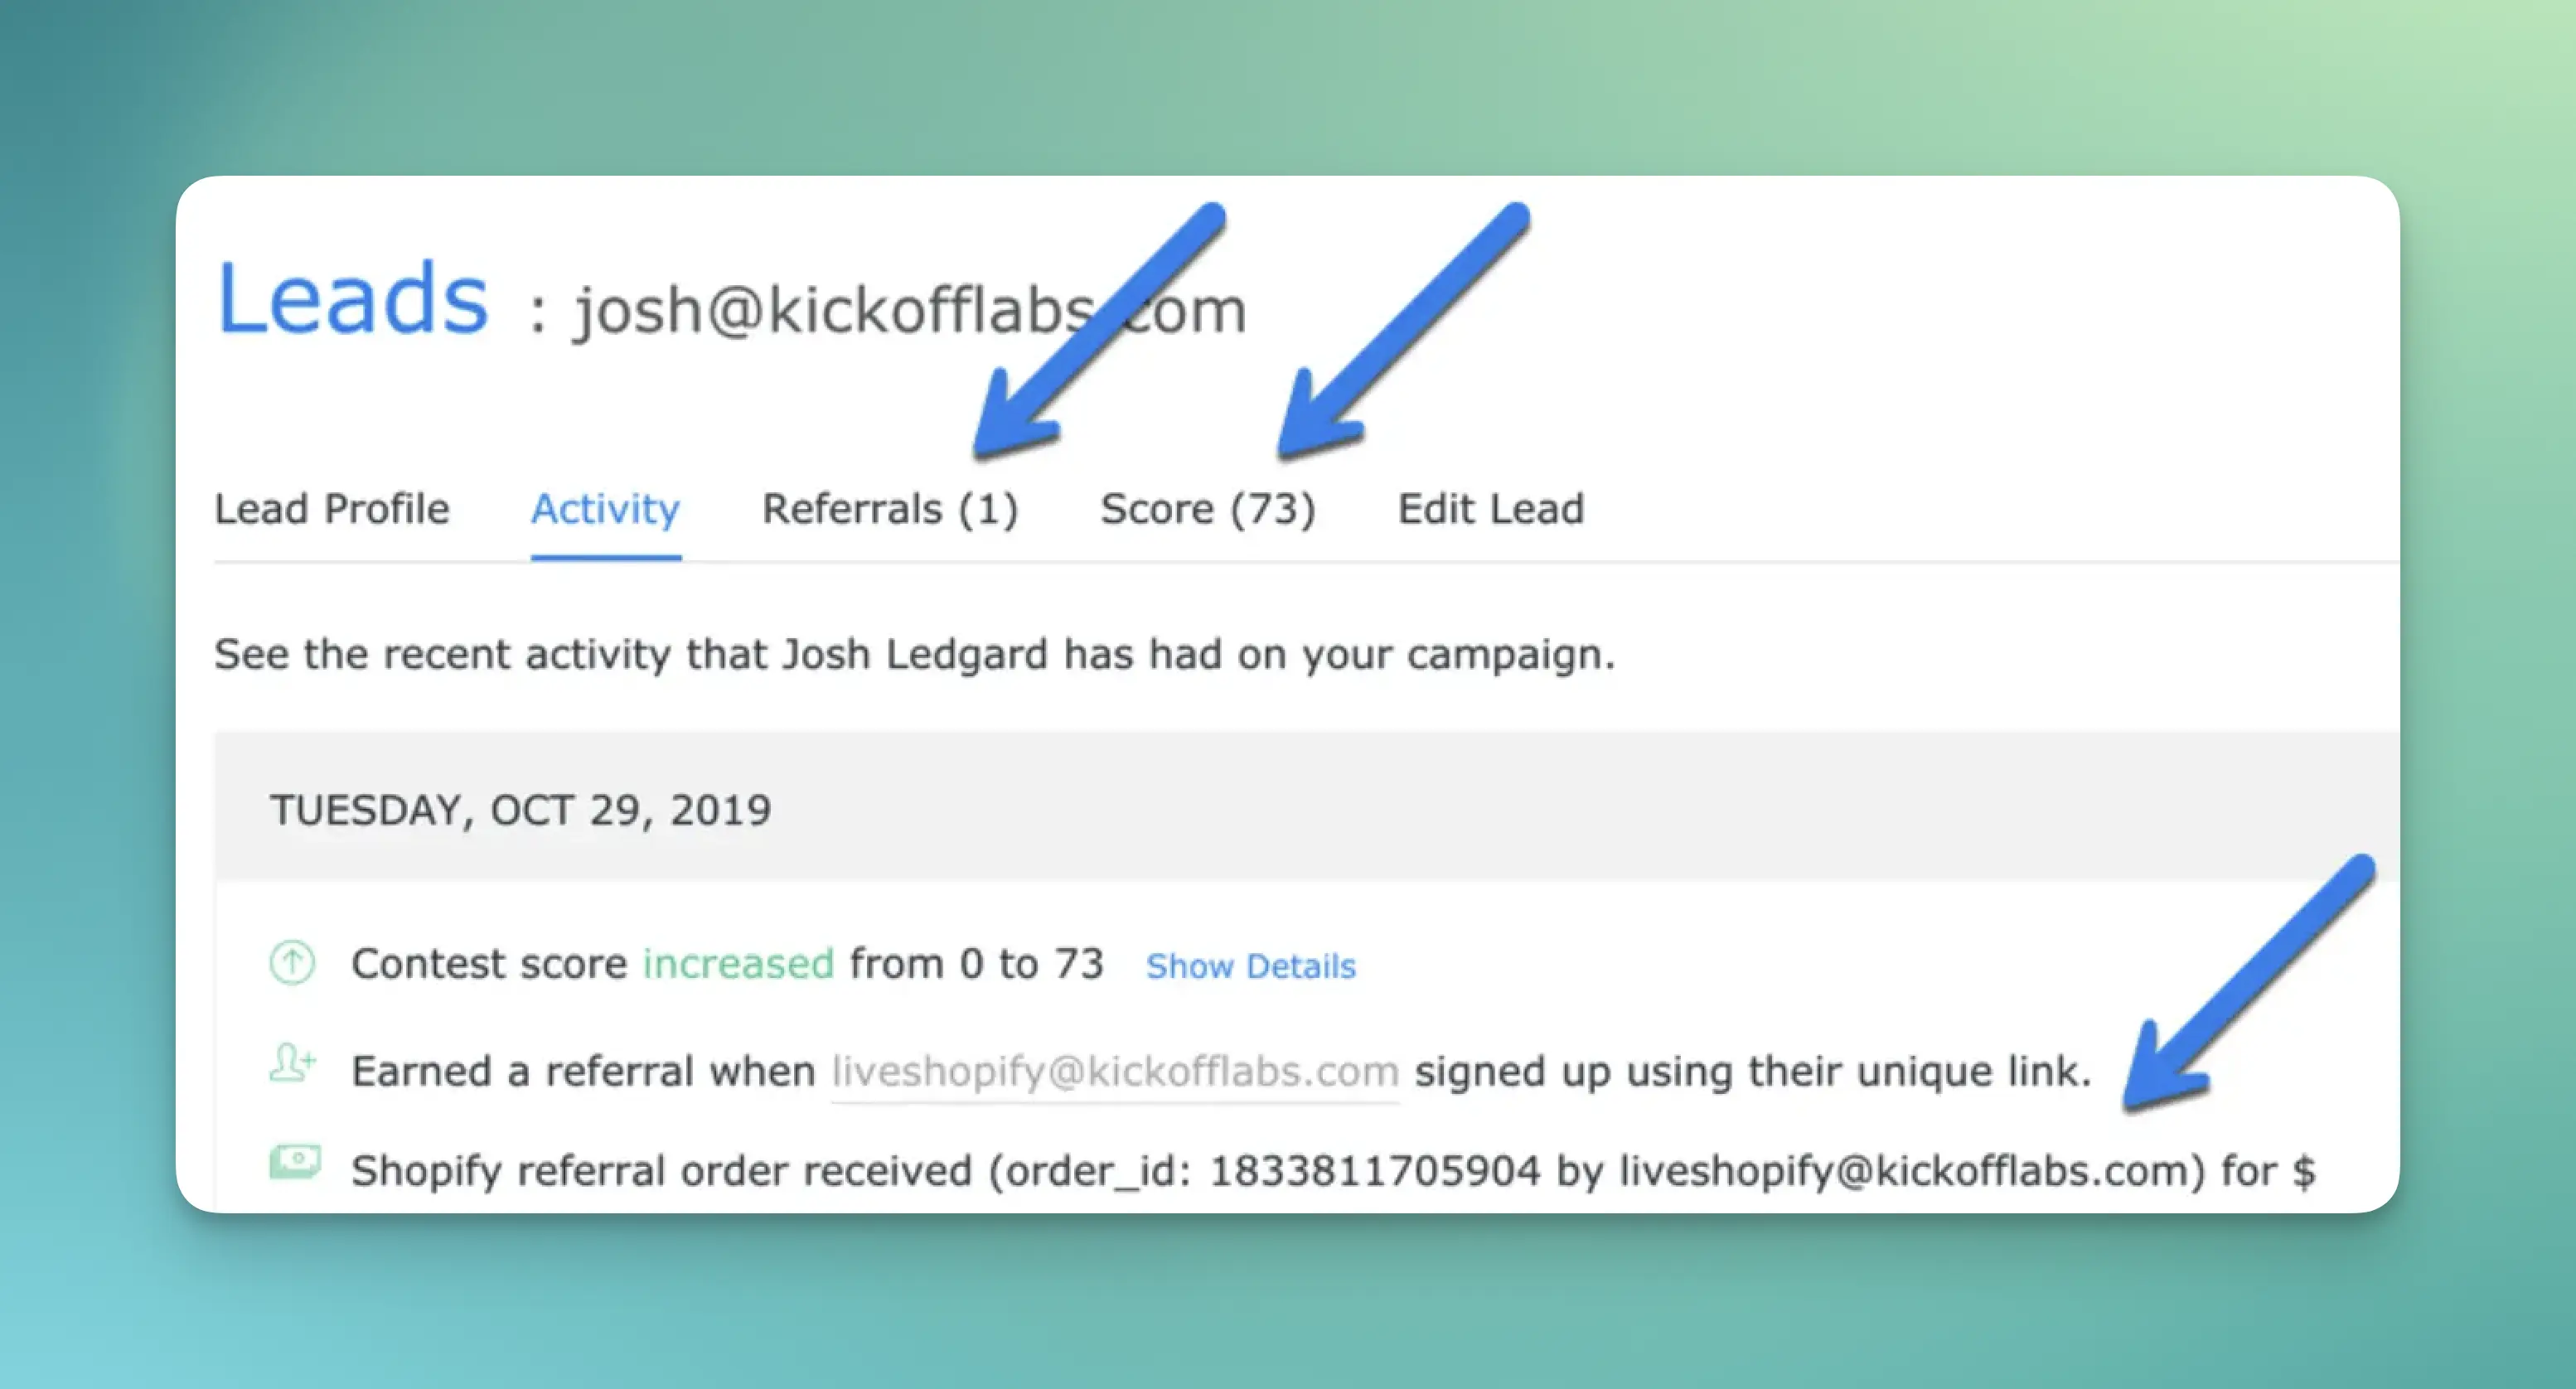
The lead that referred the order should have the points for the order as well as points for the referral.
If you have trouble verifying these things please email support@kickofflabs.com and we’d have happy to check it out.
Step 8 - Get your existing customers sharing!
Now that your campaign is live it’s time to tell your existing customers about it.
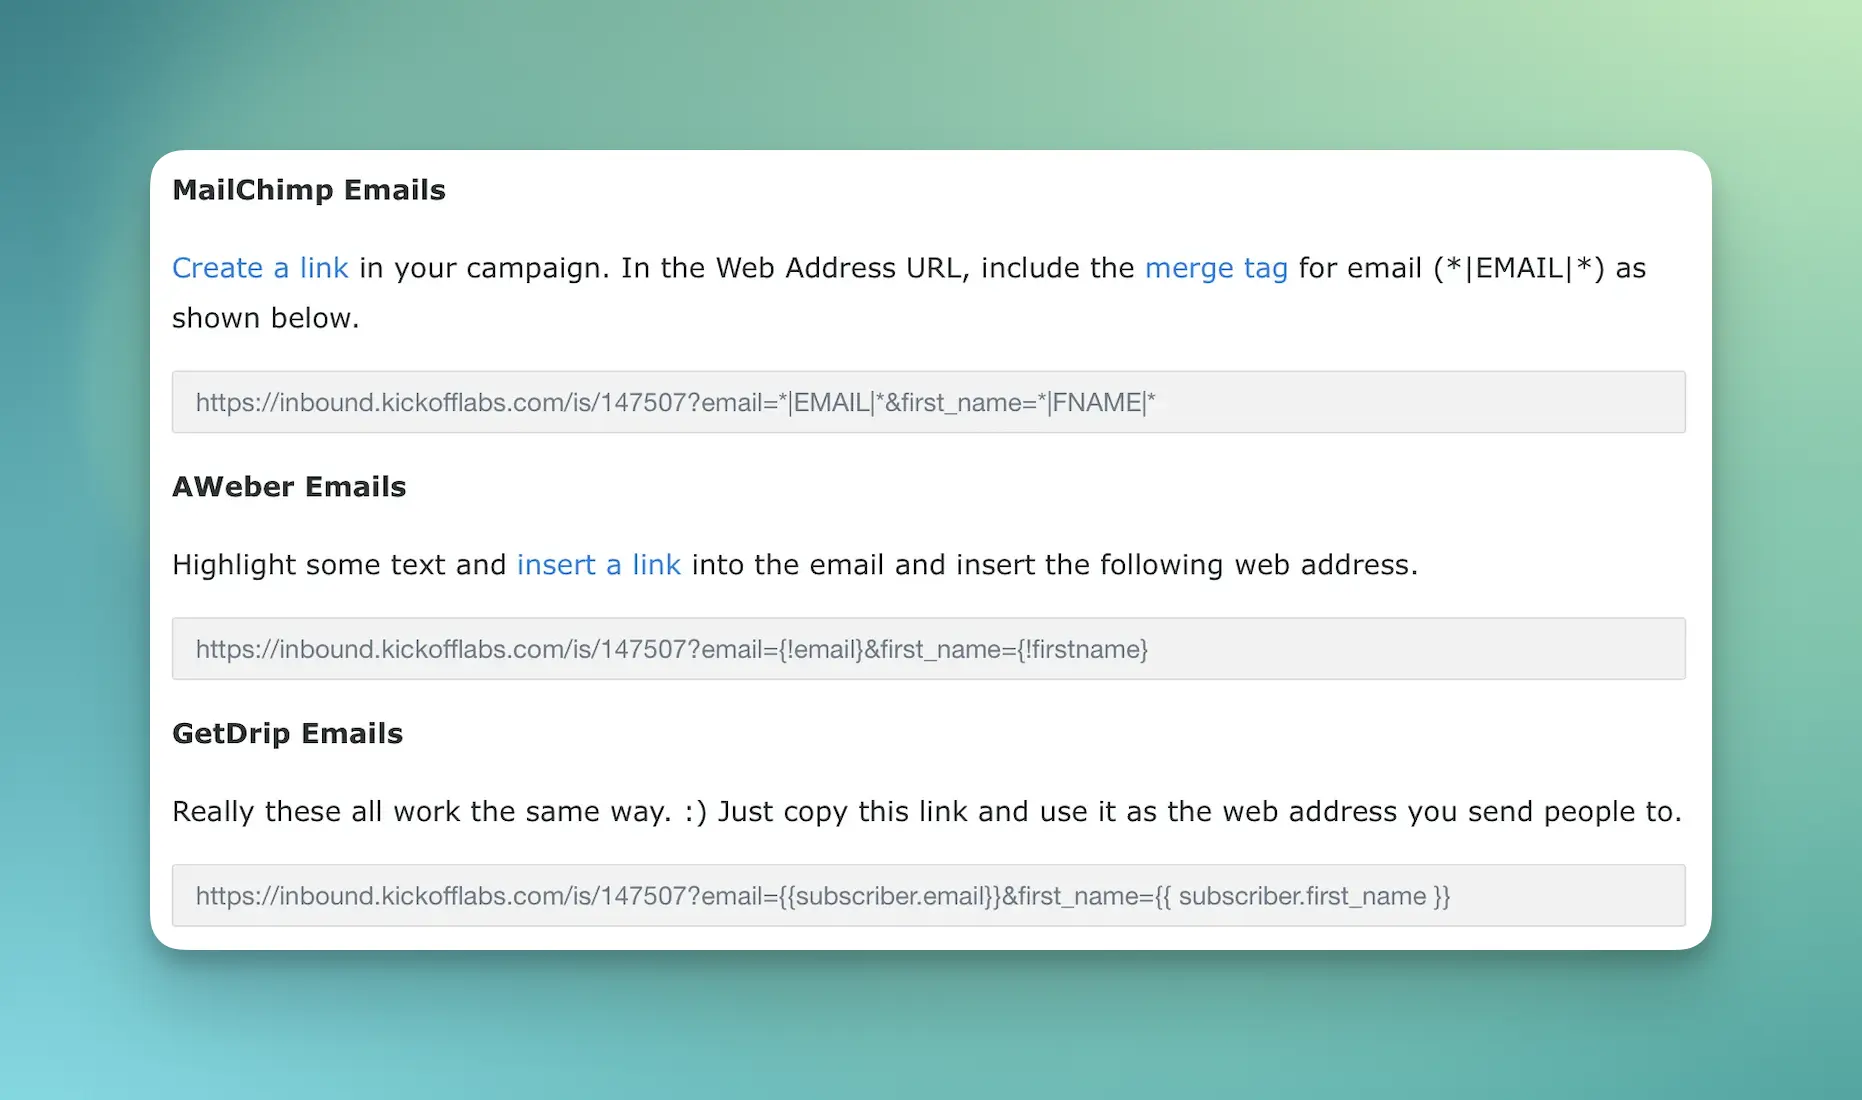
KickoffLabs provides 1:1 contest notifications, but you probably have an email provider like MailChimp or Klaviyo that you use to promote your store. Here’s how to get them links to their individual reward pages using our “Instant Signup” feature.
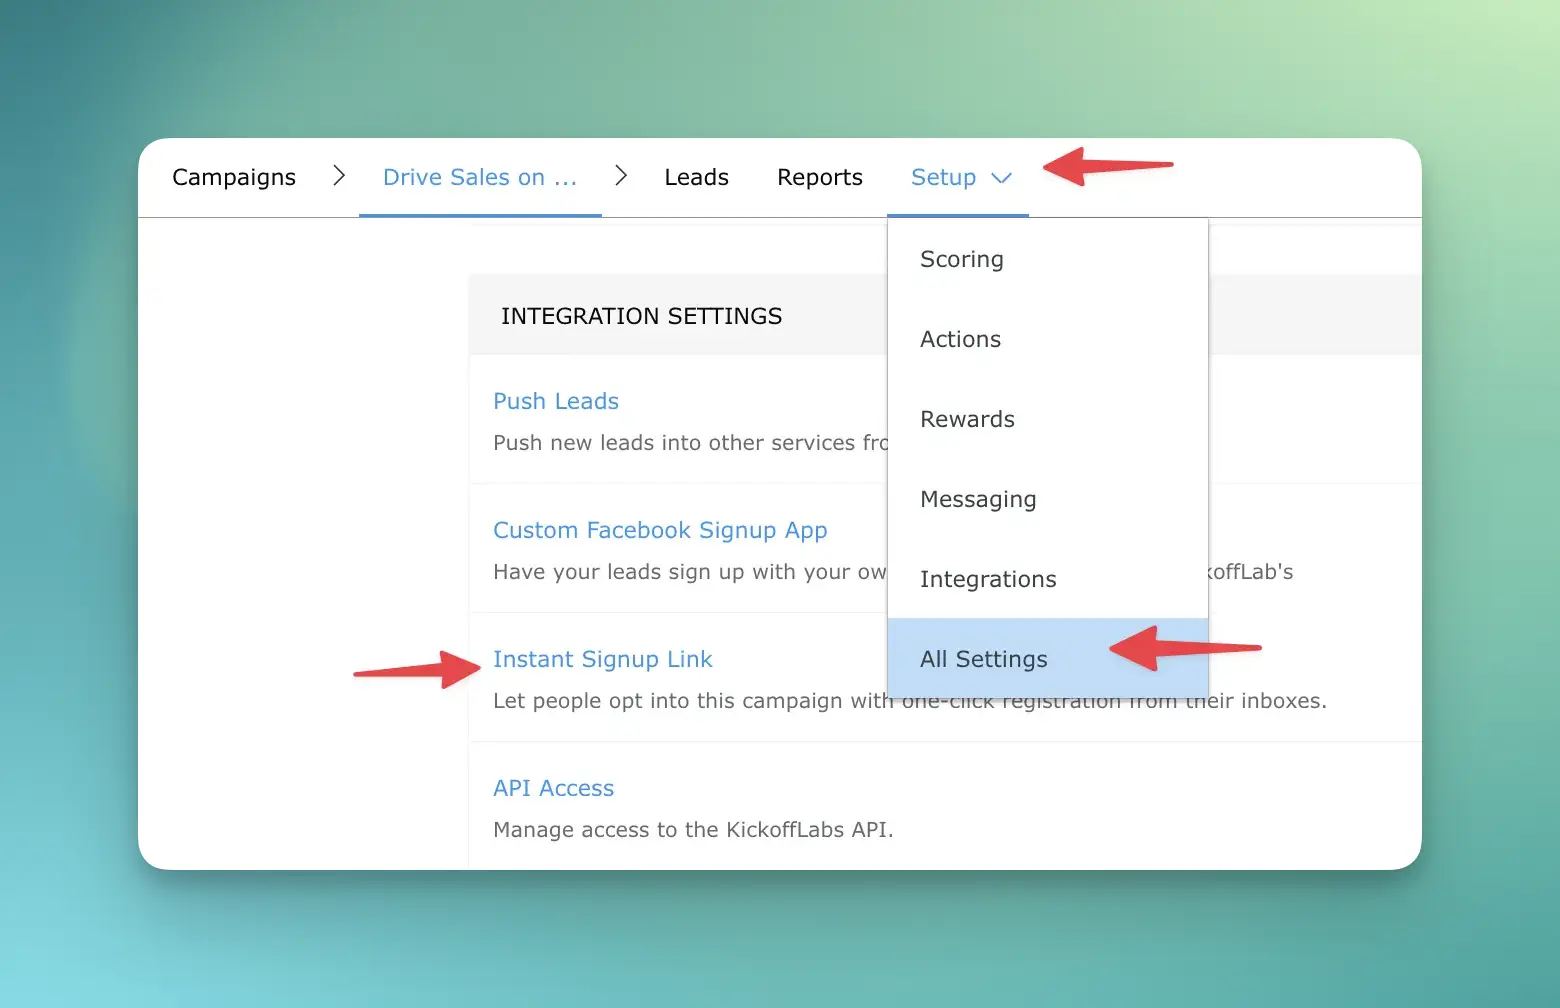
From that page you need to copy the link provided for your email provider. It’s specific to the campaign, will instantly generate the rewards page for an email address on your list, and requires only that they click the link from your email.
We recommend testing this email in your email provider before sending it.
Step 9 - Other tips and tricks
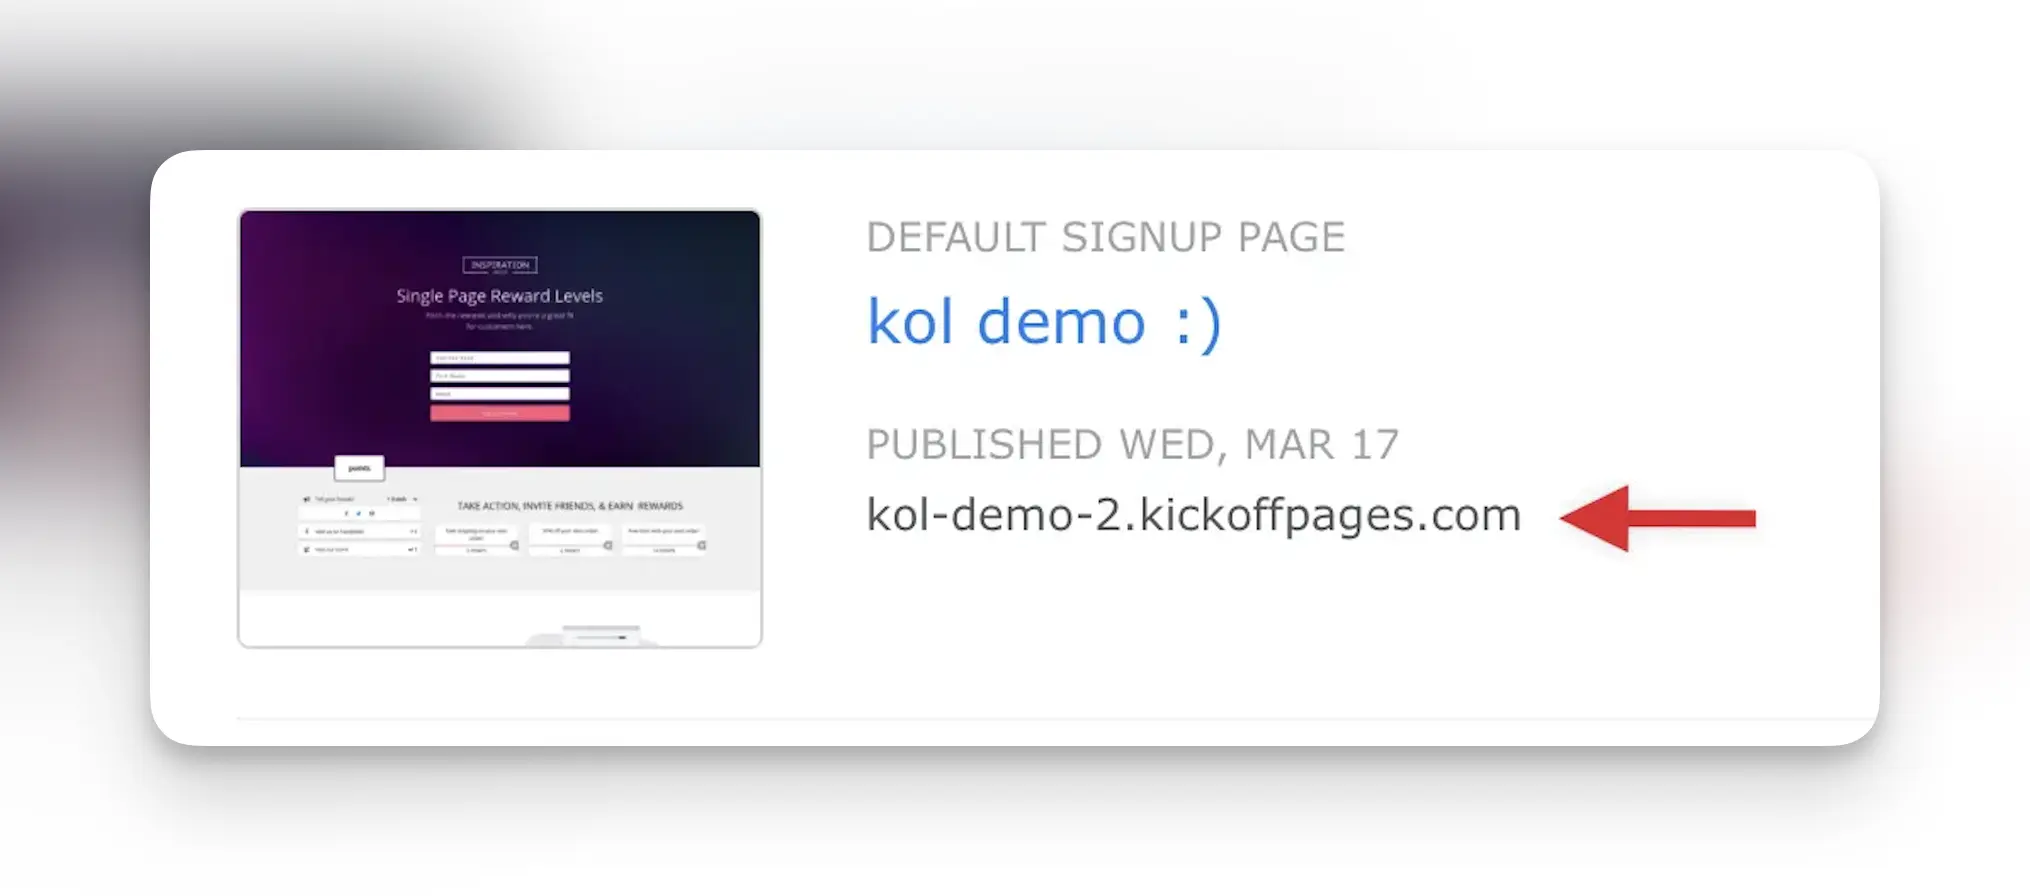
Use your store’s URL/Domain for the reward pages
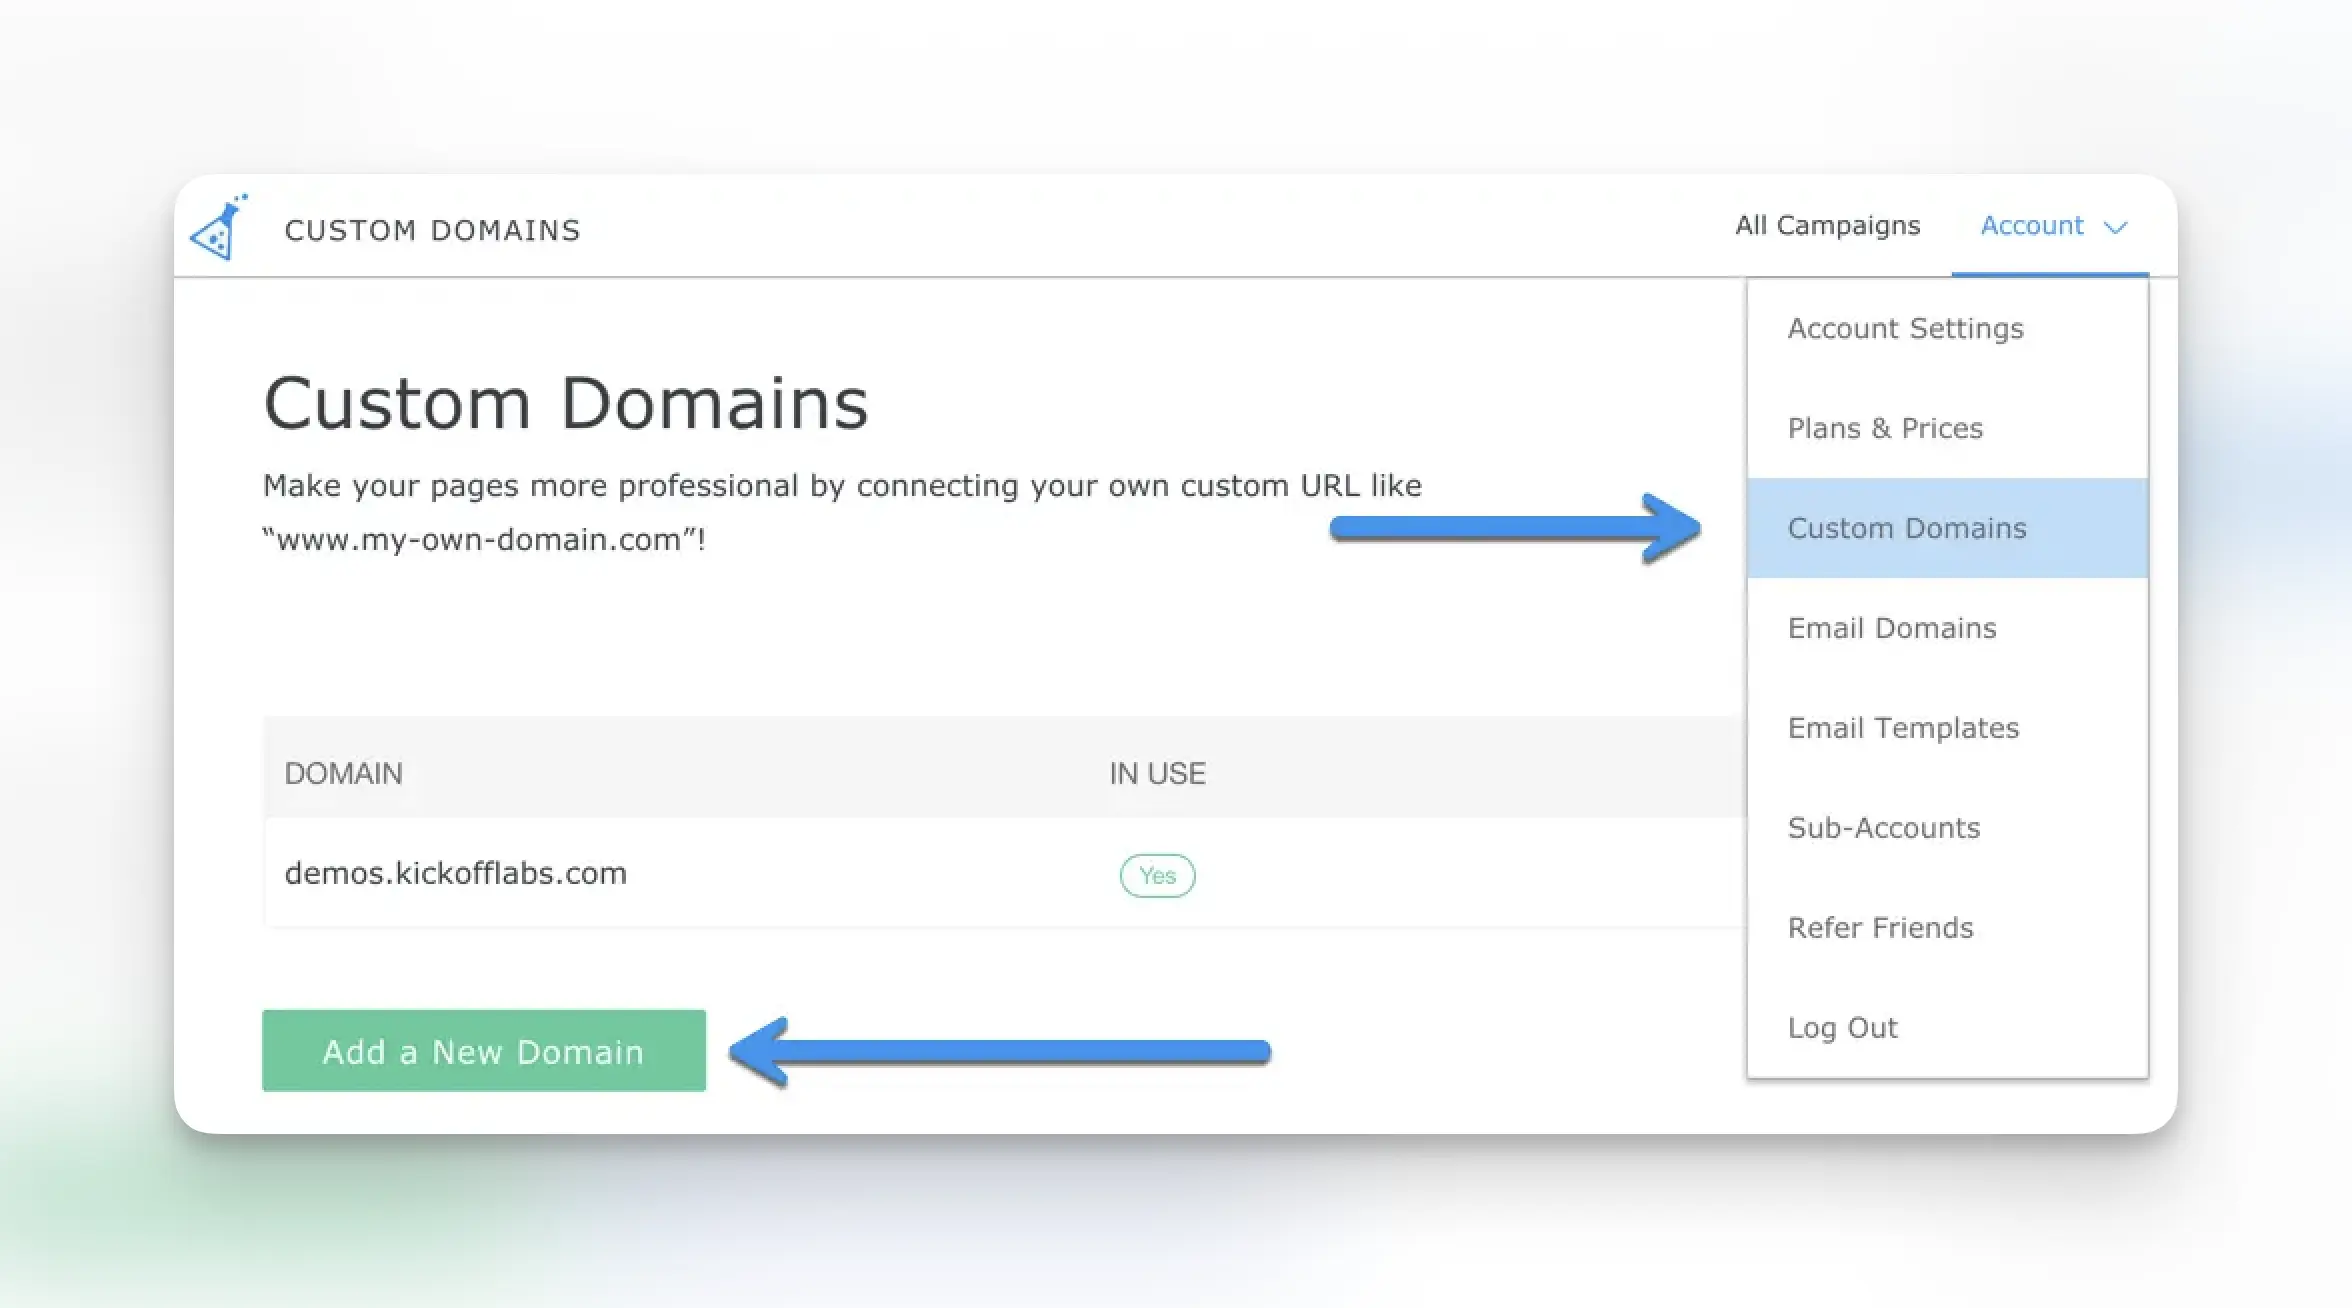
You can use your own store’s custom domain for the landing pages in this campaign. To do this you’d need to add a domain to KickoffLabs.
- Click “Account” in KickoffLabs then “Custom Domains”
-
Click “Add Domain”
-
If your store is something like my-shopify-store.com we suggest adding a domain like rewards.my-shopify-store.com.
-
Once you’ve added this domain follow the steps we give you in order and don’t forget to go back and re-publish the pages to this domain. The signup page would probably be rewards.my-shopify-store.com and the rewards page would be rewards.my-shopify-store.com/share
Install your Google Analytics and tracking codes
If you are already using a program like Google Analytics to track traffic it’s helpful to add that tracking script into your KickoffLabs pages. You can do this from “Setup” > “All Settings” > “Analytics & Tracking Codes”
![]()
Ready to Launch Your Shopify Referral Program?
Now that you understand how to build a referral loyalty program for Shopify, it’s time to choose the right campaign type for your store:
- Referral Reward Program - Reward customers for purchases and referrals with instant incentives
- Milestone Rewards - Create tiered rewards like Starbucks that unlock at different point levels
- Newsletter Referral - Build your email list alongside your customer referral program
Essential features to power your Shopify referral campaign:
- Shopify Integration - Seamlessly track purchases and referrals from your Shopify store
- Referral Tracking - Automatically track every customer referral and attribute sales correctly
- Rewards Management - Deliver milestone rewards automatically as customers hit their goals
- Fraud Detection - Keep your program honest with IP filtering and duplicate detection
Want more inspiration? Check out real referral program examples or learn how to run a simple refer-a-friend campaign. If you have any comments or questions about this functionality please let us know by emailing support@kickofflabs.com
Read more Referral Programs with the next chapter:
10. Best Practices for Referral Programs
Check out additional resources, expert advice, and industry secrets that will transform your referral program.
