You’ve read about viral launches and have wondered what it would take to replicate that success for your business. We’ve also talked in the past on how to supercharge your conversion rate using social referrals. But let’s be honest… without a team of developers, a full blown refer-a-friend campaign is not easy to build. Especially if you’re just starting out. You’re in luck!
KickoffLabs gives you access to the same marketing tools (and more!) that Harry’s used to gather over 100,000 emails. It’s easy to quickly gather 35,000, or even 100,000 emails using KickoffLabs and the power of social referrals.
Woah! We’ve hit 100,000 founding members on the new GLP APP. Launching this Thursday. @kickofflabs #growthhacking pic.twitter.com/qhmUsB0QGg — Rossa Shanks (@rossashanks) April 28, 2015
Let’s take a look at setting up a viral social referral campaign like Harry’s. If you’re new to referral programs, check out our guide on what is a referral program first. Log in to your account now to follow along, or if you haven’t yet sign up now for free.
The Signup Landing Page
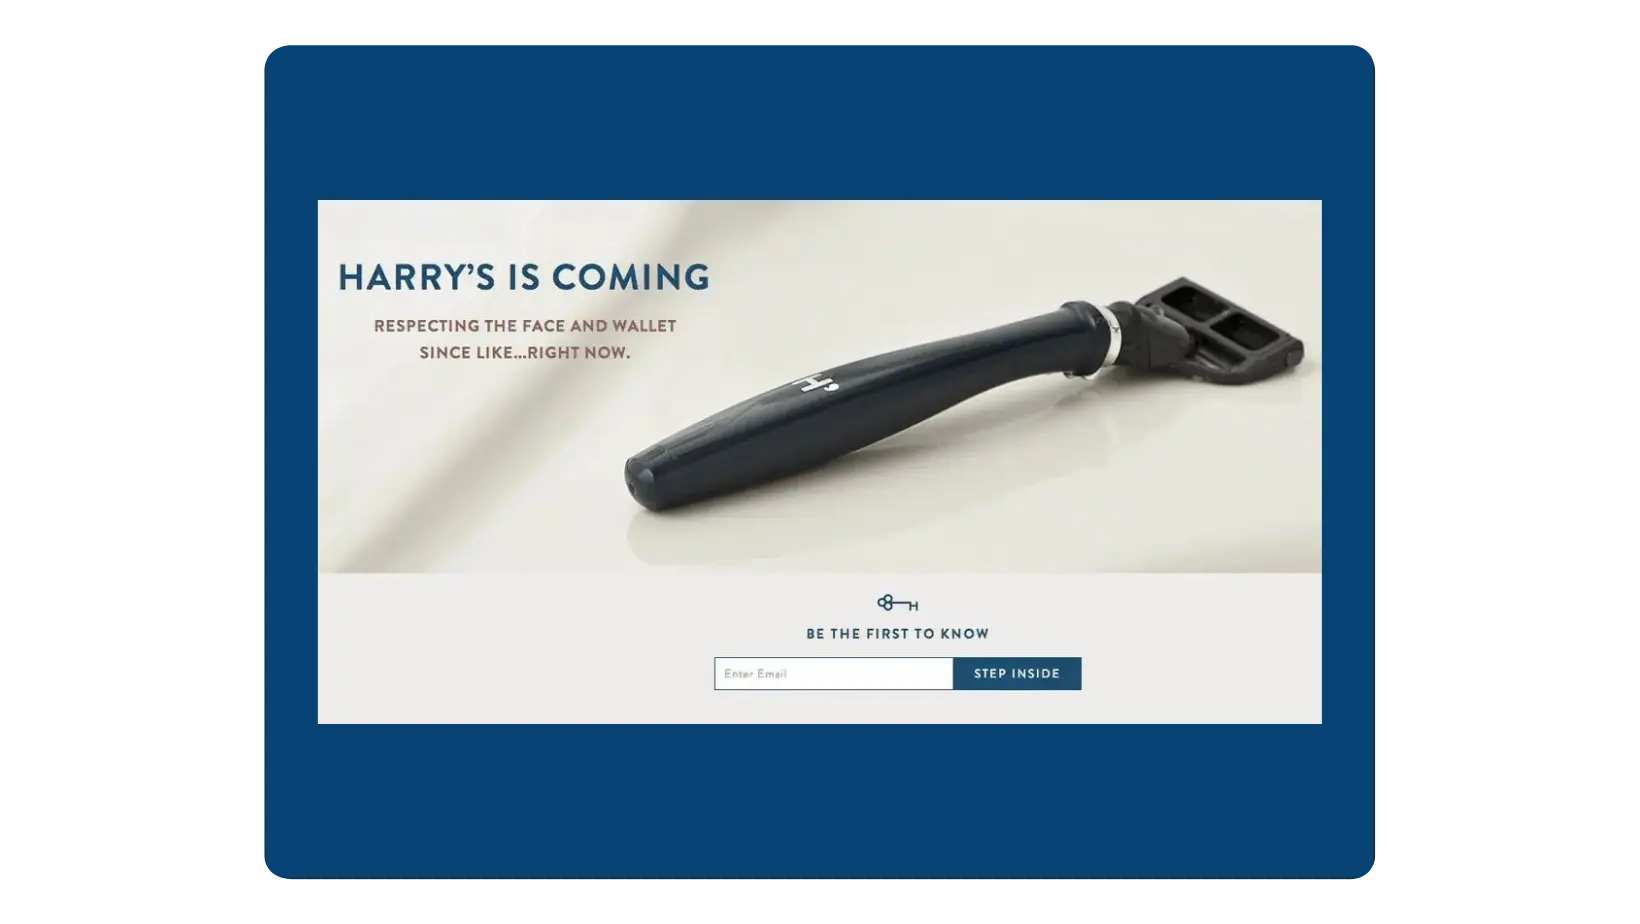
Harry’s used a two-page microsite, automated email replies and reward levels to boost their launch campaign. Let’s start by focusing on the initial splash page.
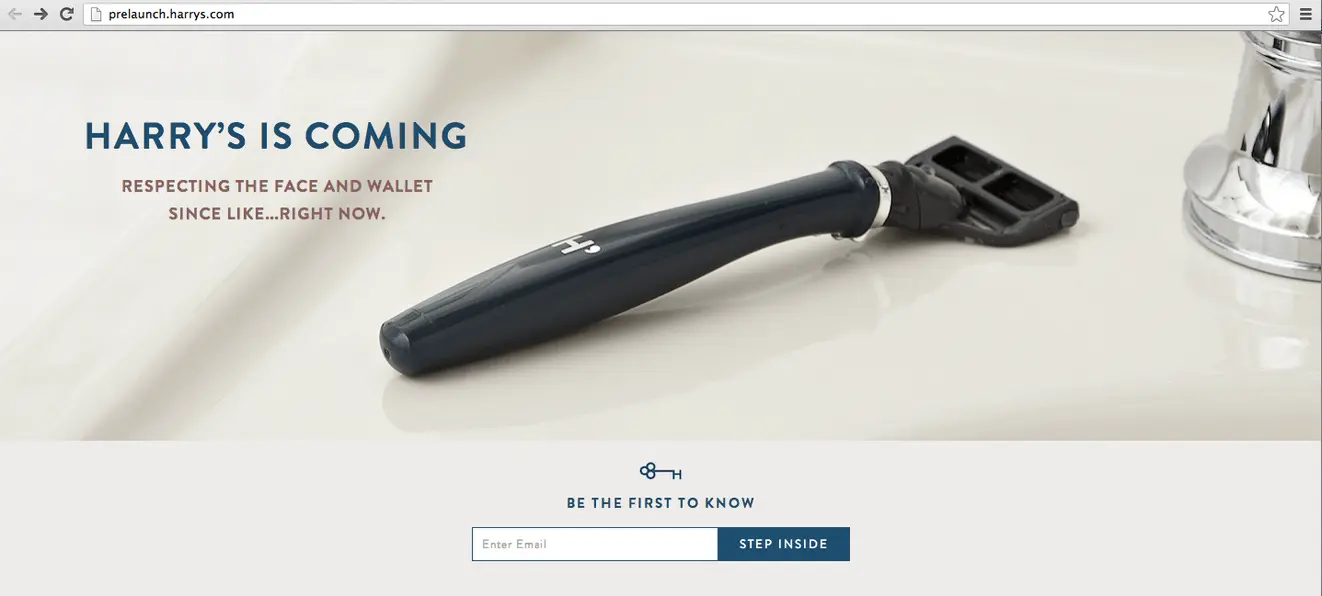
Strategy The strengths of the Harry’s signup page:
- simple page with a great design.
- high quality image that is descriptive of the offering.
- asking only for an email address. Less fields = less friction.
- key icon above signup form “unlocks” access.
- own domain name that builds customer trust (prelaunch.harrys.com)
Setup with KickoffLabs We’ll be creating a new campaign from scratch, but you can also create these changes under any existing KickoffLabs Campaign. Need design, copywriting, or marketing inspiration? We’ve got you covered in our Marketing Resource Center! Check it out now.
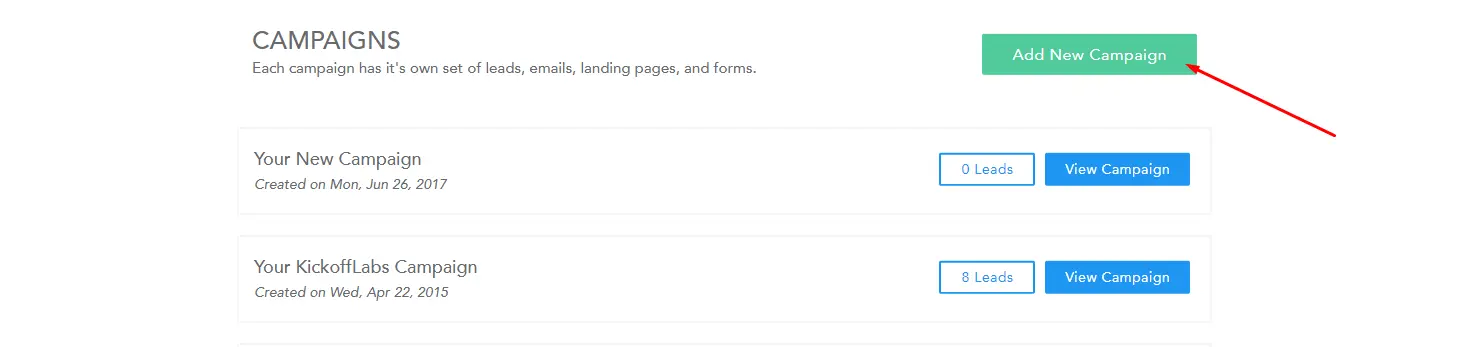
1. In this example we’ll be creating an entire campaign from scratch, but you can always create a new landing page under any existing campaign within KickoffLabs. Click ‘Add New Campaign’ to create a new lead generation campaign. If you’ve just signed up, you’ll automatically be taken to the campaign creation page when you log in.
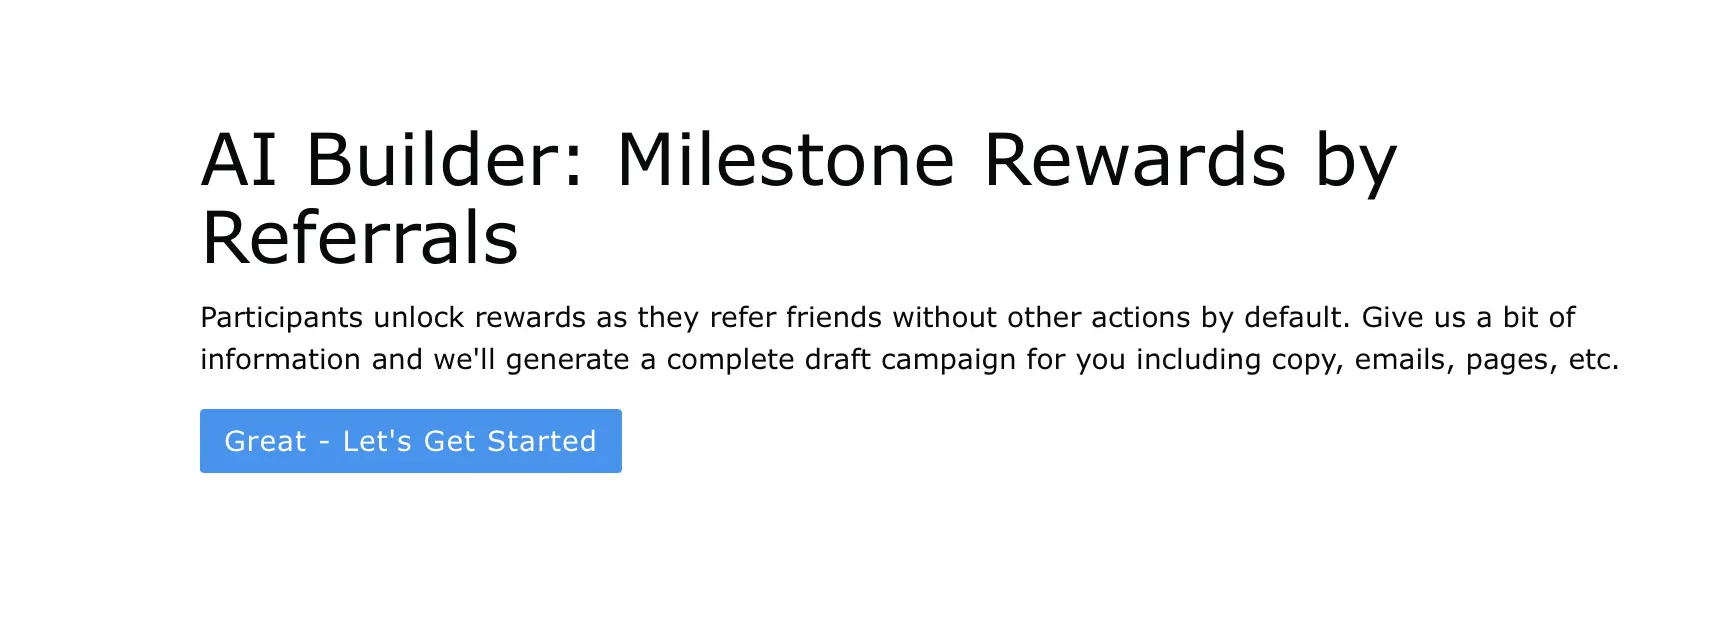
2. To mimic Harry’s set-up, scroll down to the “Launches” section and select the “Milestone Rewards by Referrals” campaign.

3. Next you’ll be prompted to use our new (optional) AI builder tool. Harry’s did not use AI, but it’s an extremely helpful tool that can assist with things like generating example page copy, emails, share text and even legal terms and conditions. If you’d like to use it, provide a 1-2 sentence description of your company/product. If you’d like to skip it, simply scroll past to the next step.
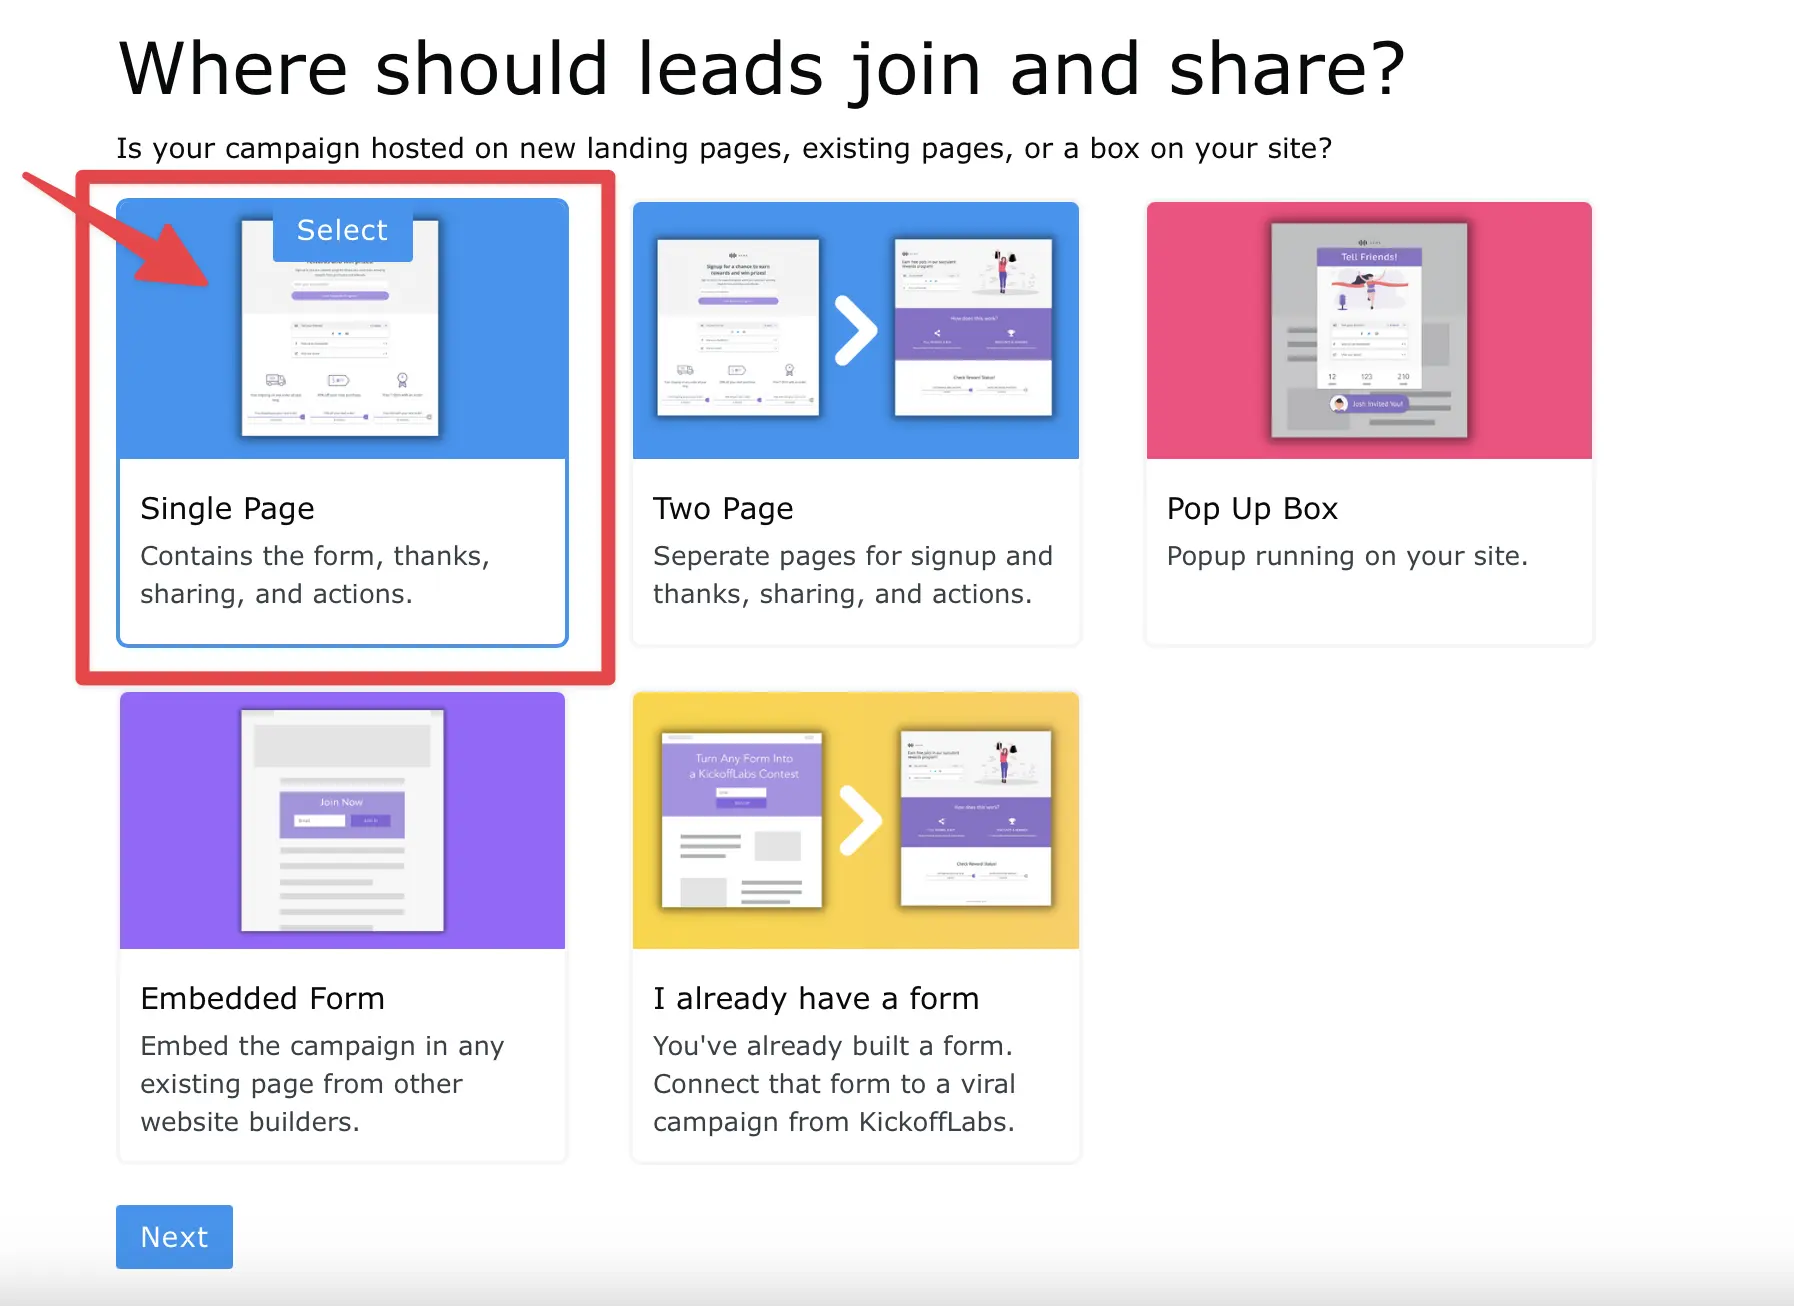
4. Now, we’ll choose how we want the lead to sign-up and share. For the purposes of this guide we’ll choose the KickoffLabs “Single Page” option, but you can choose the option that best suits your needs.
5. You’ll now be presented with a list of our most popular themes (depending on what you chose in step 4) Remember, there is no right or wrong signup page design for this type of campaign, so choose the one you like best!
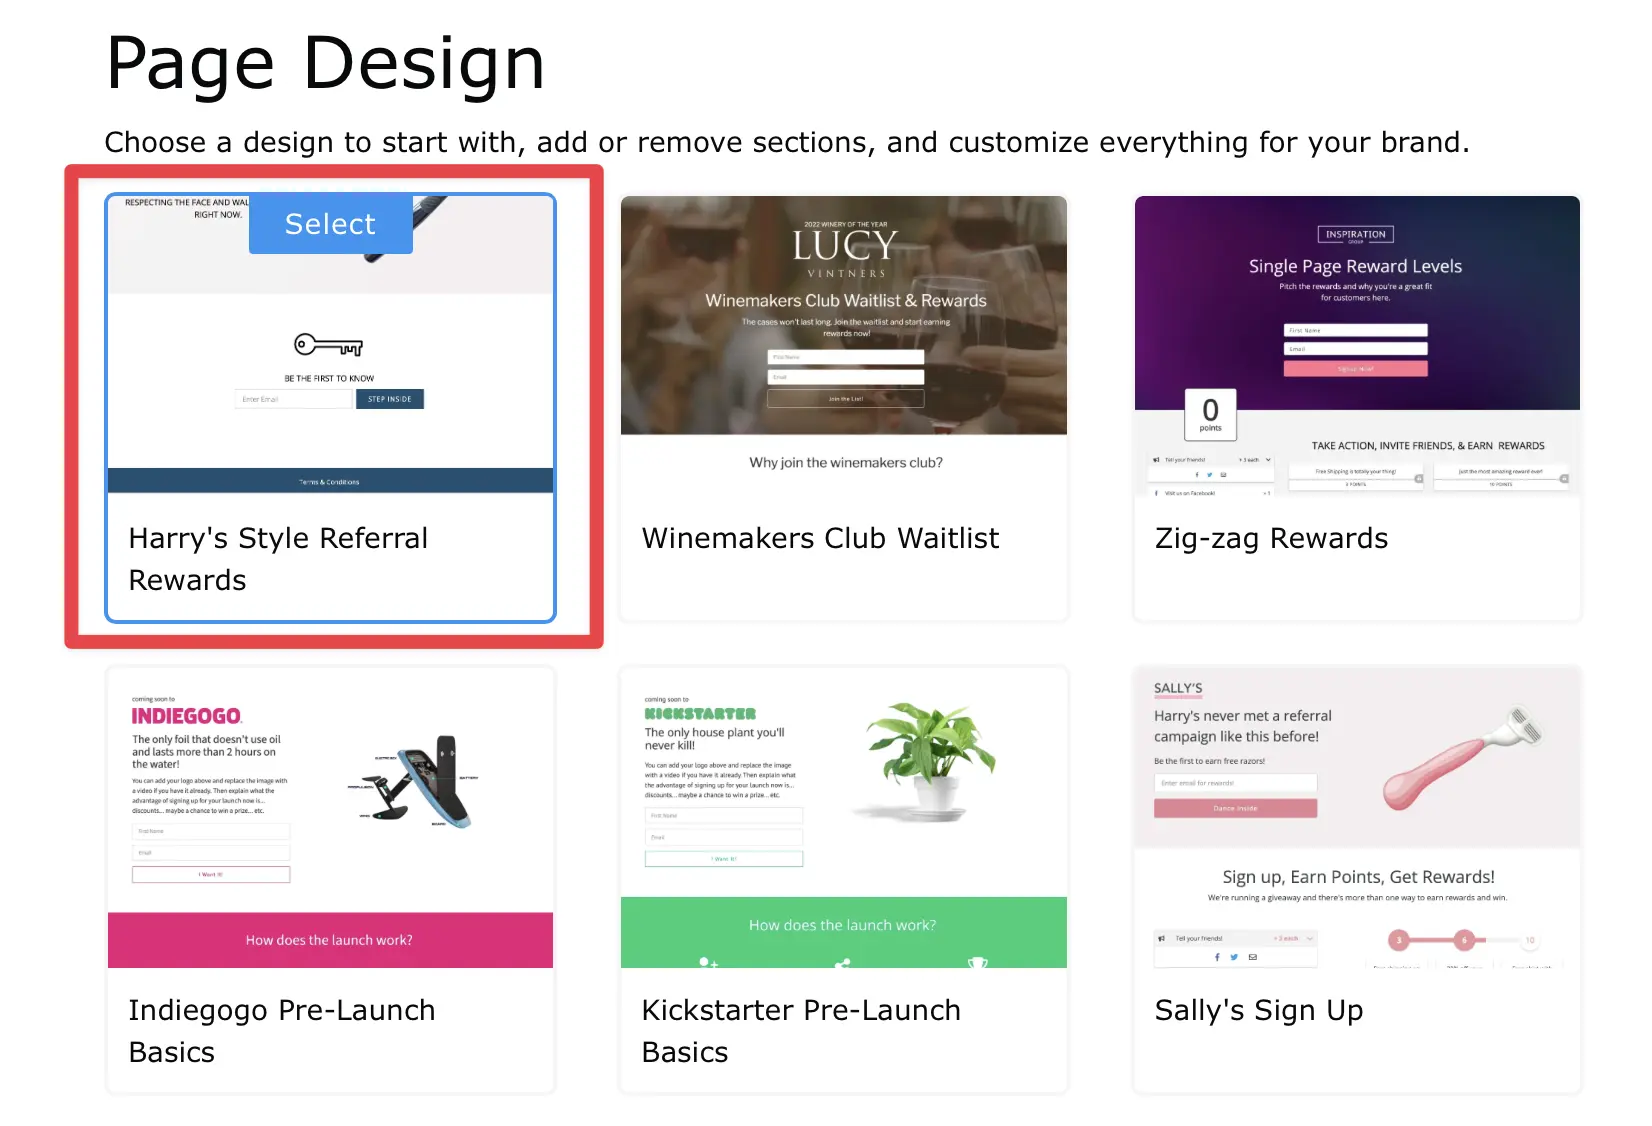
For this guide, we’ll be selecting the Harry’s inspired reward theme, which is our version of the Harry’s signup page!
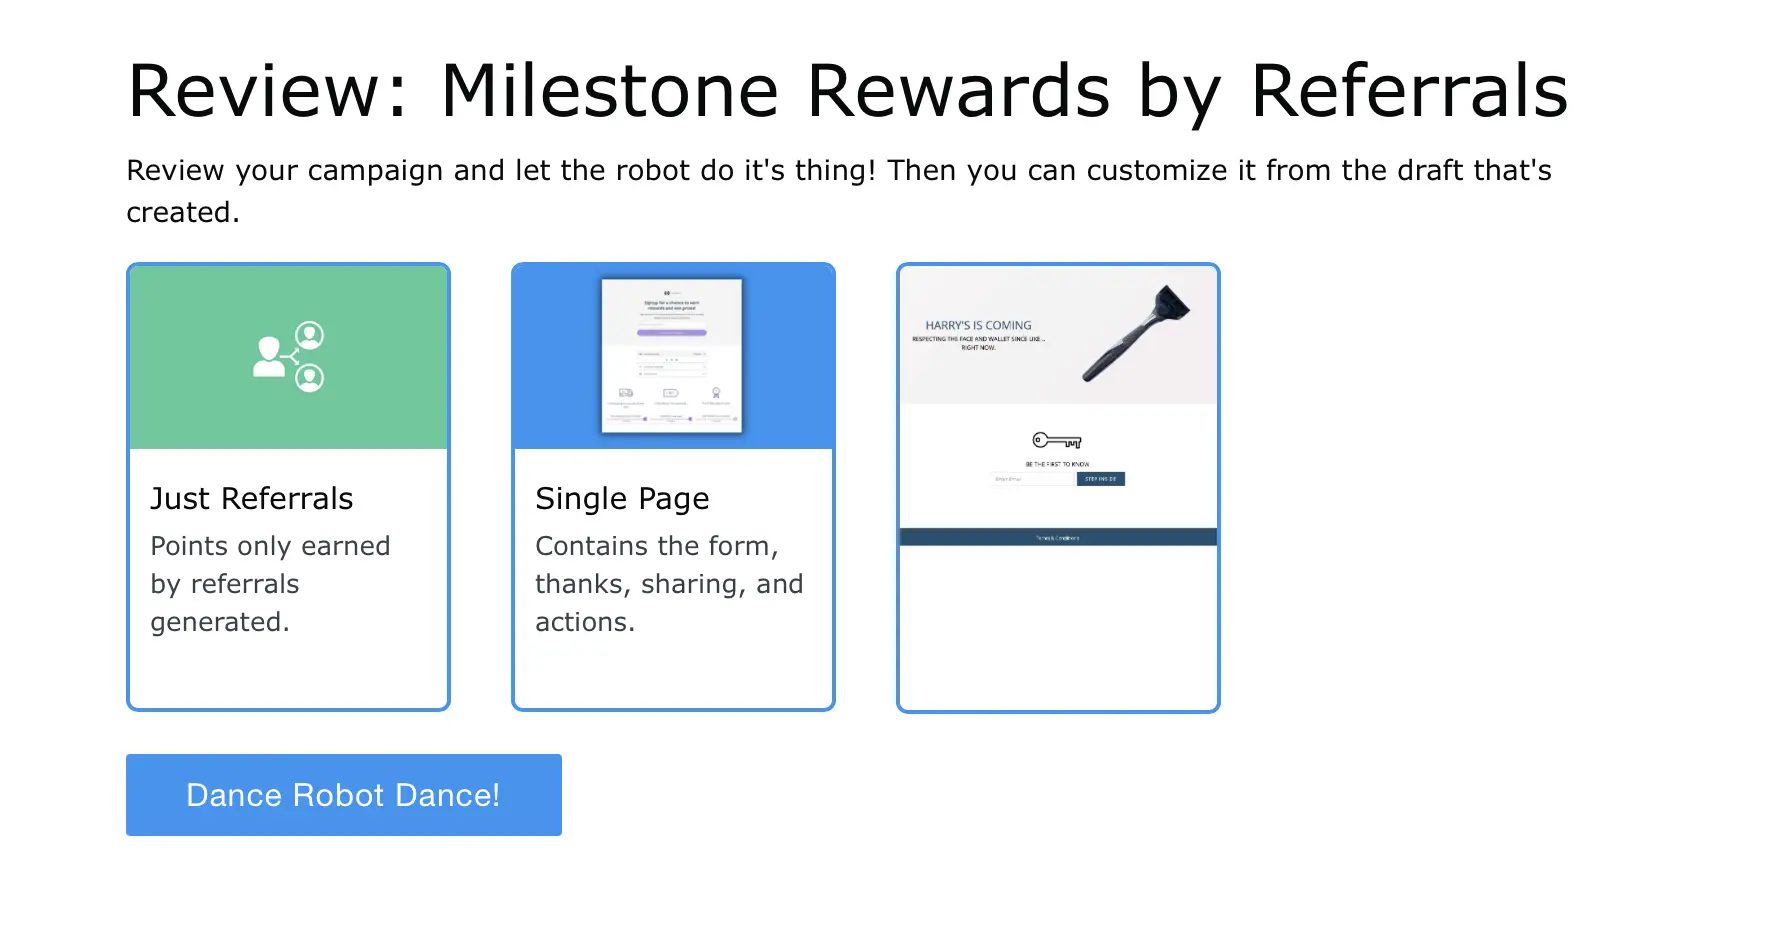
6. Next, you’ll be prompted to review your set-up. If everything looks correct, click the button to make the robots dance! If you need to make any changes, simply scroll up to see the previous options that you selected and make any changes before continuing on.
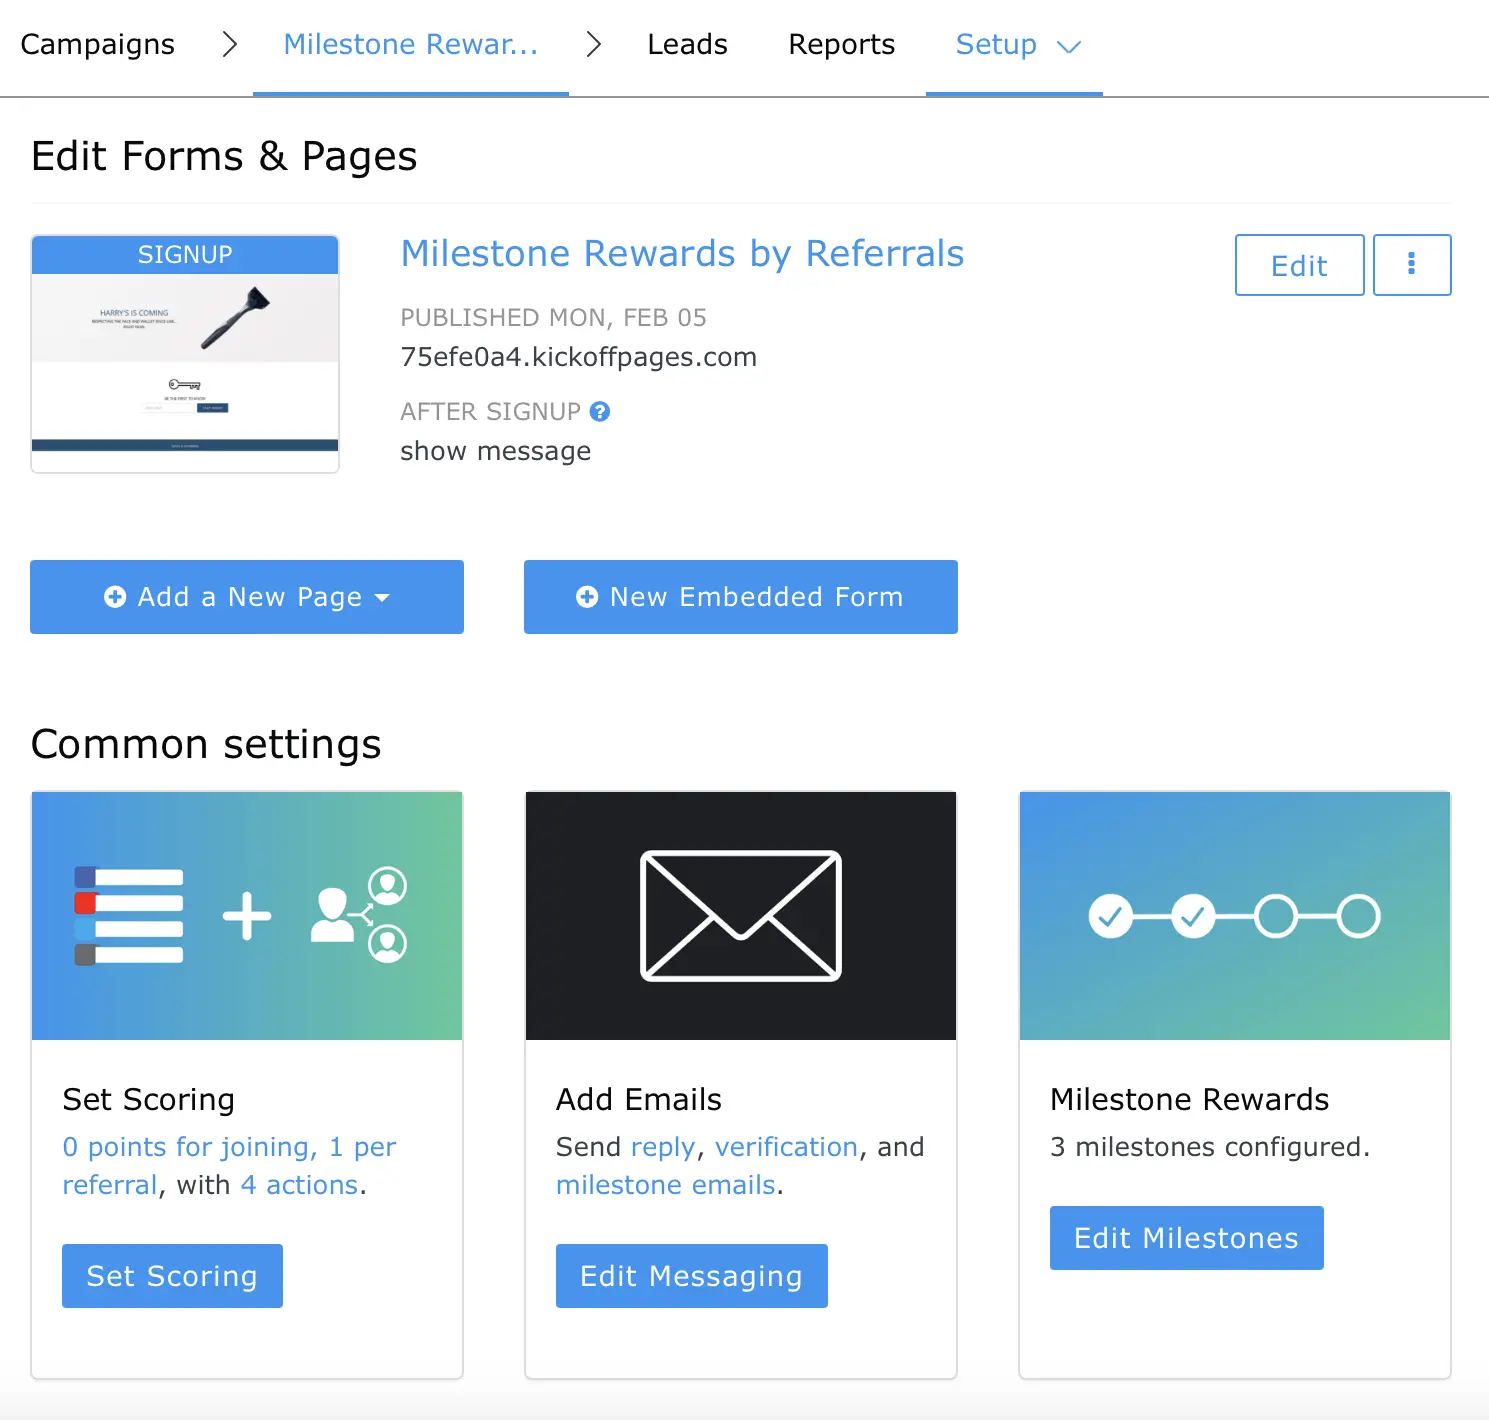
7. You’ll be taken out to your Campaign Dashboard where you can complete the campaign set-up and edit your page(s) If you selected a two page set-up in step 4, we’ll automatically add the matching status page to your campaign based on the landing page that you chose.
If you want to change the set-up from a one page set-up into two or vise versa, no need to start over again. Just follow these steps to change the campaign confirmation setup.
8. Now it’s time to edit your pages! On the Campaign Dashboard, click the “Edit Page” button to get started.
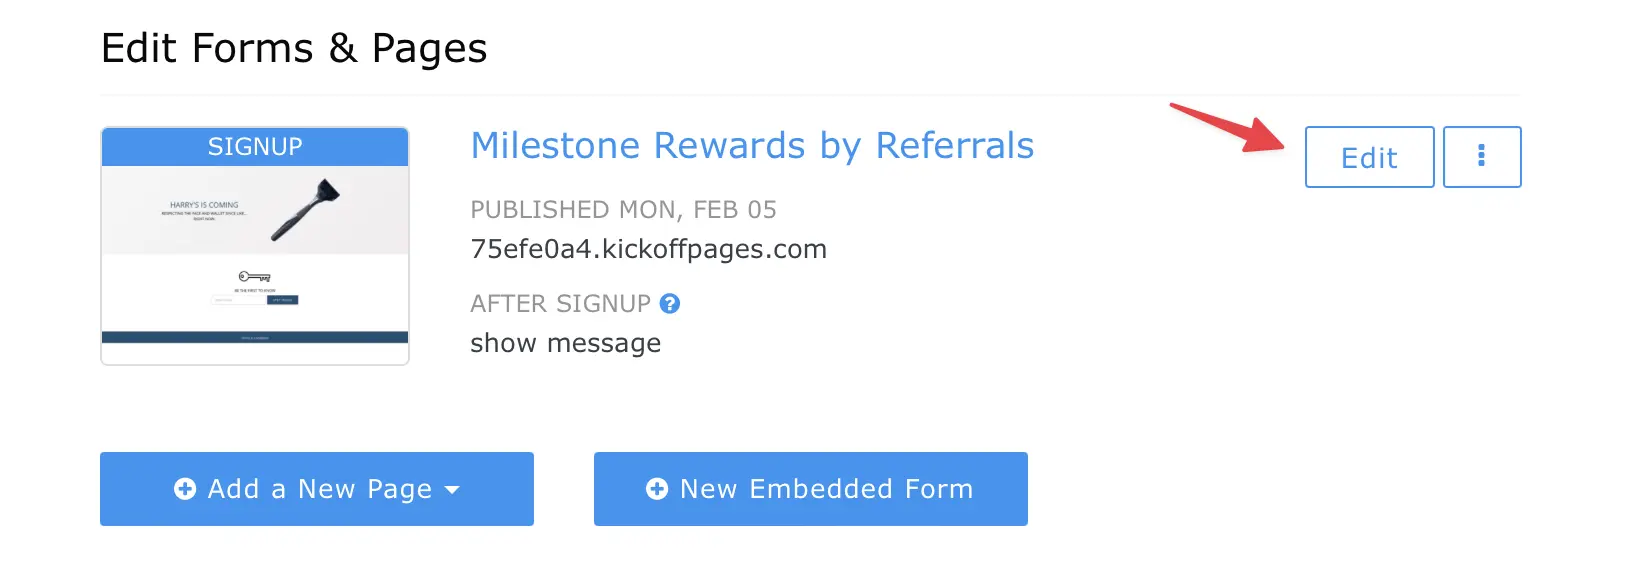
9. Inside of the designer, go ahead and customize the signup page to your liking. Add in custom text, fonts, colors, images and more. We’ve also included an indepth breakdown on editing your pages HERE!
10. You can edit the post sign-up, status experience from the “Thanks & Status” section in the editor.
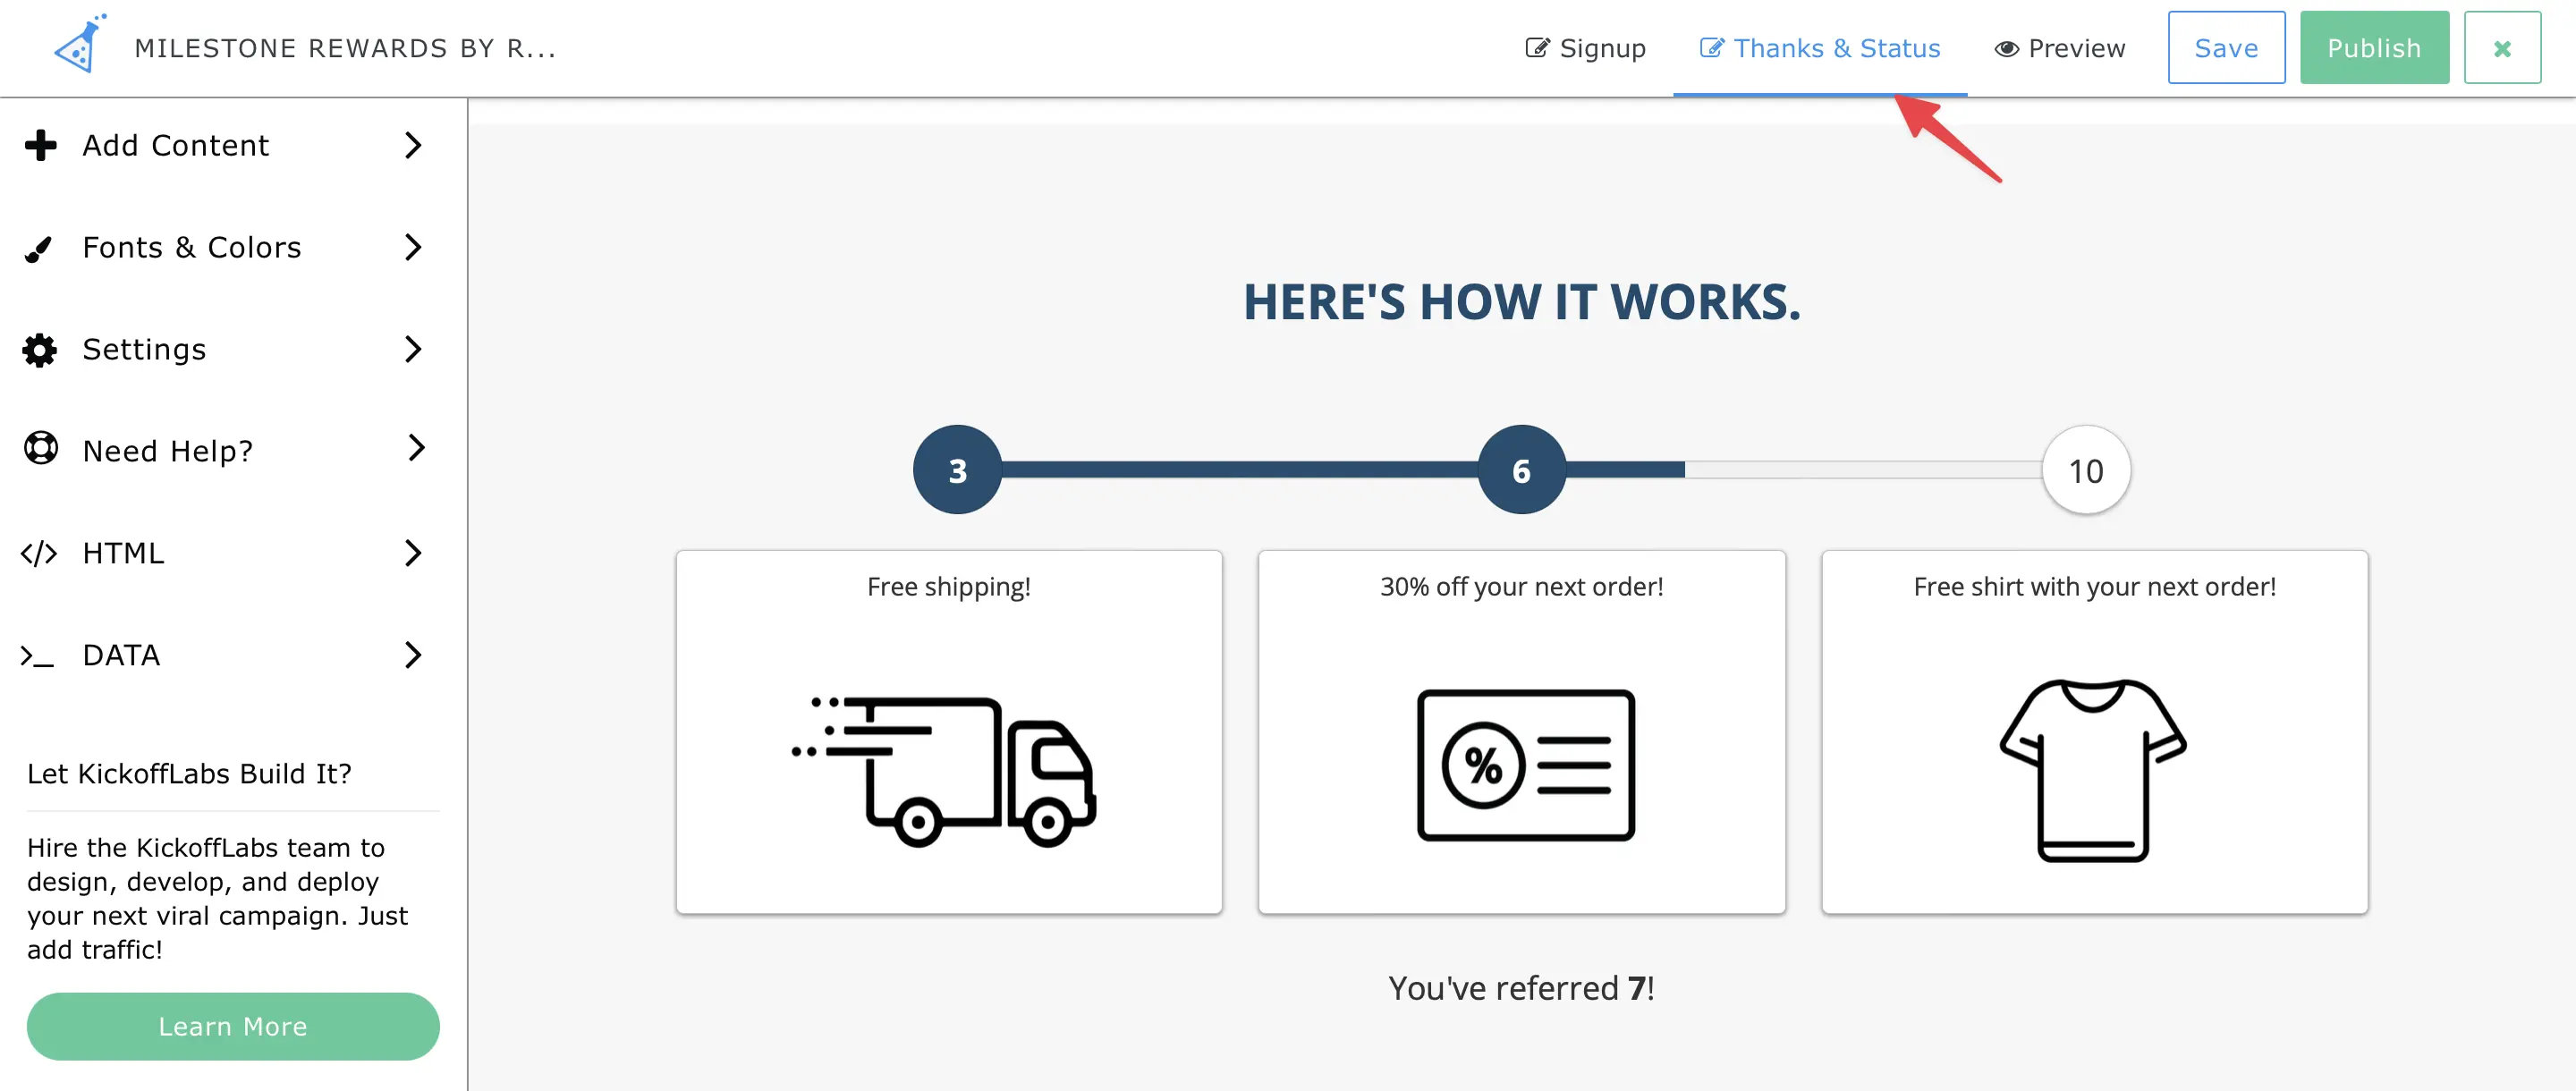
You’ll notice that our new Harry’s template now includes the post-signup widgets that were previously located on our OG thanks page(now known as a status page). We recently improved the user experience by keeping everything on the same page. Learn more about the campaign modes that you can create here!
Our Harry’s theme automatically calculates and displays referral information to your signups.
Click anywhere on the progress bar snippet to open the reward editor. This is where you’ll update the colors. Click the “edit” button to be taken to the campaign reward settings where you can set the prize tiers, emails, and text.
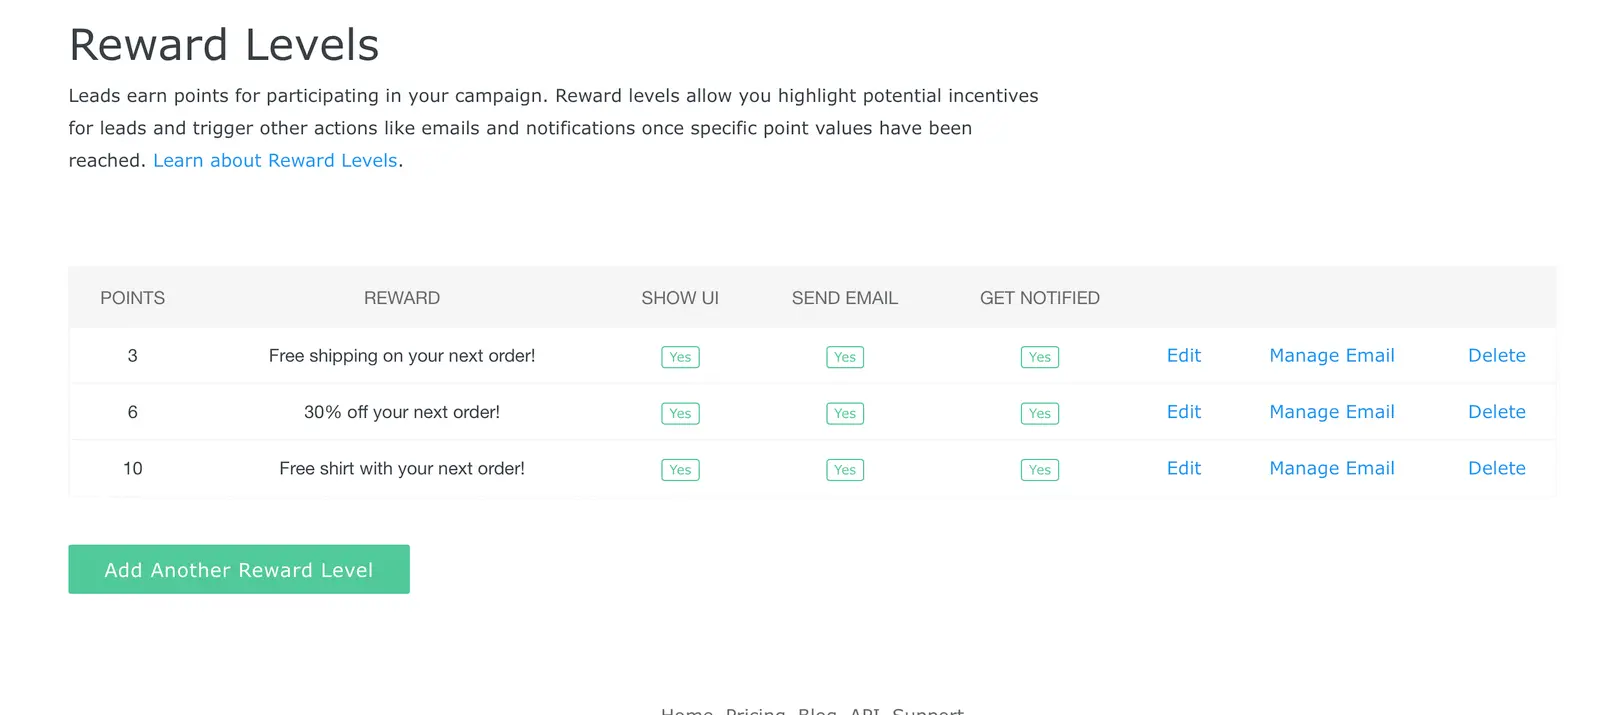
Here’s a more in-depth look at what you can update in the campaign reward level settings:
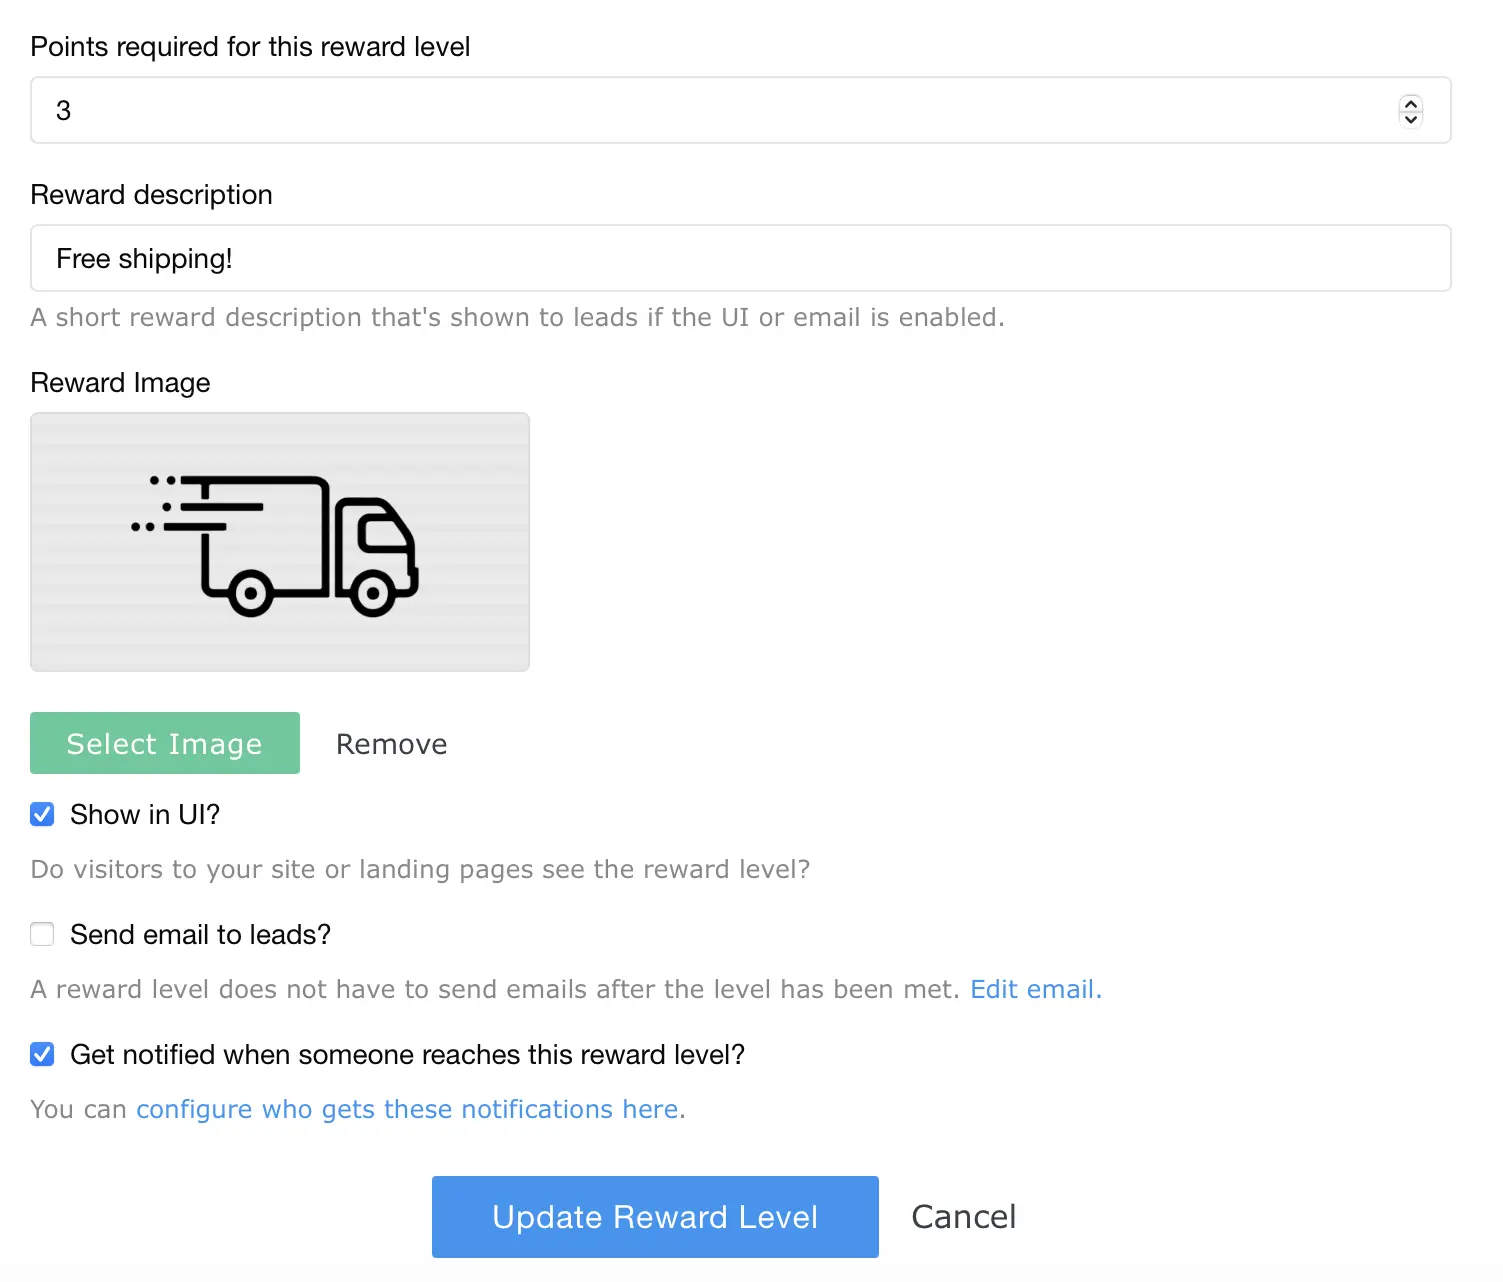
- Points required for this reward level – allows you to customize the number of points needed to achieve the milestone.
- Reward Description – This will set the text for the reward tier.
- Reard Image - Set an image for the reward milestone.
- Show in UI- Choose to hide or display this specific reward tier.
- Send email to leads – Choose to send out a reward level mail with the reward tier. Learn more about reward mails here.
- Get notified when someone reaches the reward level - Get alerted each time a lead reaches the reward tier.
Optionally add social share actions by dragging and dropping the widget from the “add content” menu.
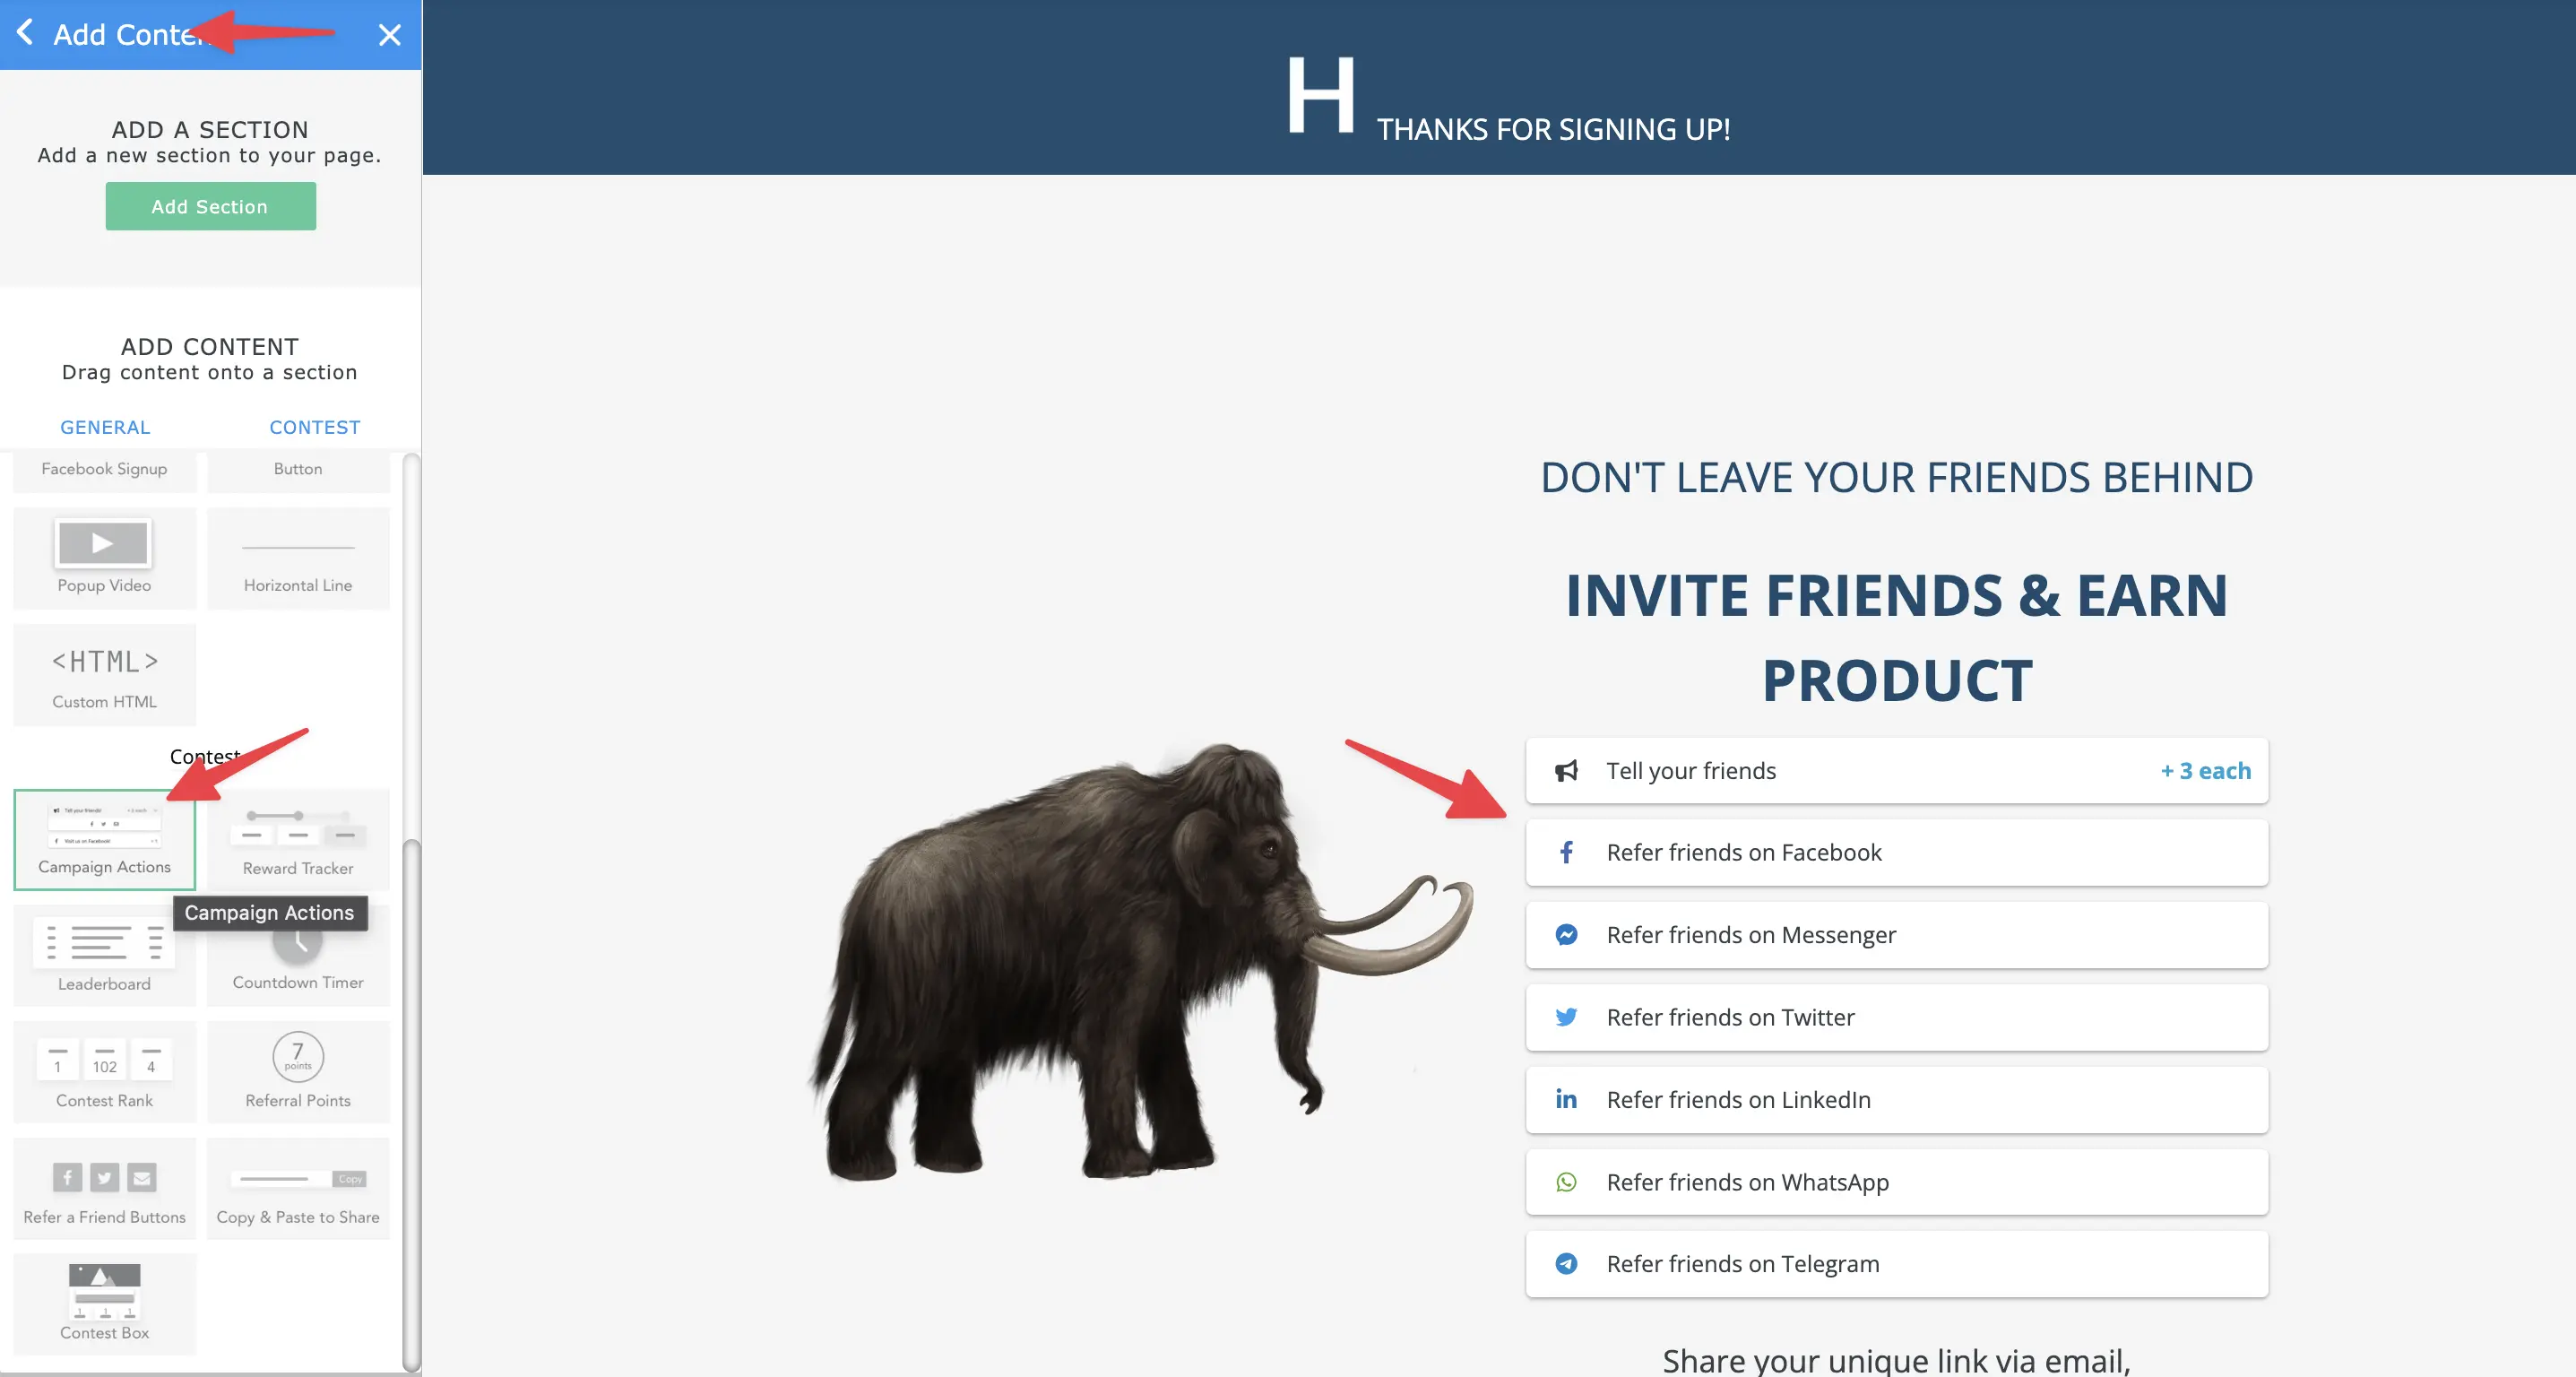
Click anywhere in the snippet that contains your action icons. This will open an editing window on the left menu. Here’s you can change the primary color of the widget. You can then click the “edit actions” button to be taken to the campaign action settings. Find our full guide on updating your viral actions here!
*Note – Facebook Sharing and Twitter Image Summary Cards are set up via the campaign level settings.
When your edits are complete, click ‘Save’, then click ‘Publish’ to push the changes live.
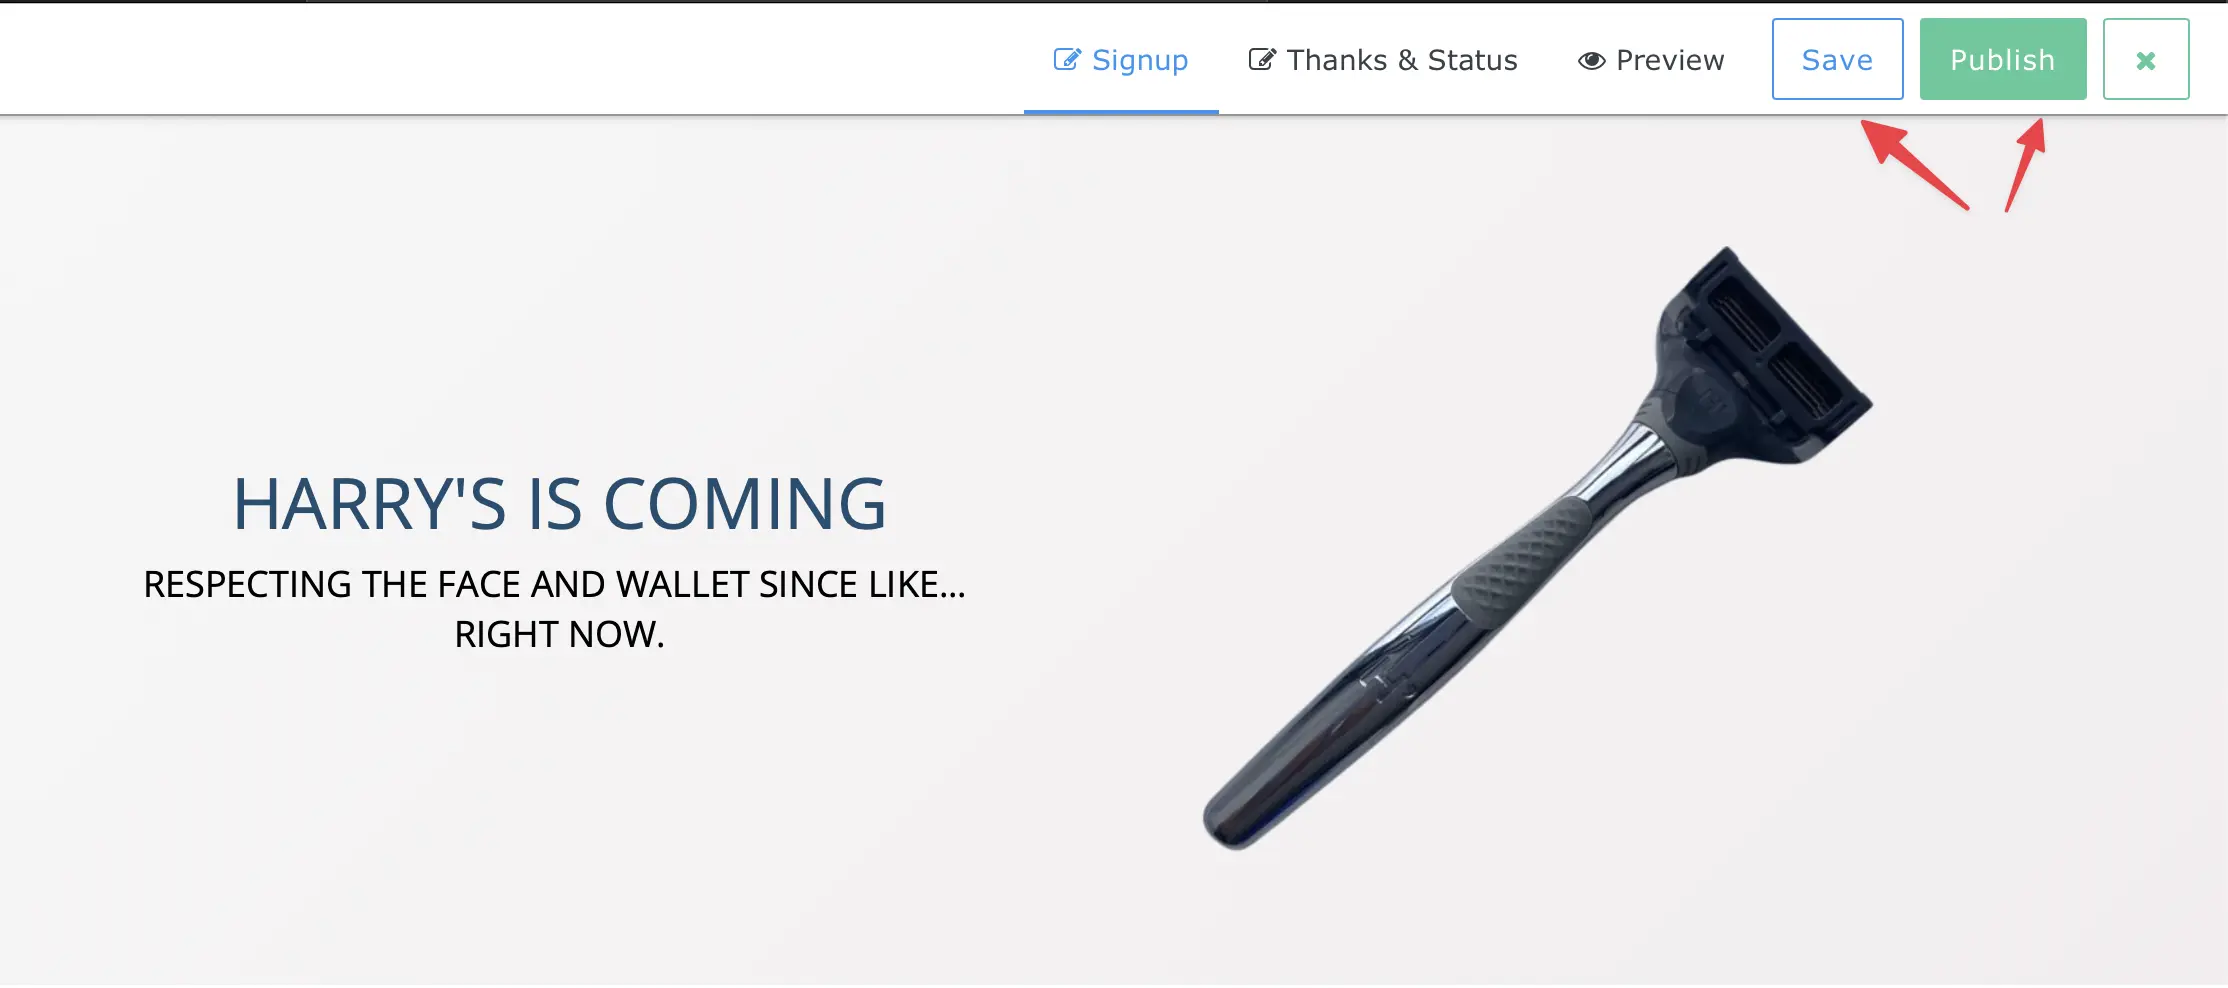
All set creating the signup page!
Below we’ve included what Harry’s unique status page looked like. You can now easily recreate this with our single page set-up or redirect the lead to a separate status page. There’s no right or wrong answer when selecting a single page set-up vs our two page set-up. It’s really personal preference.
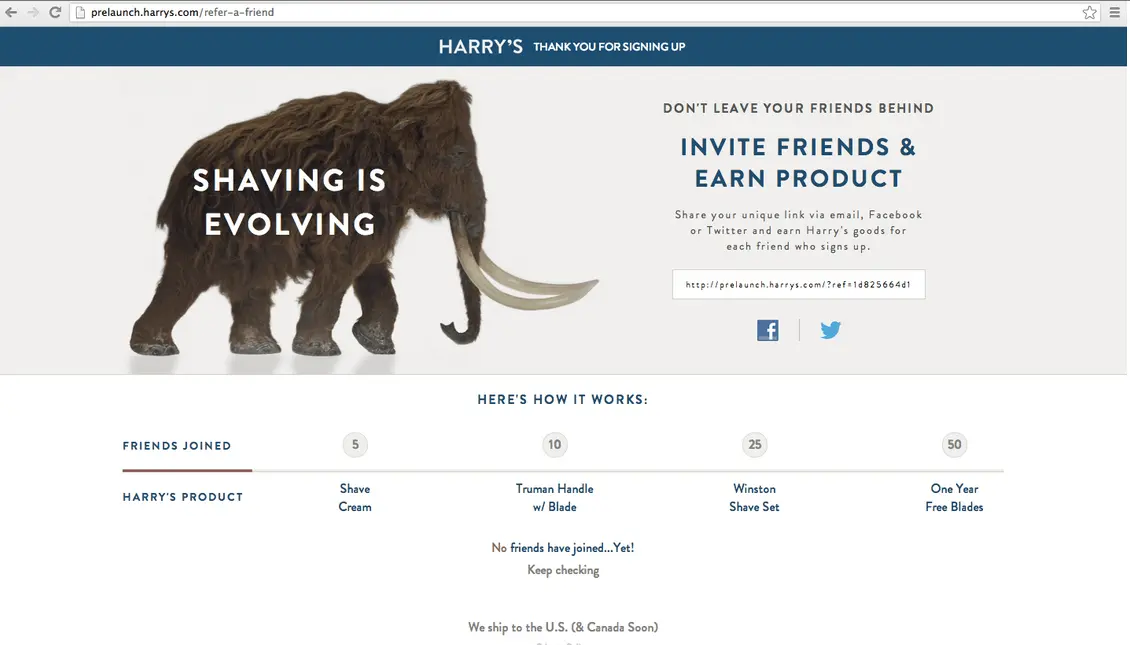
Strategy Elements that were key to success:
- earning free product is as easy as sharing.
- prominent social buttons and social referral link.
- reward levels and progress are clearly visible.
- pre-populated custom social sharing messages.
The Emails
Don’t neglect your signups after they’ve converted. Email reminds people what they signed up for and instigates action. Not to mention it’s proven that email has the highest ROI out of all marketing channels.
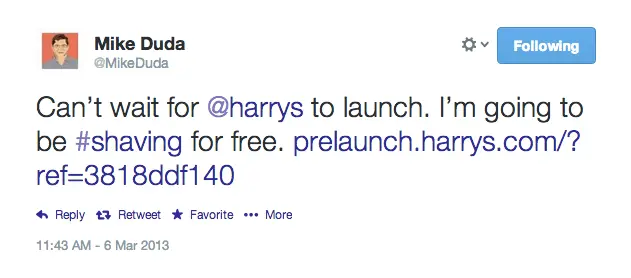
Harry’s amounted a huge subscriber list, in part due to their sharing and referral focused emails. Unfortunately there are no examples on the web, so we can only speculate what Harry’s emails looked like. But judging by the social share message, we can see the copy is first-person and non-salesy.
Strategy
The series of emails we’ll be sending out are:
- Instant thank you and share email (AutoReply) – the initial email response reminding people about the rewards for sharing.
- Rewards & incentives emails (a KickoffLabs exclusive) – notify people if and once they’ve reached any of multiple reward levels you setup.
Setup with KickoffLabs
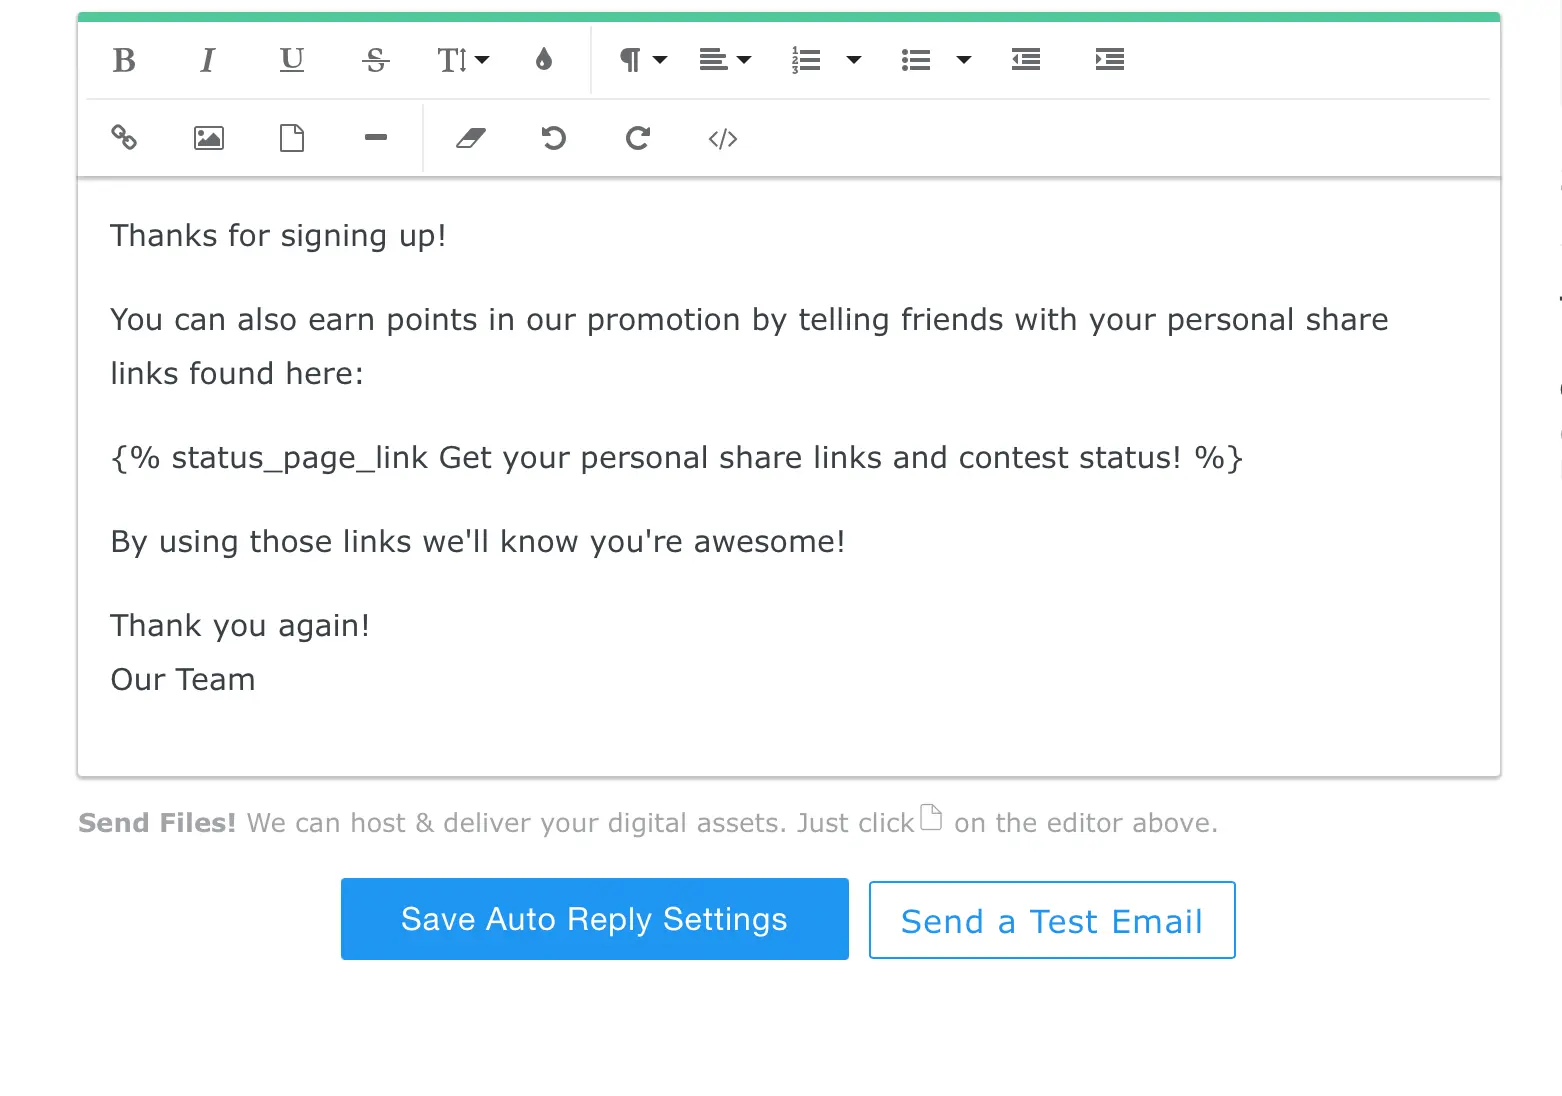
A. Instant thank you email (AutoReply)
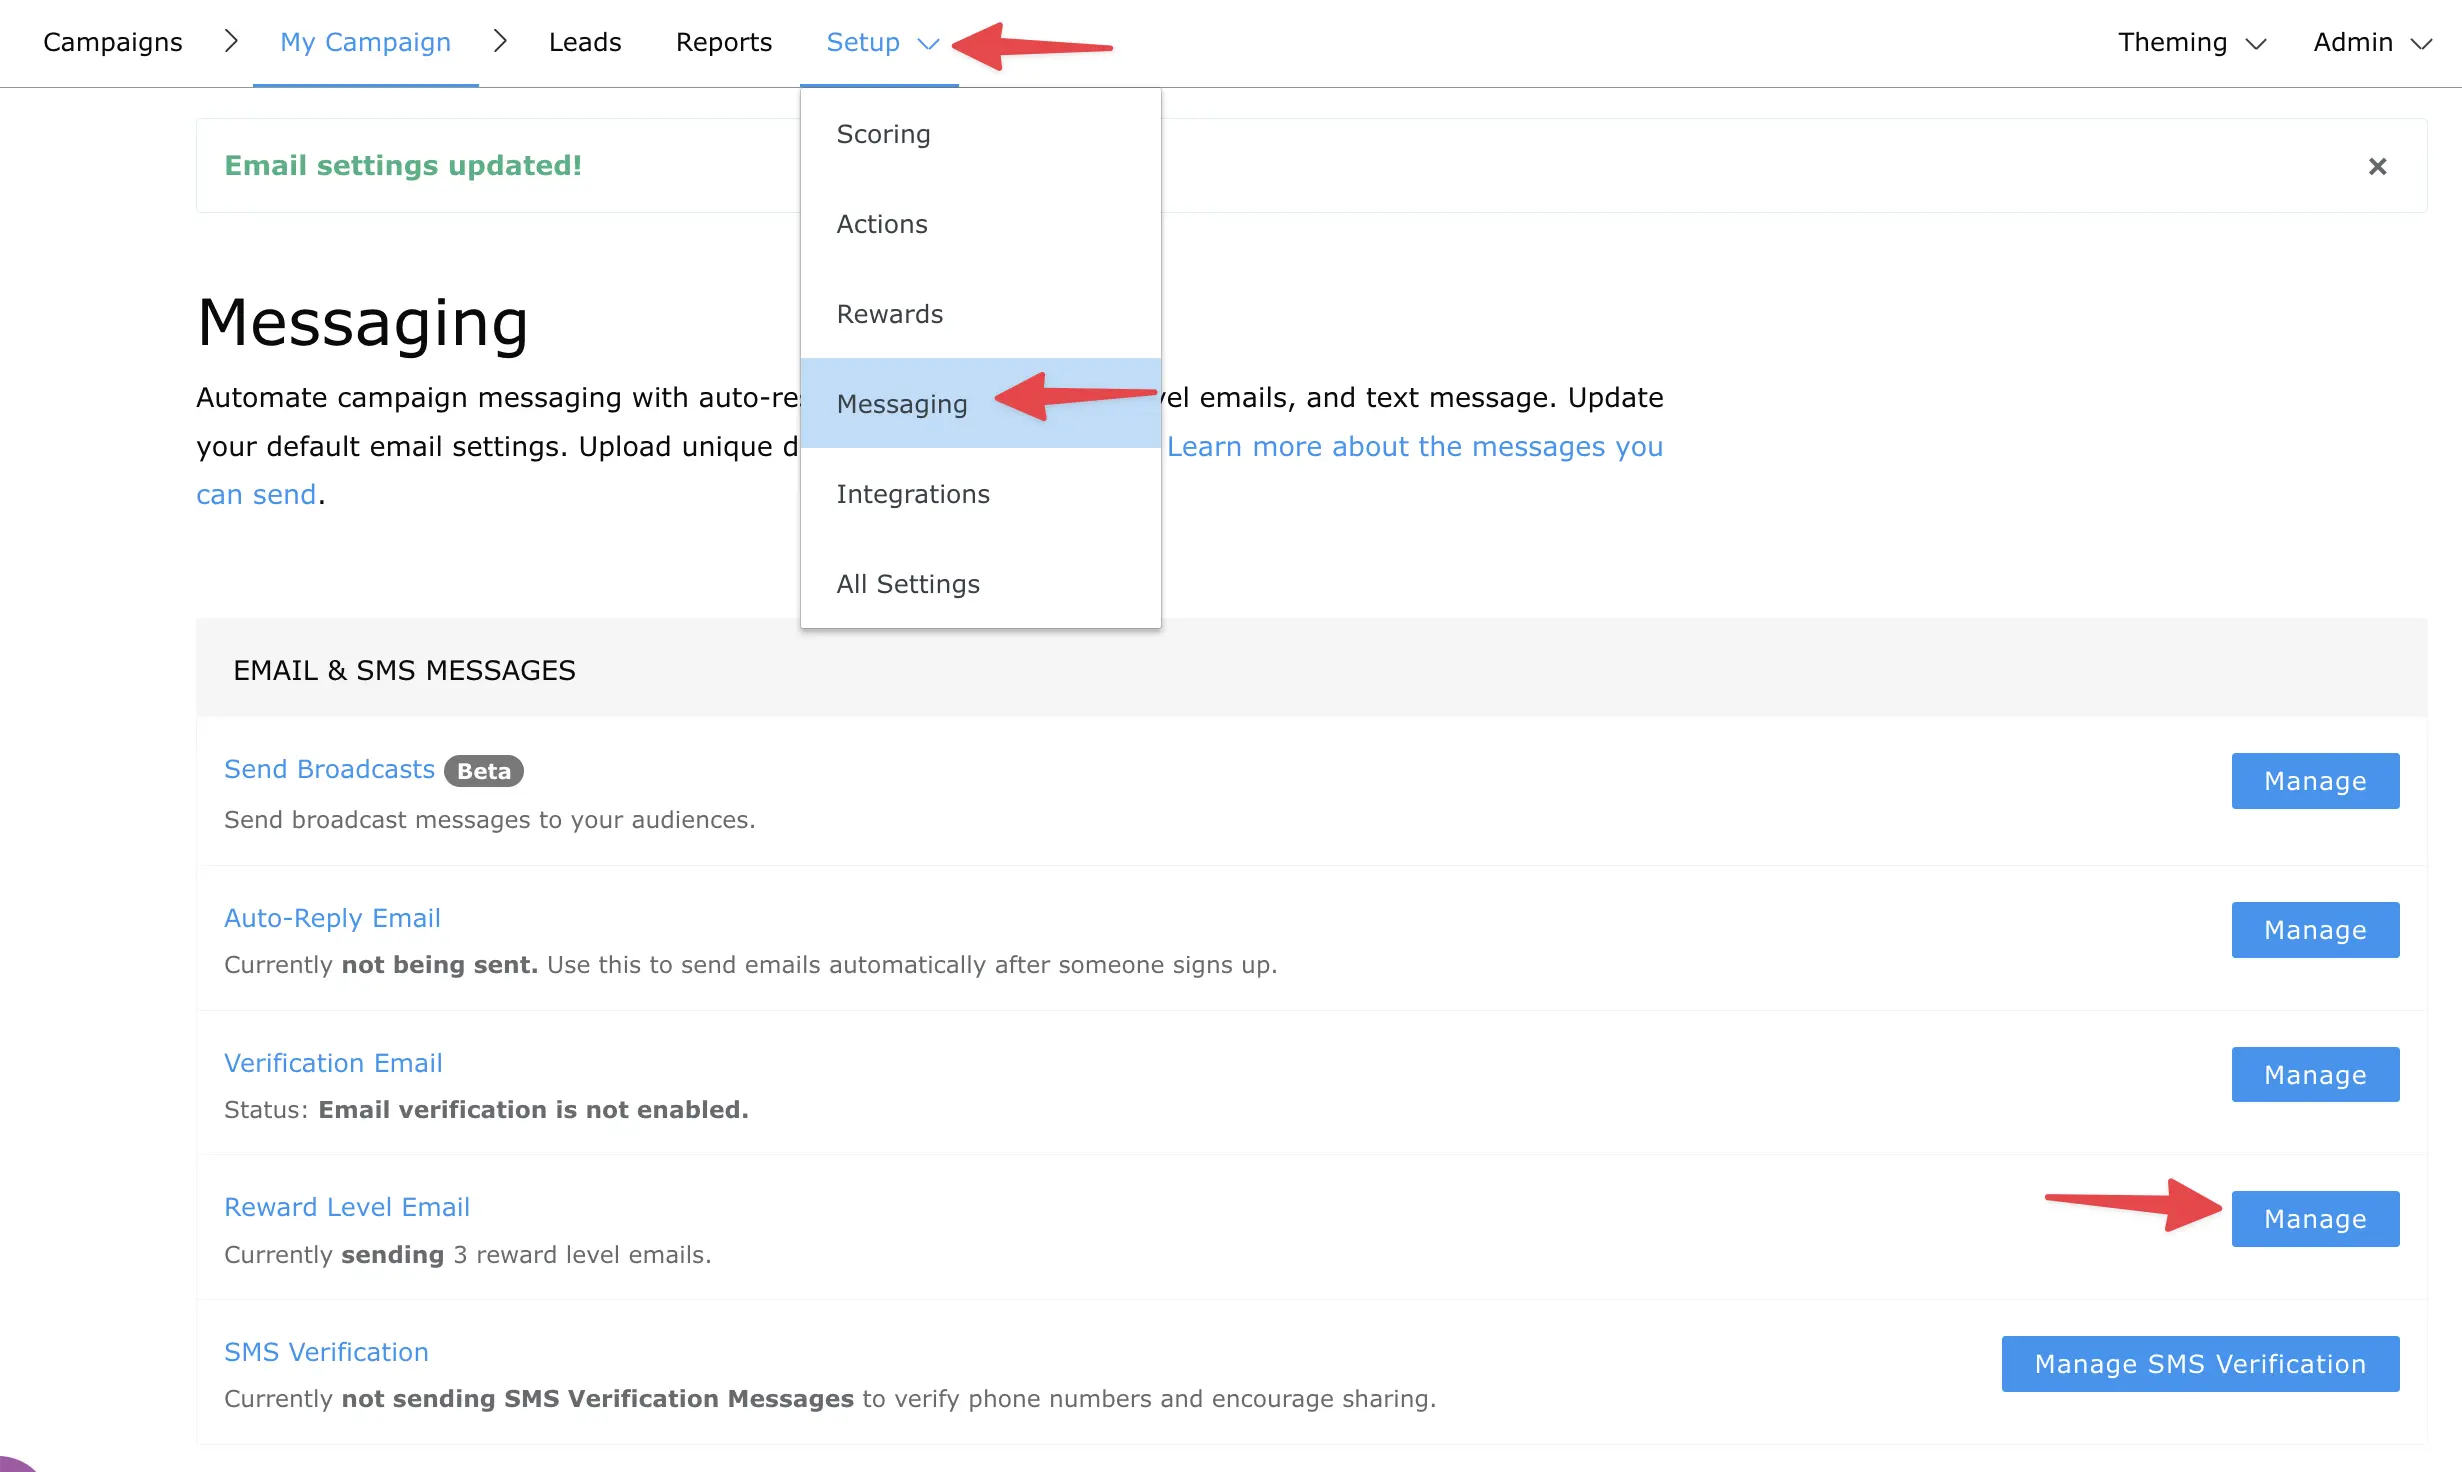
1. From your Campaign Dashboard, select ”Auto Reply Email” from the Messaging settings.

2. If you’ve not yet set up your Email Settings for the campaign, you can do so by instead selecting the “Manage Messaging” button. This is where you can update your “From” name, your “From Email Address”, postal address (required under the CAN-SPAM Act), unsubscribe message, as well as set a custom unsubscribe page.
However you customize the email, we highly recommend you use the Email tokens we provide to autogenerate the social referral and sharing links – do not type out your own links, as we will not be able to track referrals properly.
3. When you’re done editing the Auto Reply email, scroll down and click ‘Save Auto Reply Settings’.
All set configuring the initial email auto-response!
Click here to find our full guide on editing your Auto Reply Email.
B. Rewards & incentives emails
Our campaign has specific sharing goals and rewards for leads, so we will not enable KickoffLabs Influencer Email… rather we will setup a series of Incentive Emails to guide progress and deliver specific rewards after reaching referral totals you define.
1. From your Campaign Dashboard select “Messaging” from the Settings menu. Then manage the rewards.
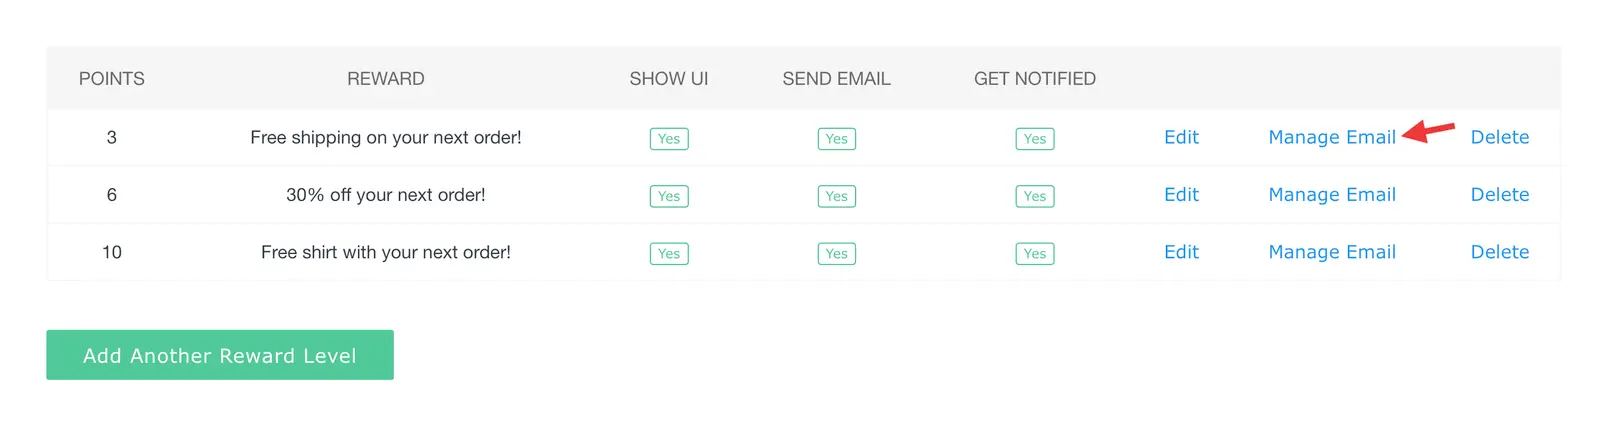
2. Next, select “Manage Email” next to the reward you would like to work on.
3. Customize your reward level mail! Make sure to check the checkbox to enable the mail

It’s really up to you how you use KickoffLabs Reward Level mails. Feel free to get creative. We’d love to see what you come up with!
4. When you’re done editing the incentive email, make sure to scroll down and click ‘Save Email’.
The cool thing about KickoffLabs Viral Incentive Emails is that you can create as many reward levels as you need. Repeat this process for each reward level. When you are finished setting up each email, your currently configured reward emails may look like this…
Find our full guide to setting up Reward Level (Incentive) Emails here!
Additional Steps
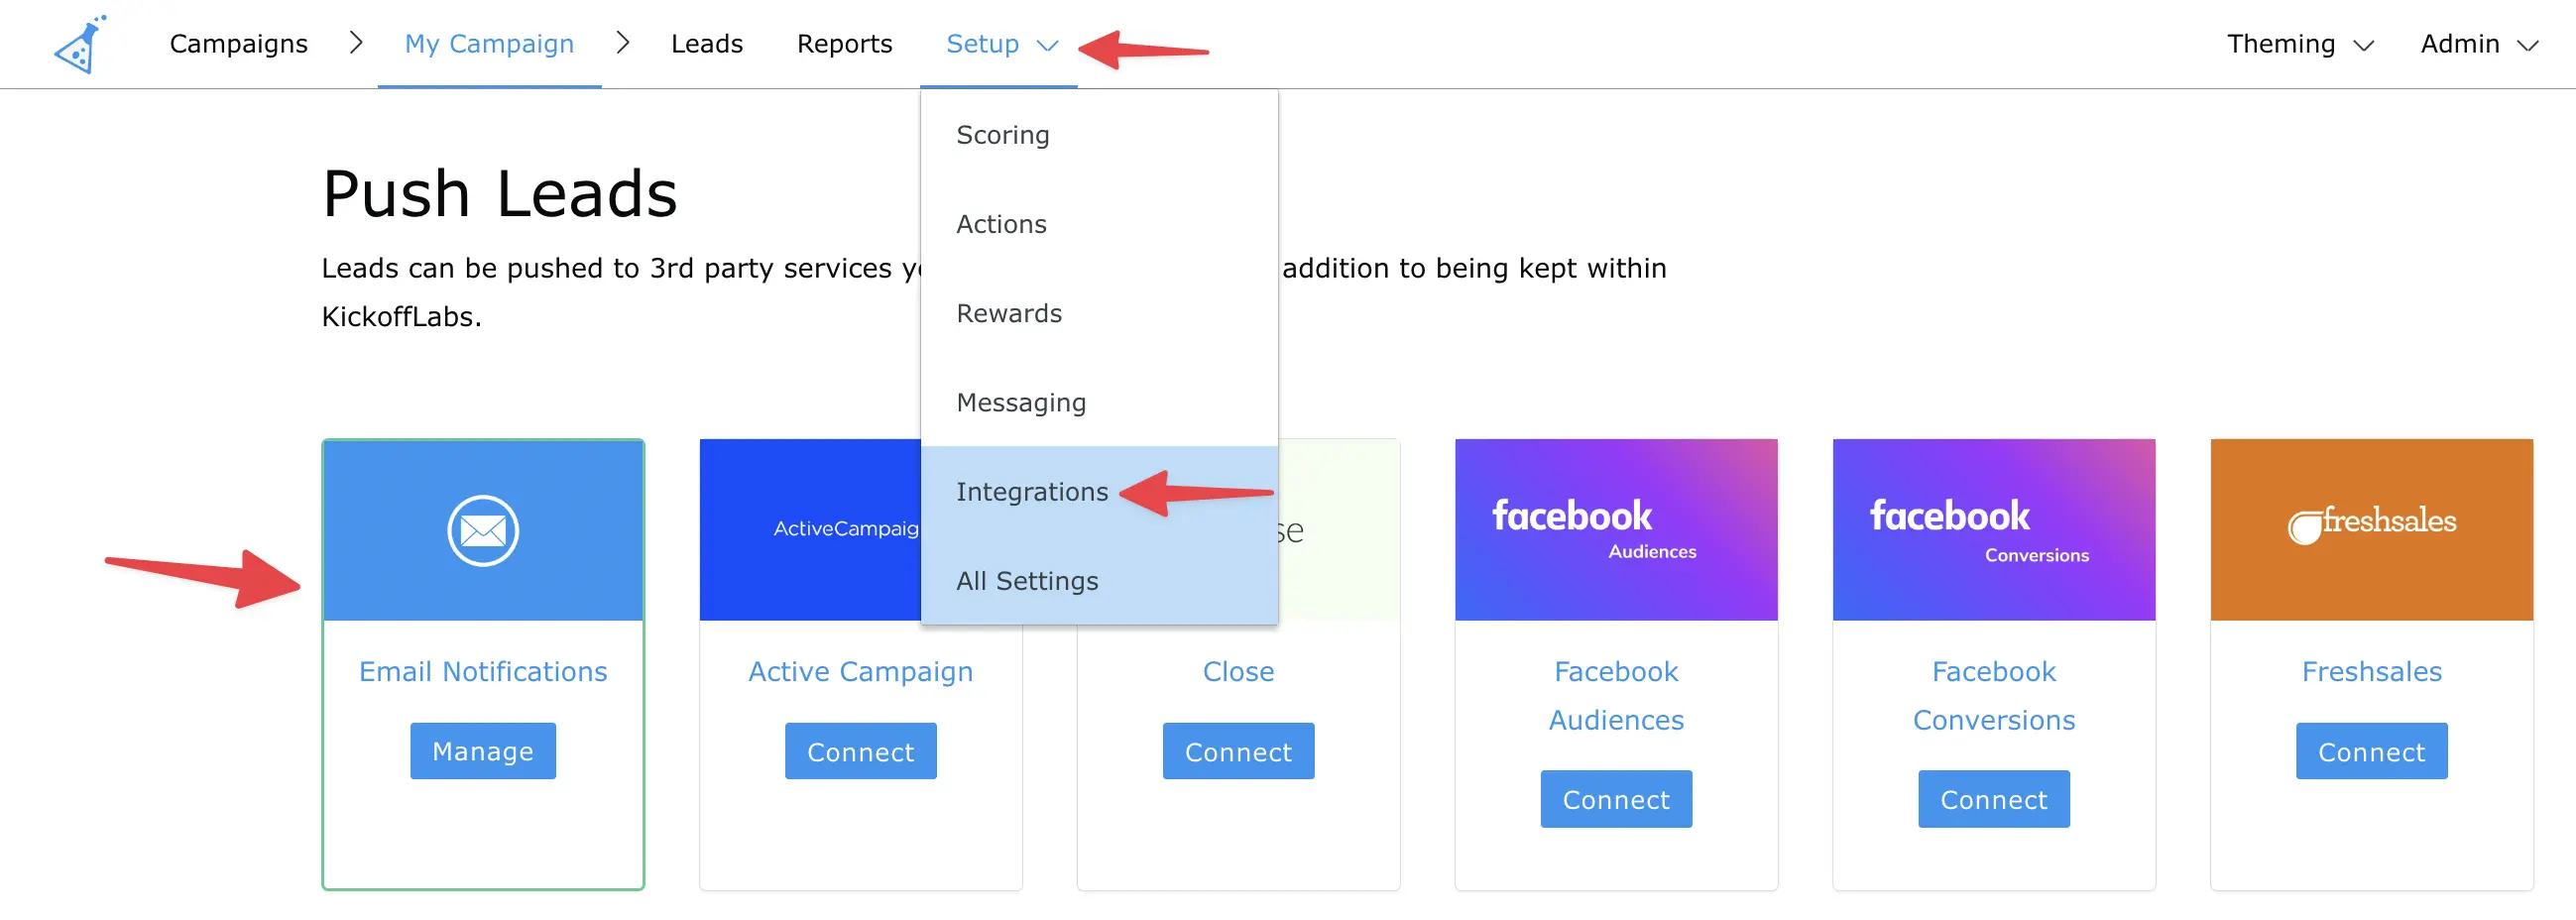
We can send real-time Email alerts anytime someone signs up to your campaign. You can enable/disable these messages from the “Integrations” drop-down.
Publish Your Campaign
When you are ready to start collecting signups, it’s time to publish your campaign to the live web. When you publish your page, you get a URL link that can be shared and advertised.
While you can always publish pages to our free kickoffpages.com sub-domain – this is generally meant as a testing domain for your landing pages. It’s best to use a custom domain so visitors don’t get confused if they see kickoffpages.com in your domain name. For the best results (and highest conversion rate), we recommend using your own custom domain with KickoffLabs.
For detailed instructions on using your own custom domain name please refer to our guide on Publishing to a Custom Domain and General Custom Domain Setup guide.
Tracking Sharing and Reports
KickoffLabs automatically tracks any referrals that your leads bring in.
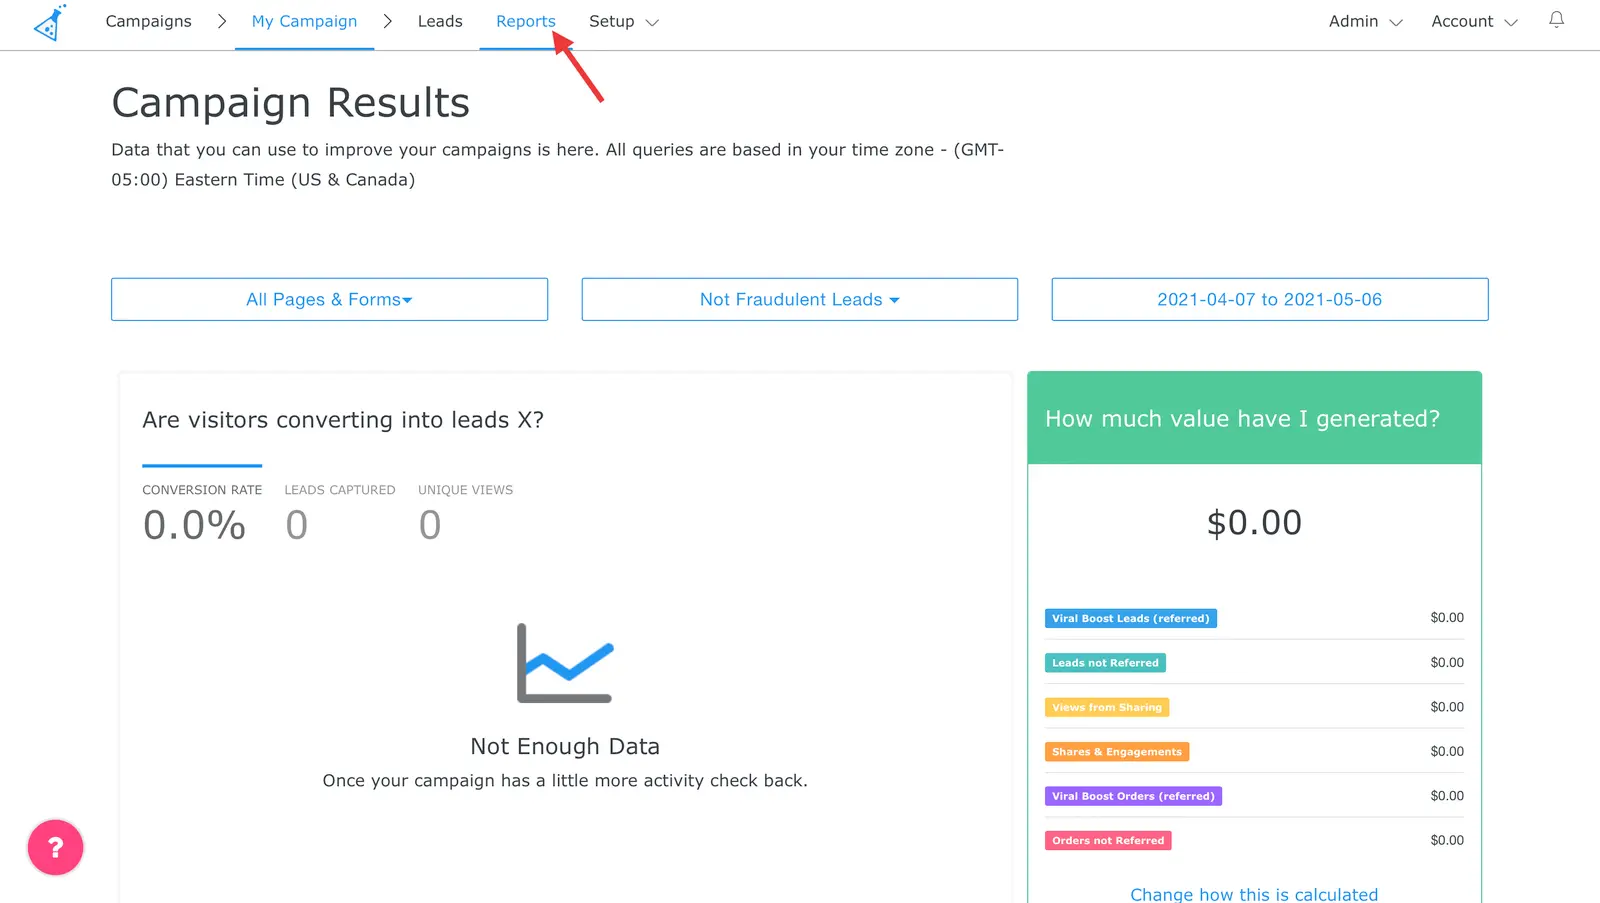
1. Once you start collecting leads, you’ll find all the data under the “Reports” tab on the top menu.
2. You can also use your Lead Report to access your list of leads to filter through most recent AND most influential leads. Use our Lead Filters to search and segment your lead list. From the top menu, select the “Leads” tab.**
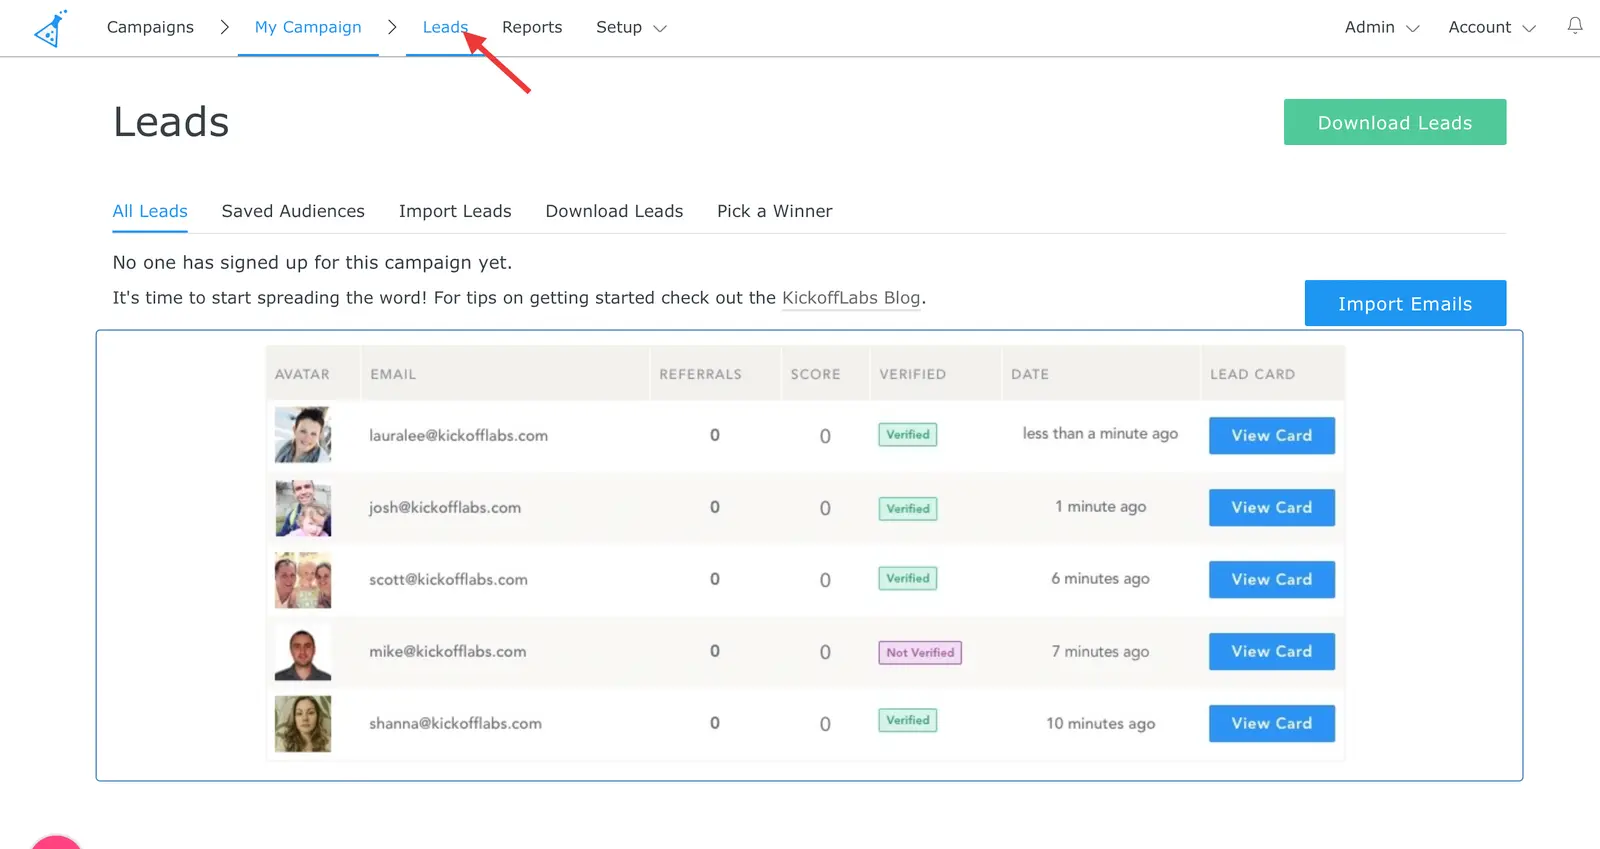
Find our full guide on managing your leads here!
3. For more in-depth tracking, click ‘Download Leads’ to download a detailed spreadsheet of your leads.

Ready to Launch Your Own Harry’s-Style Campaign?
Now that you understand how to build a referral rewards campaign like Harry’s, it’s time to choose the right setup for your goals:
- Referral Reward Program - Create a simple refer-a-friend program with instant rewards
- Milestone Rewards - Build a tiered system like Harry’s that unlocks bigger rewards at each level
- Newsletter Referral - Grow your email list with referral incentives
Essential features to power your Harry’s-style campaign:
- Referral Tracking - Automatically track every referral with unique links for each customer
- Rewards Management - Deliver milestone rewards instantly as customers hit their referral goals
- Fraud Detection - Keep your program honest and prevent gaming of the system
Want more guidance? Check out our step-by-step guide to refer-a-friend campaigns or explore more referral program examples. If you require any assistance, feel free to drop us a line at support@kickofflabs.com. If you’ve gotten this far and still don’t have a KickoffLabs account, sign up now for free!
Read more Referral Programs with the next chapter:
8. Stopping Fraud
Learn how to prevent fraud and scams from dragging down your online referral contest with these strategies.