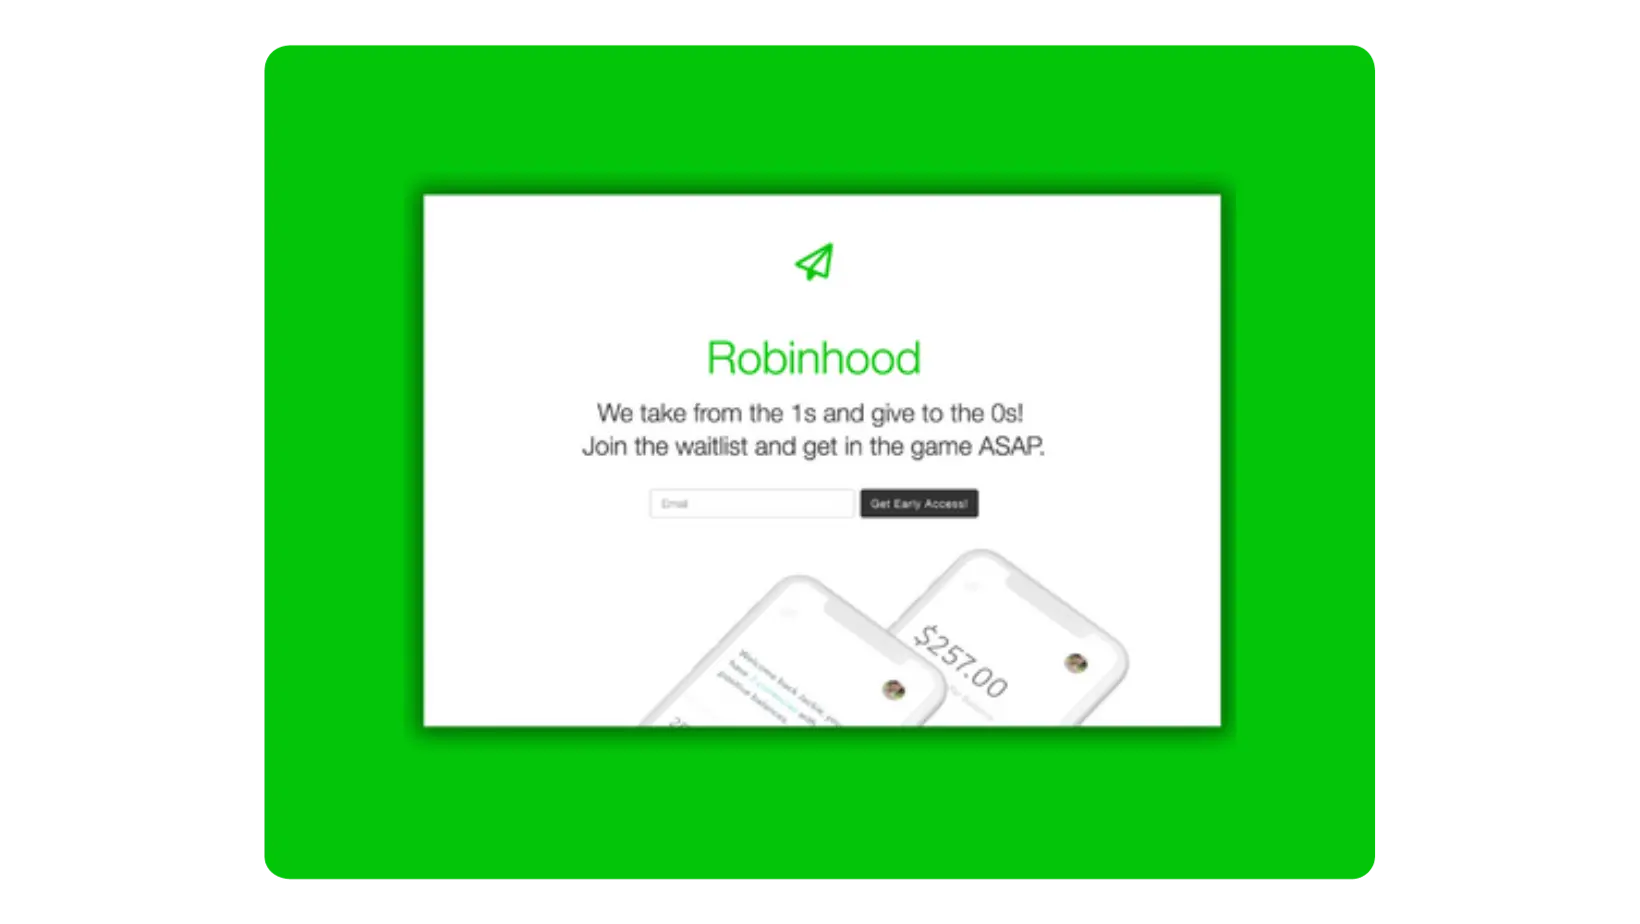
You’ve read about viral launches and have wondered what it would take to replicate that success for your business. We’ve also talked in the past on how to supercharge your conversion rate using social referrals. But let’s be honest… without a team of developers, a full blown waiting list campaign is not easy to build. Especially if you’re just starting out.
Did you know that now you can build a viral waitlist landing page with KickoffLabs. Quick and effective! Let’s take a look at setting up a waiting list campaign like Robinhood.io
Log in to your account now to follow along, or if you haven’t yet sign up now for free.
The Signup Landing Page
Most people may have seen the Robinhood.io page using a video background. After several iterations this was their final waiting list version. Keep in mind, just because they used a background video signup page doesn’t mean you have to. In fact, most mobile devices do not support video backgrounds..which is how roughly 80% of viewers view a landing page.
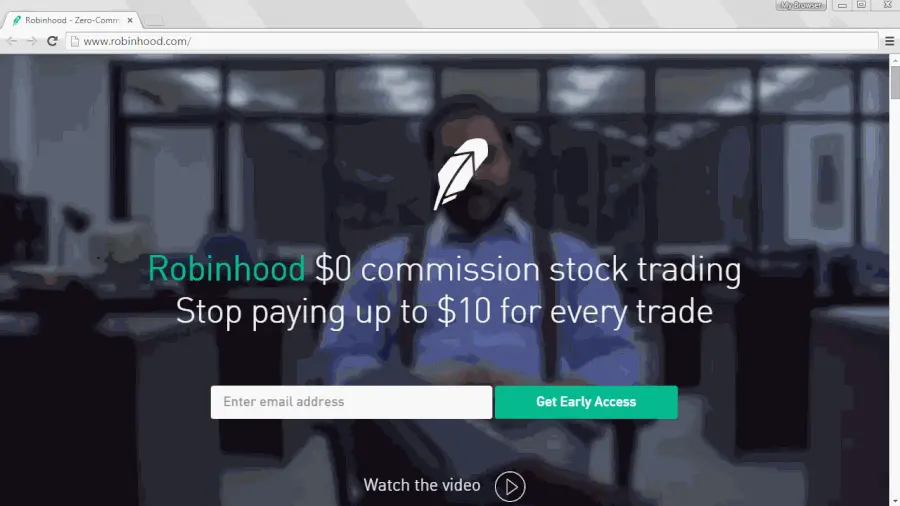
The 1st version of their signup page was a cleaner white background and image below the form.
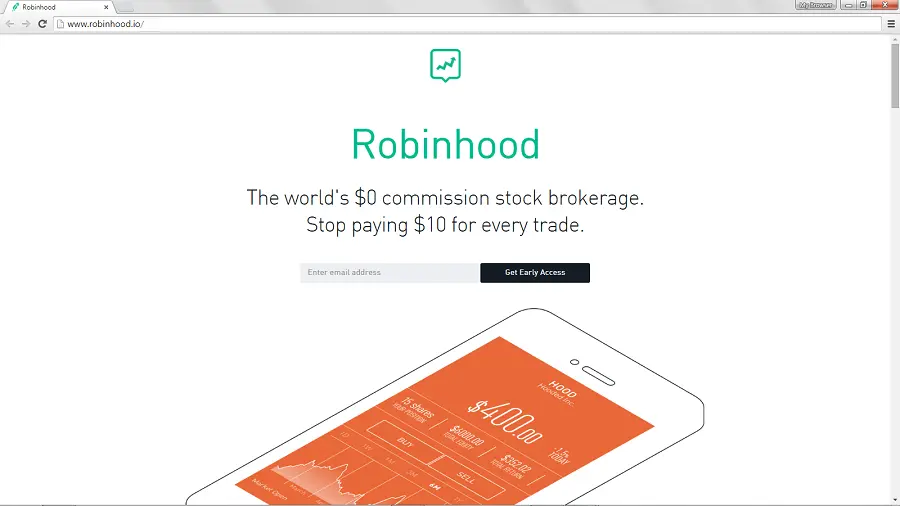
This 2nd version of their page used a great static background image and centered form (also easy to do using KickoffLabs themes).
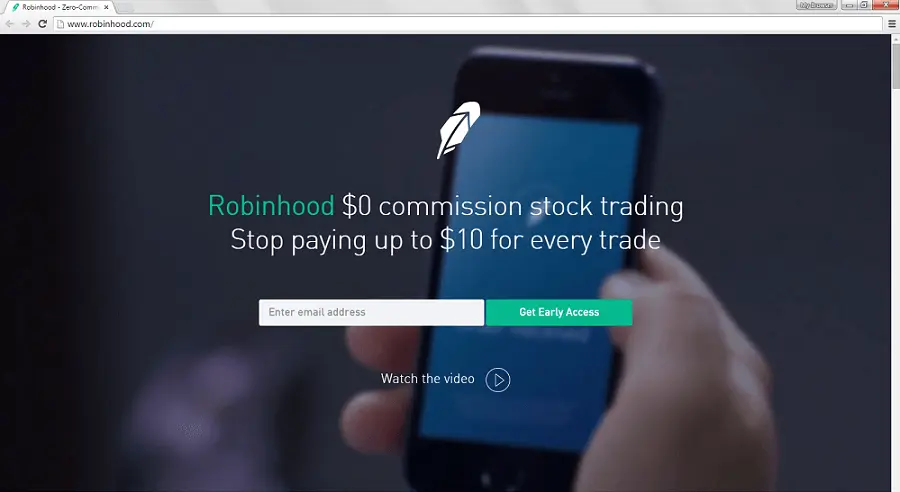
However you design the signup page, in the images above did you notice what remains just about the same? The copy. That’s a point we’d like to get across – rather than spending your time making smalltweaks that have small impacts on conversions, focus on the copy. If you’ll be doing any kind of A/B split testing, test your headlines and copy first.
Strategy
The strengths of the Robinhood.io signup landing page:
- a strong benefit-focused headline – it stays just about the same through all iterations
- clean page with no distracting elements
- asking only for an email address (depends on your business)
- descriptive call-to-action button text
Setup with KickoffLabs
Building the signup landing page is really up to you. You can literally use ANY landing page as your signup page. Use a KickoffLabs landing page, embeddable opt-in forms for use on a custom site, a pop-up, or connect an existing external form with our Anyform.
Need design, copywriting, or marketing inspiration? We’ve got you covered in our Marketing Resource Center! Check it out now.
In this example we’ll be creating an entire campaign from scratch, using our single page set-up, but you can always create a separate status page under any existing campaign within KickoffLabs.
1. Click ‘Add New Campaign’ to create a new lead generation campaign. If you’ve just signed up, you’ll automatically be taken to the campaign creation page when you log in.

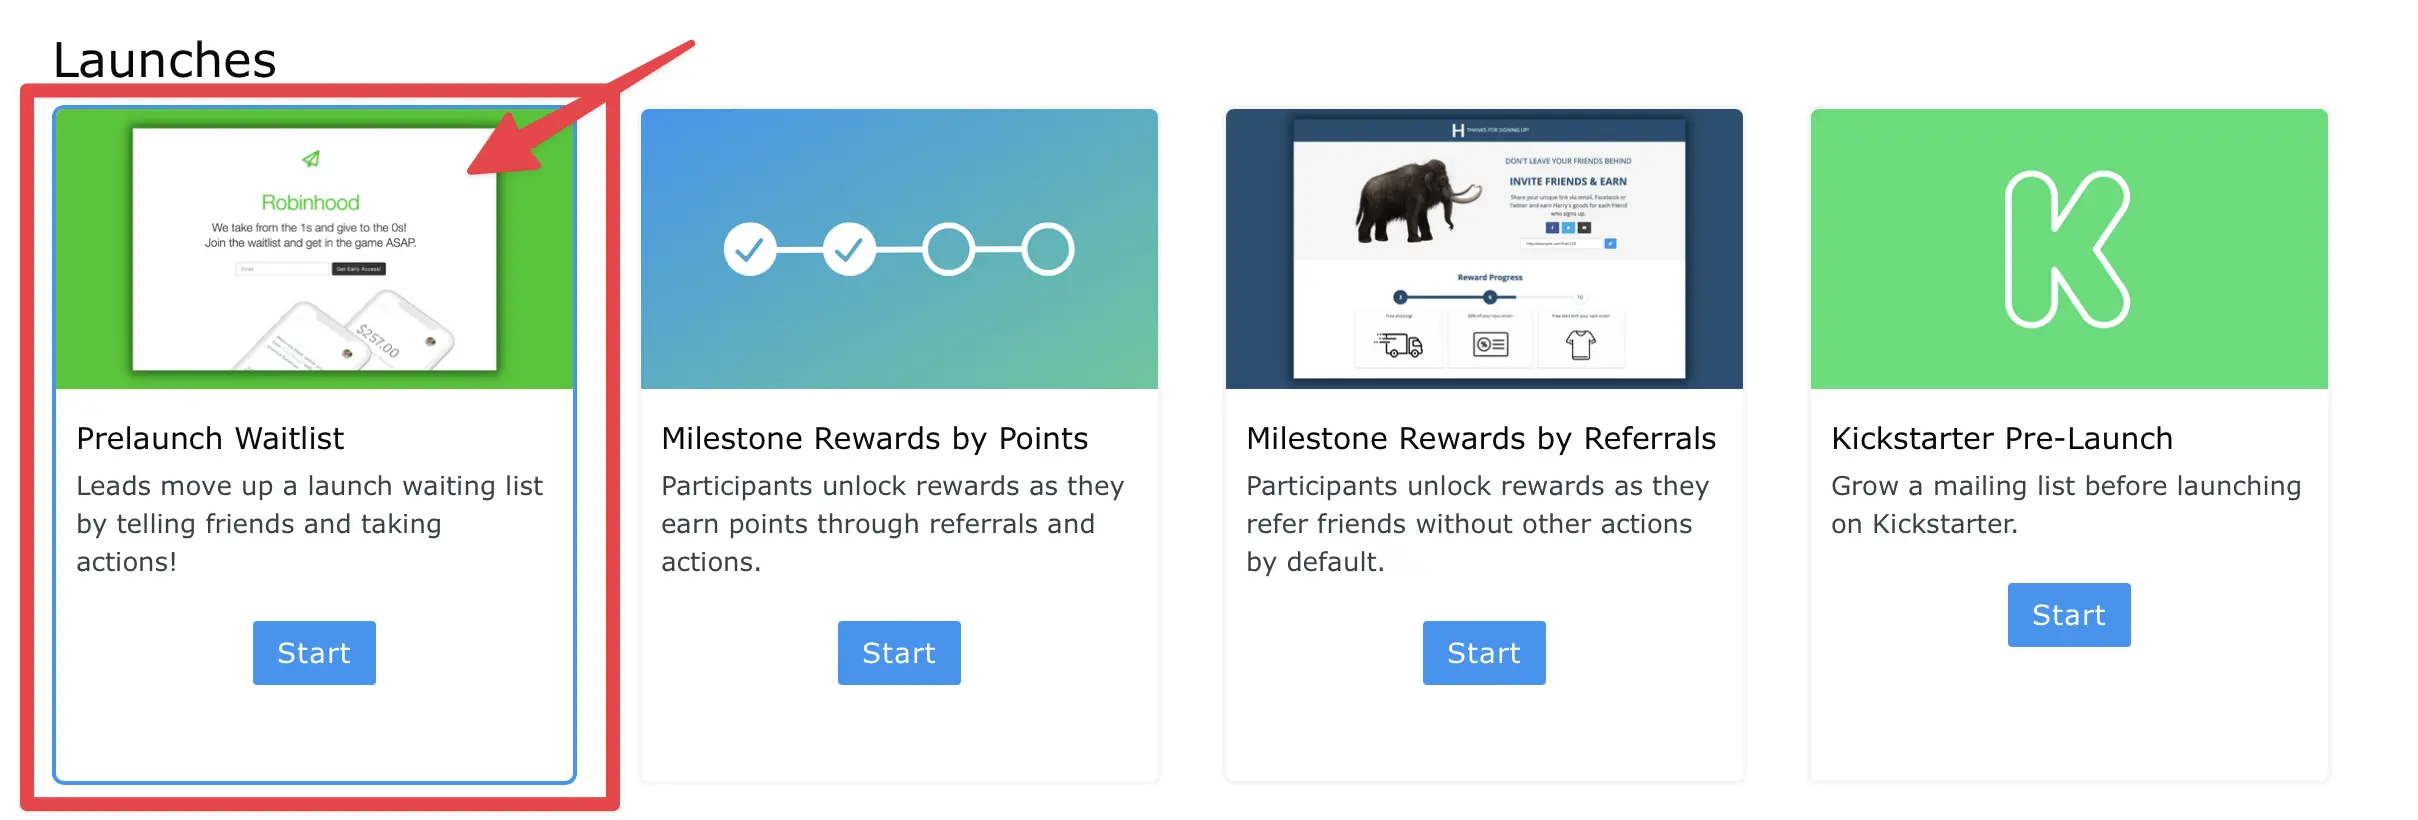
2. To mimic Robinhood’s set-up, scroll down to the “Launches” section and select the “Prelaunch Waitlist” campaign.
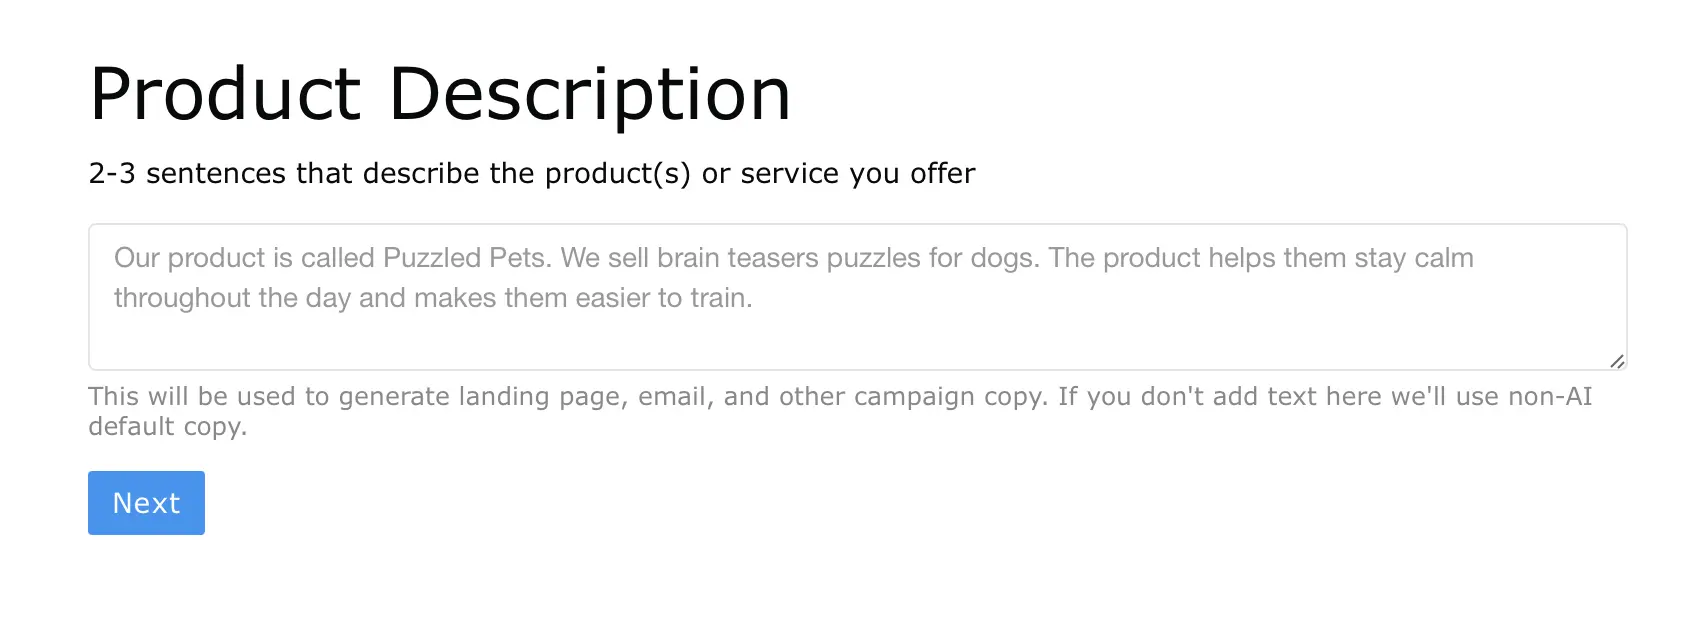
3. Next you’ll be prompted to use our new (optional) AI builder tool. Robinhood did not use AI, but it’s an extremely helpful tool that can assist with things like generating example page copy, emails, share text and even legal terms and conditions. If you’d like to use it, provide a 1-2 sentence description of your company/product. If you’d like to skip it, simply scroll past to the next step.
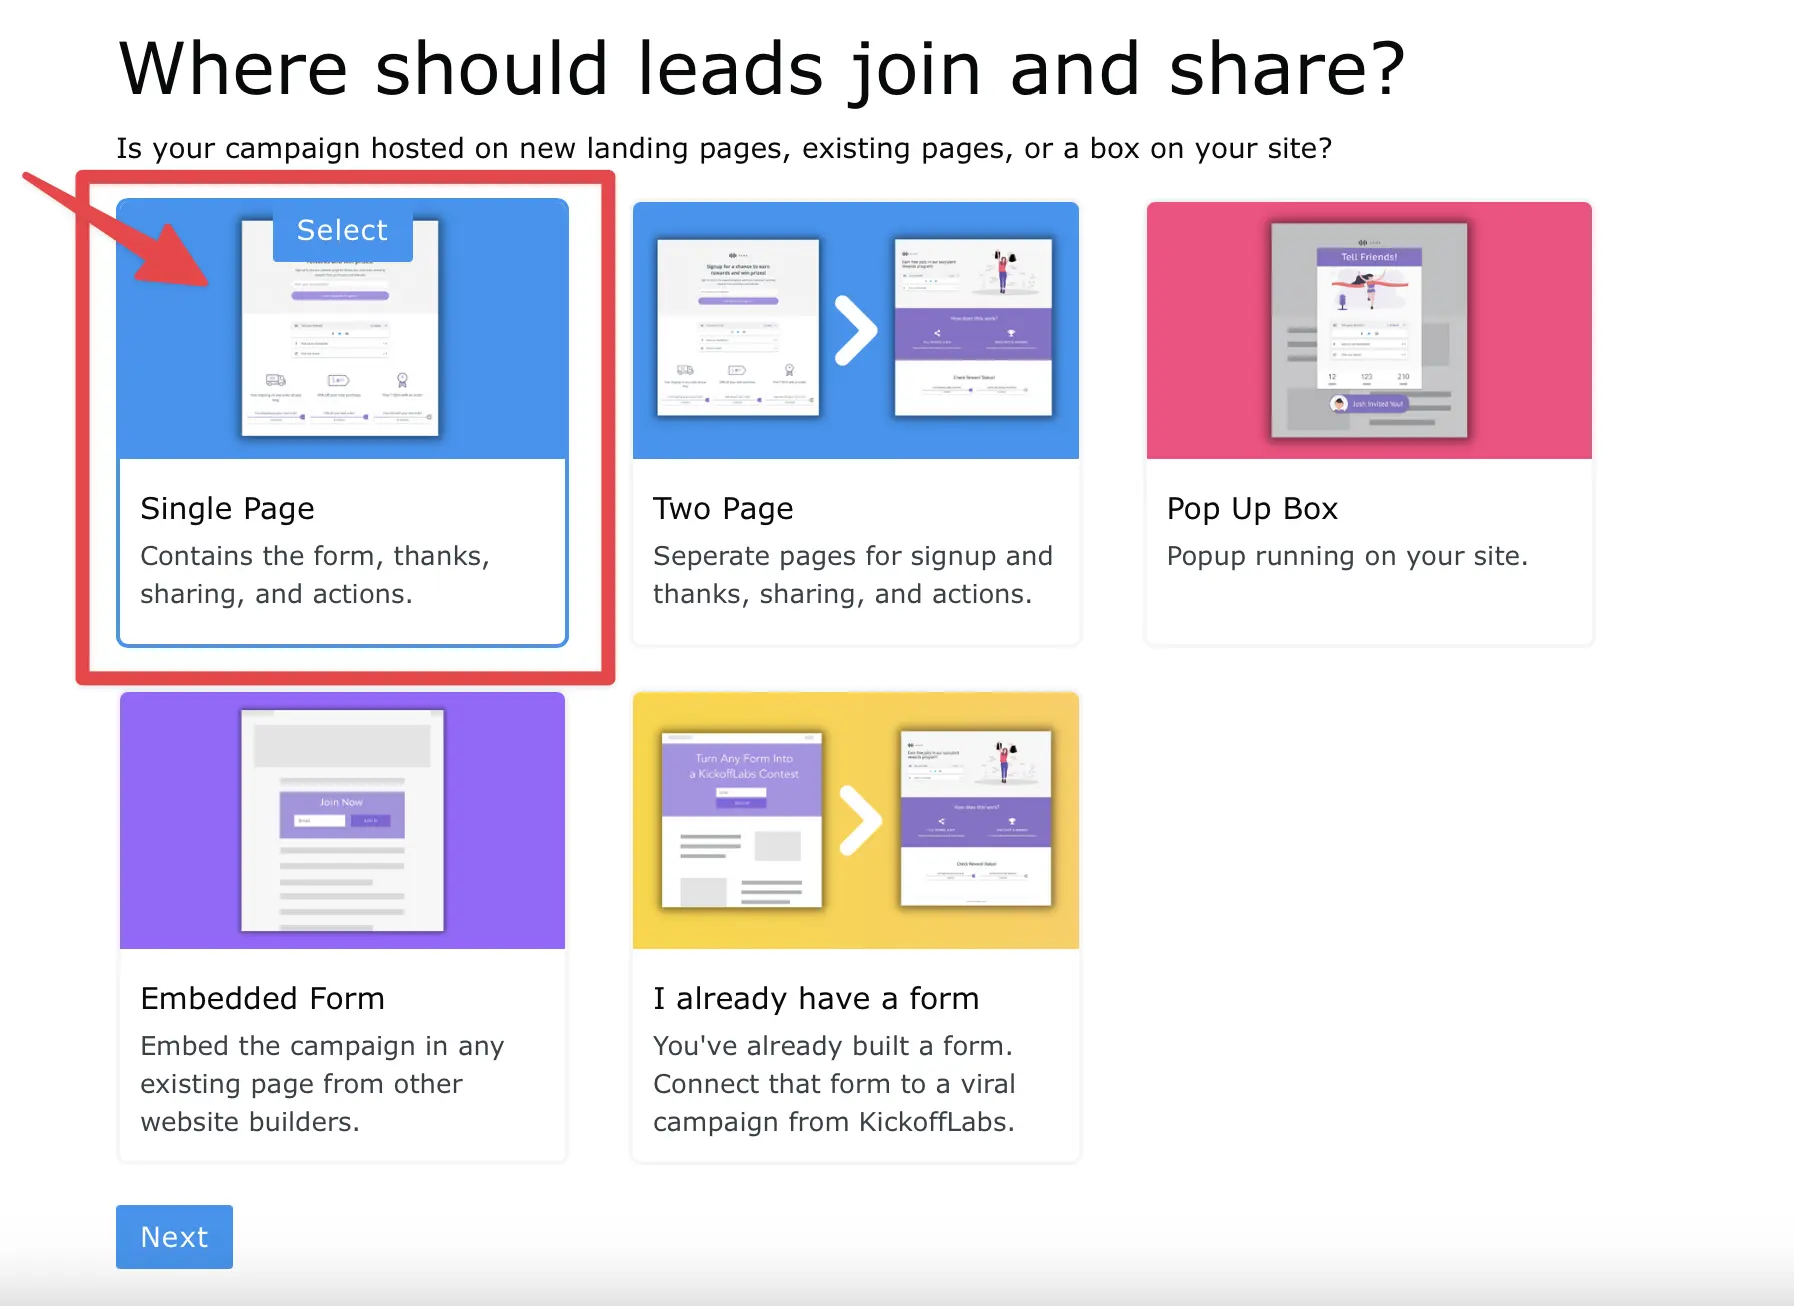
4. Now, we’ll choose how we want the lead to sign-up and share. For the purposes of this guide we’ll choose the KickoffLabs “Single Page” option, but you can choose the option that best suits your needs.
5. You’ll now be presented with a list of our most popular themes (depending on what you chose in step 4) Remember, there is no right or wrong signup page design for this type of campaign, so choose the one you like best!
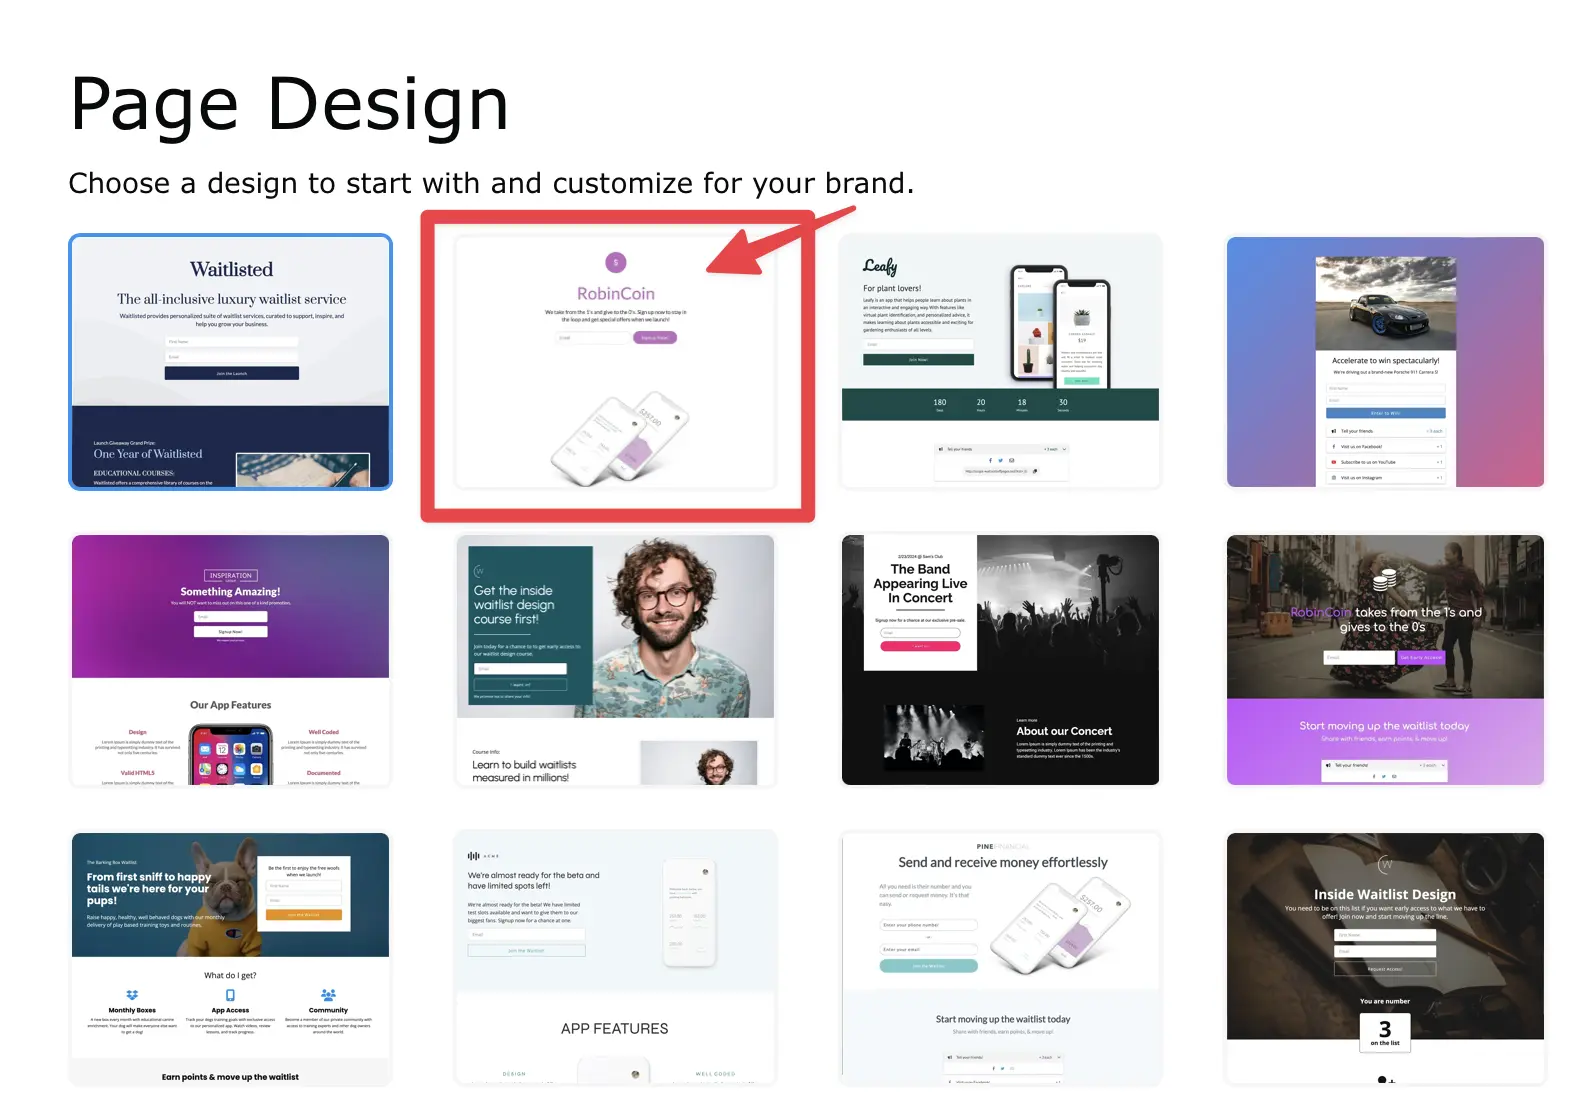
For this guide, we’ll be selecting the Robinhood inspired Waitlist theme which is our version of the Robinhood signup page! We also offer a second Robinhood option with a hero background image, called the Crypto Waitlist theme.
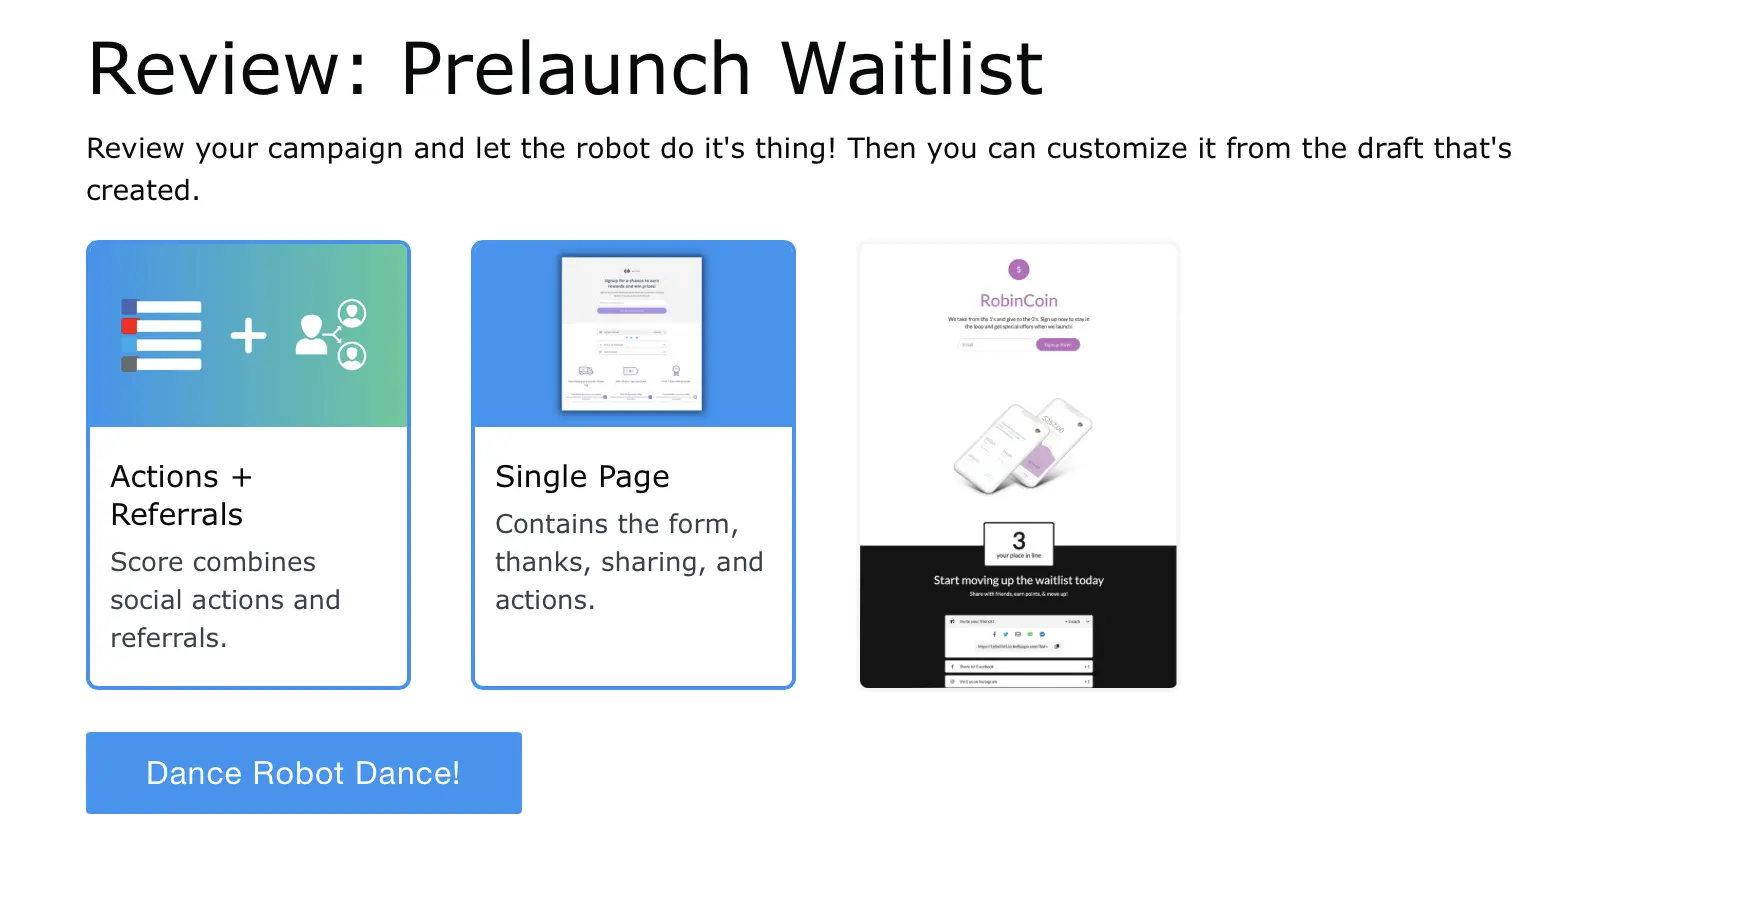
6. Next, you’ll be prompted to review your set-up. If everything looks correct, click the button to make the robots dance! If you need to make any changes, simply scroll up to see the previous options that you selected and make any changes before continuing on.
7. You’ll be taken out to your Campaign Dashboard where you can complete the campaign set-up and edit your page(s) If you selected a two page set-up in step 4, we’ll automatically add the matching status page to your campaign based on the landing page that you chose.
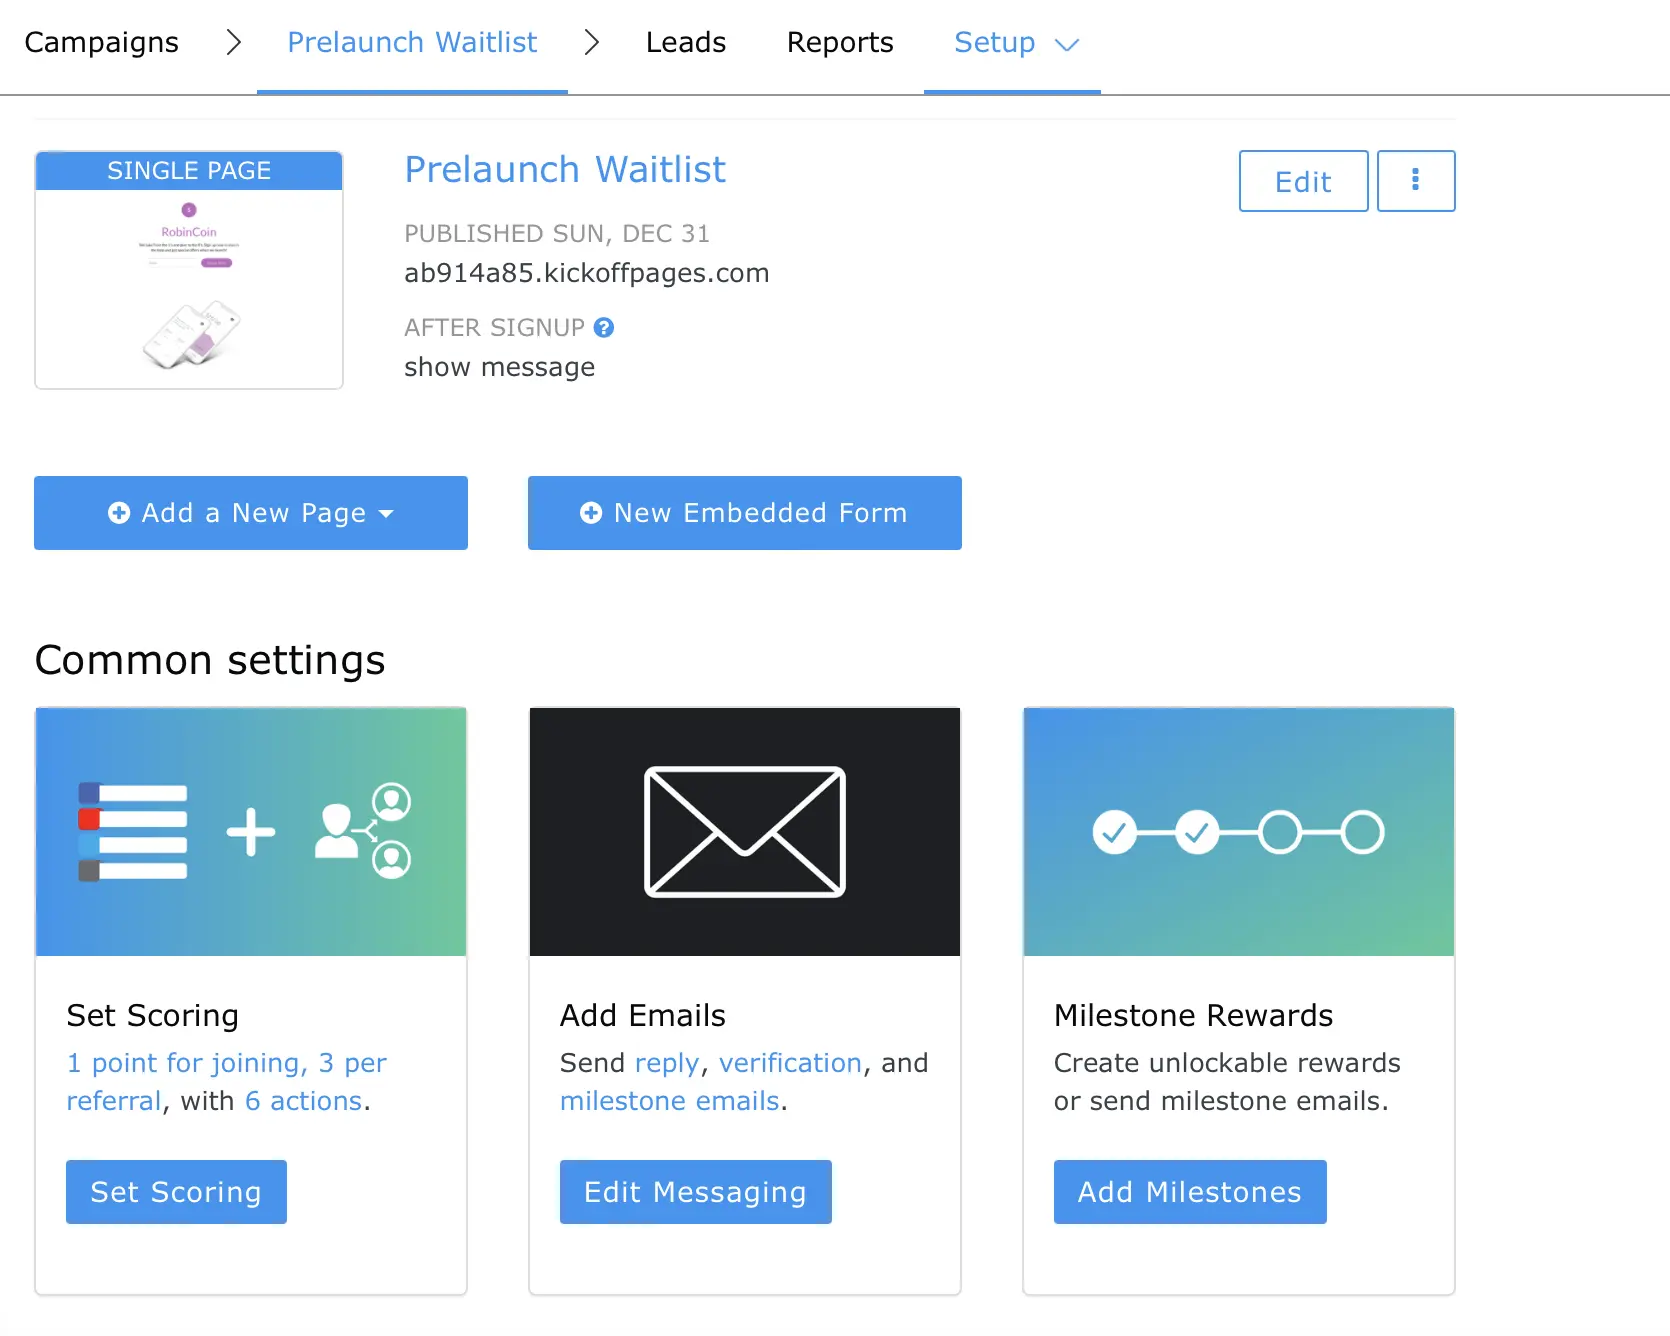
If you want to change the set-up from a one page set-up into two or vise versa, no need to start over again. Just follow these steps to change the campaign confirmation setup.
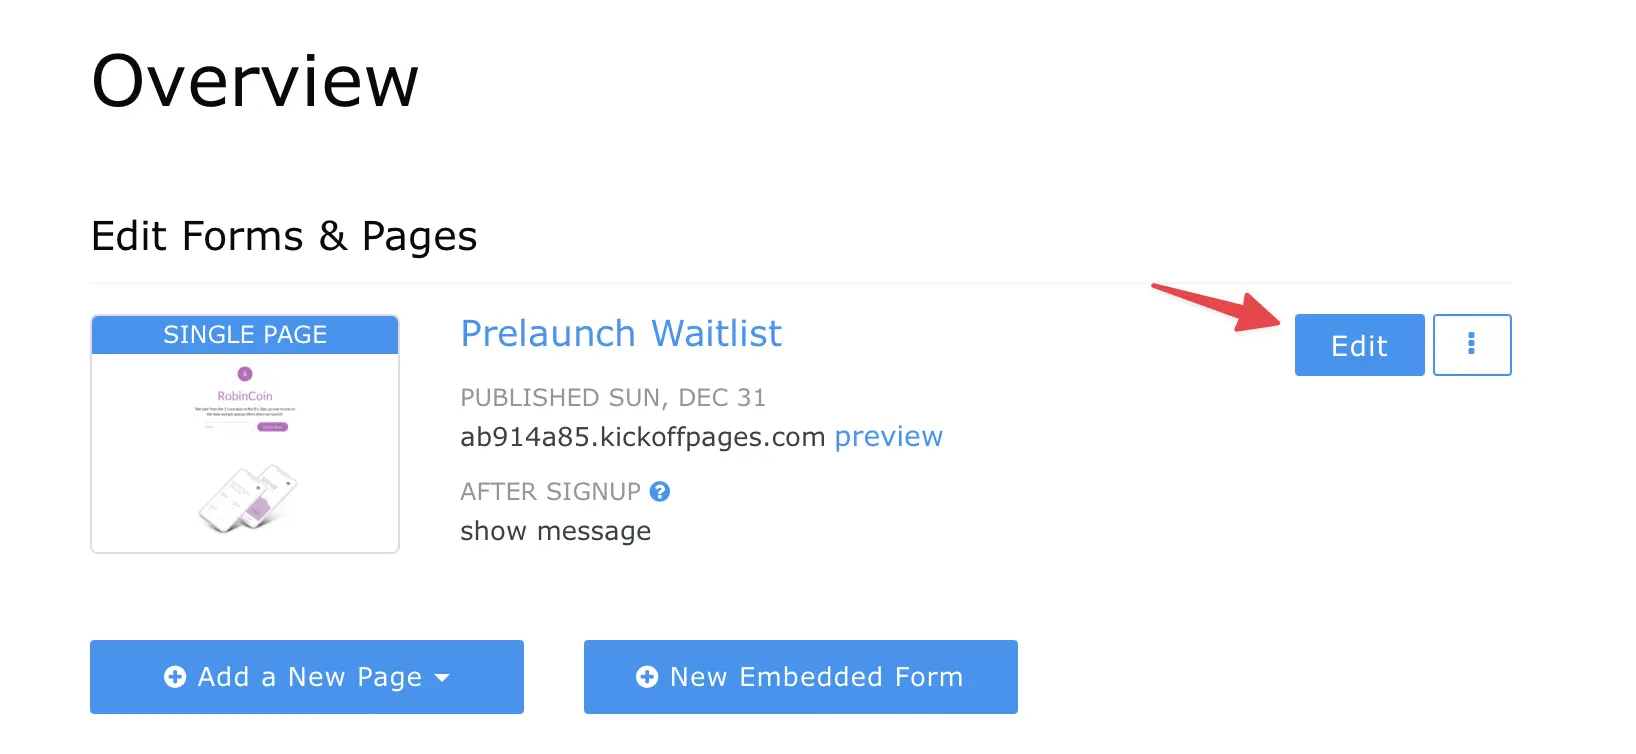
8. Now it’s time to edit your pages! On the Campaign Dashboard, click the “Edit Page” button to get started.
9. Inside of the designer, go ahead and customize the signup page to your liking. Add in custom text, fonts, colors, images and more. We’ve also included an indepth breakdown on editing your pages HERE!
10. You’ll notice that our new Robinhood template now includes the post-signup widgets that were previously located on our OG thanks page(now known as a status page). We recently improved the user experience by keeping everything on the same page. Learn more about the campaign modes that you can create here!
This is where the real magic starts to happen. The team at Robinhood reported that over 50% of signups came through social referrals. So besides a great thank you, the real call-to-action is to get people sharing.
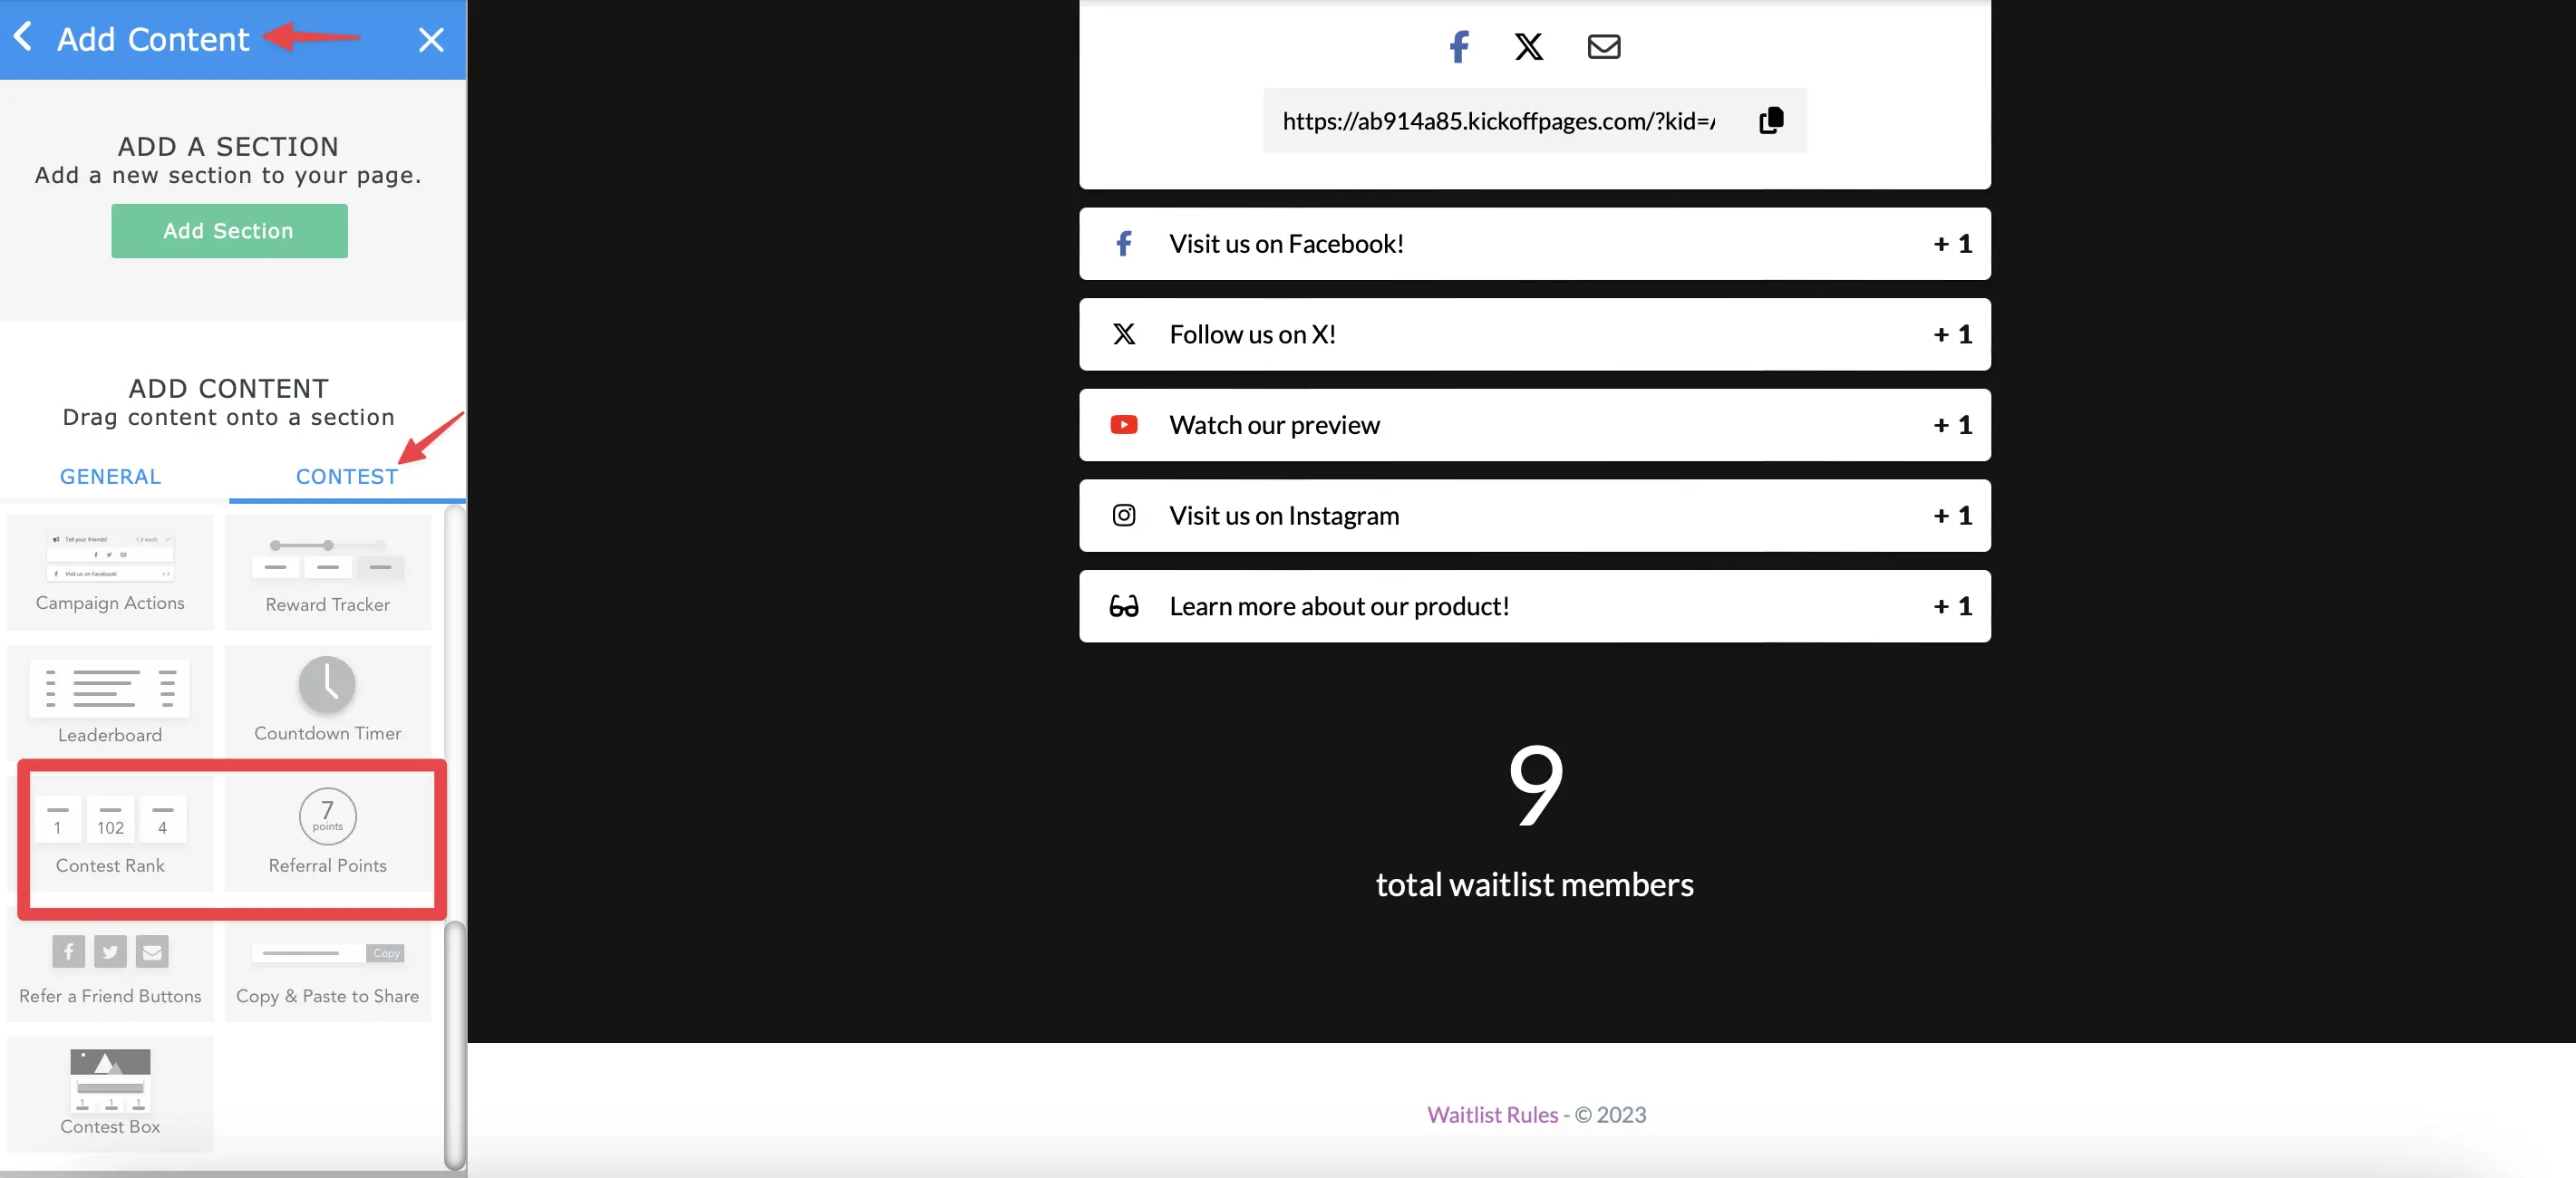
Our Robinhood theme automatically calculates and displays the correct information to your leads. However, inside of the designer and on the page preview you will see default test numbers so you can see what an example would look like. By default, we display the lead’s place in line, but we have additional options in the “add content” area of the designer above.
When your edits are complete, click ‘Save’, then click ‘Publish’ to push the changes live.
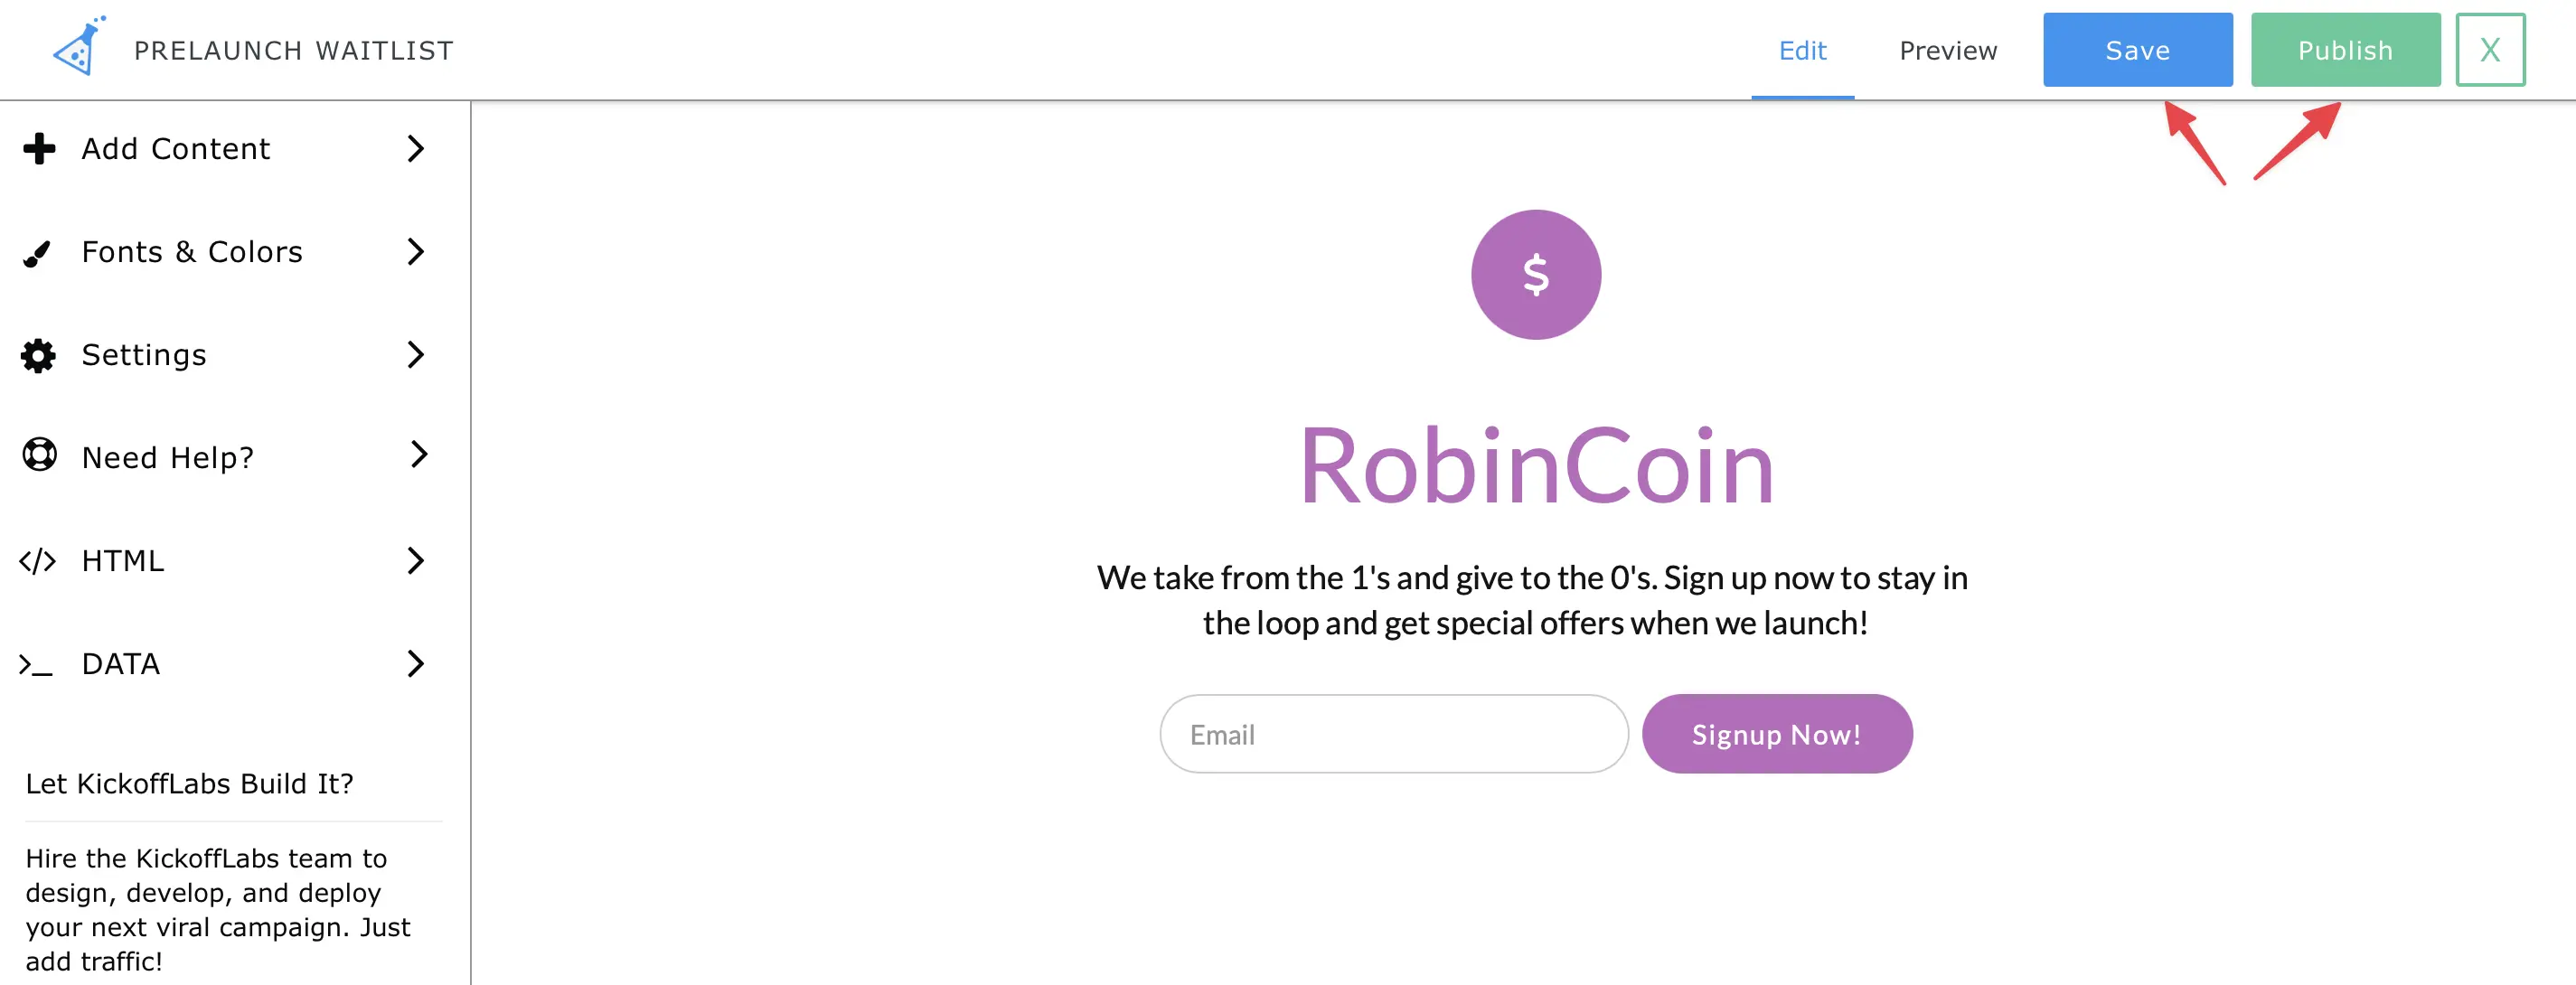
All set creating the single page sign-up experience!
Below we’ve included what Robinhood’s unique status page looked like. You can now easily recreate this with our single page set-up or redirect the lead to a separate status page. There’s no right or wrong answer when selecting a single page set-up vs our two page set-up. It’s really personal preference.
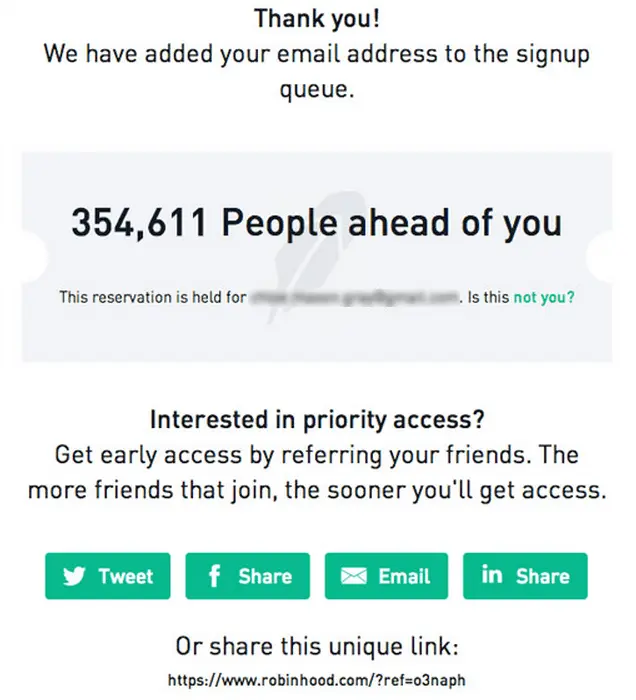
Strategy Here’s why this expertly crafted status page converts well:
- a simple thank you message
- displays a signups place in line
- clear call-to-action and incentive of sharing for priority access
- gives people a reason to revisit the page and see their progress
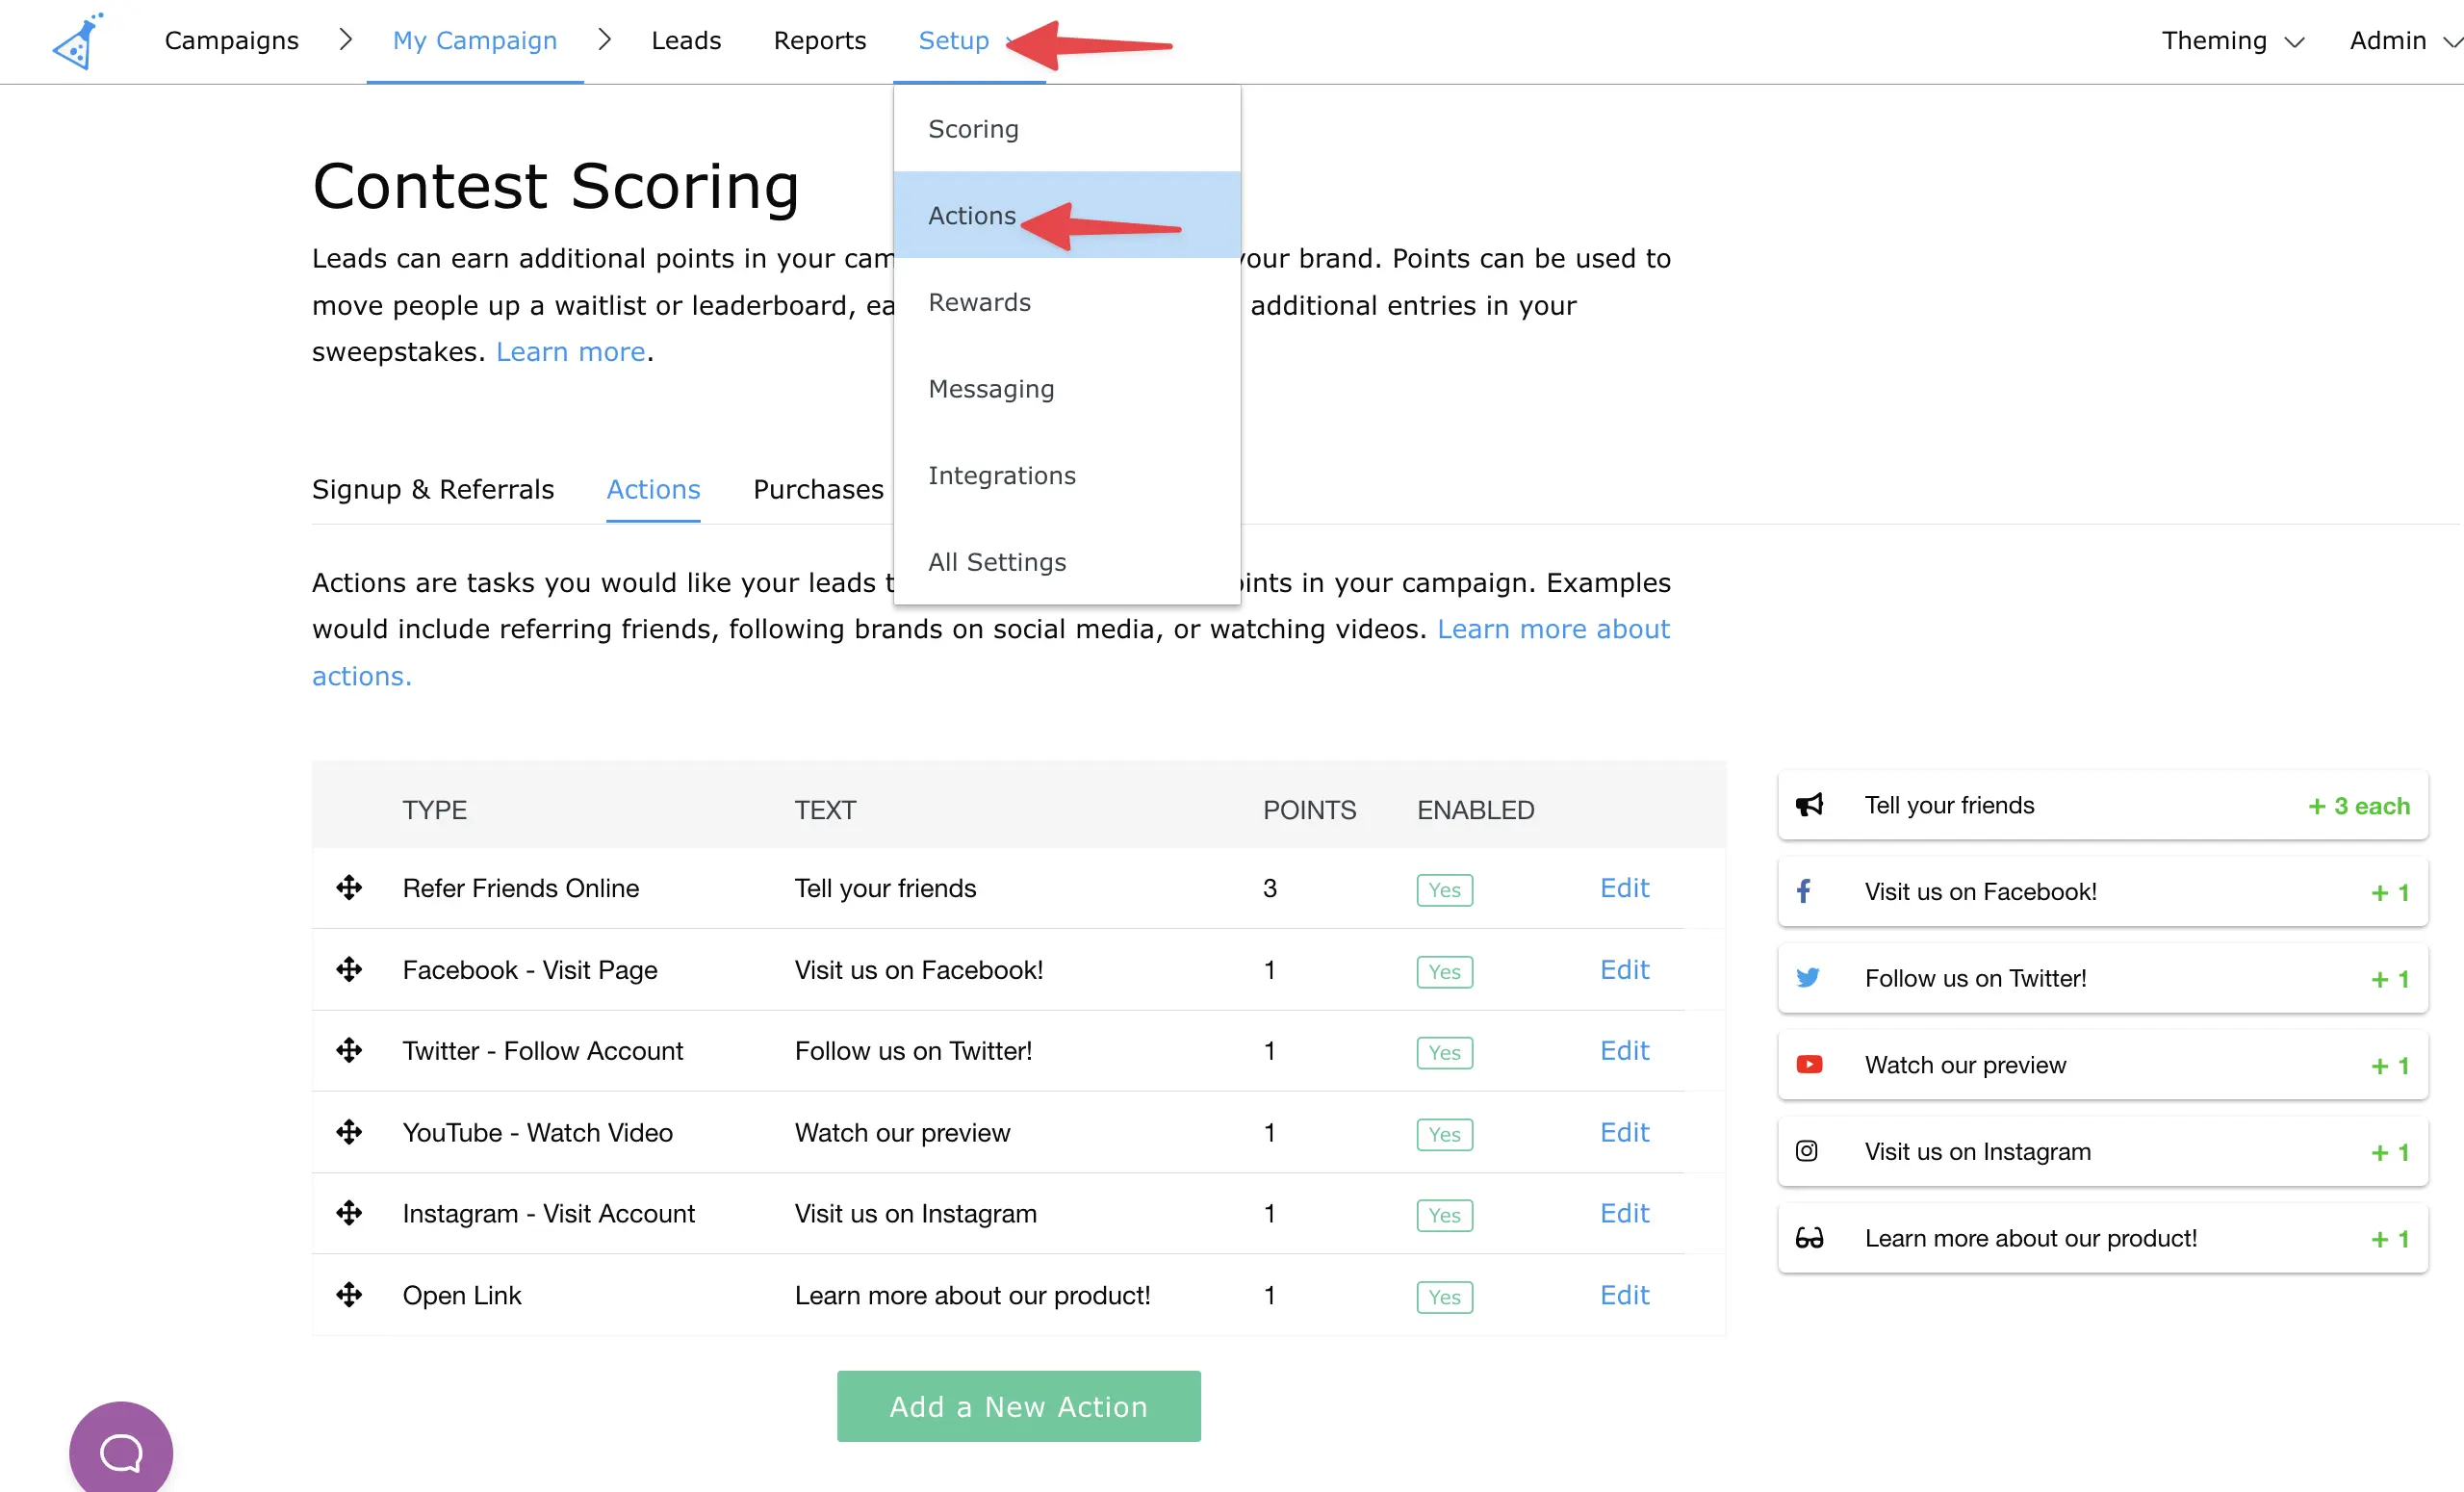
11. You can update the social share text/image from the settings in your campaign dashboard.
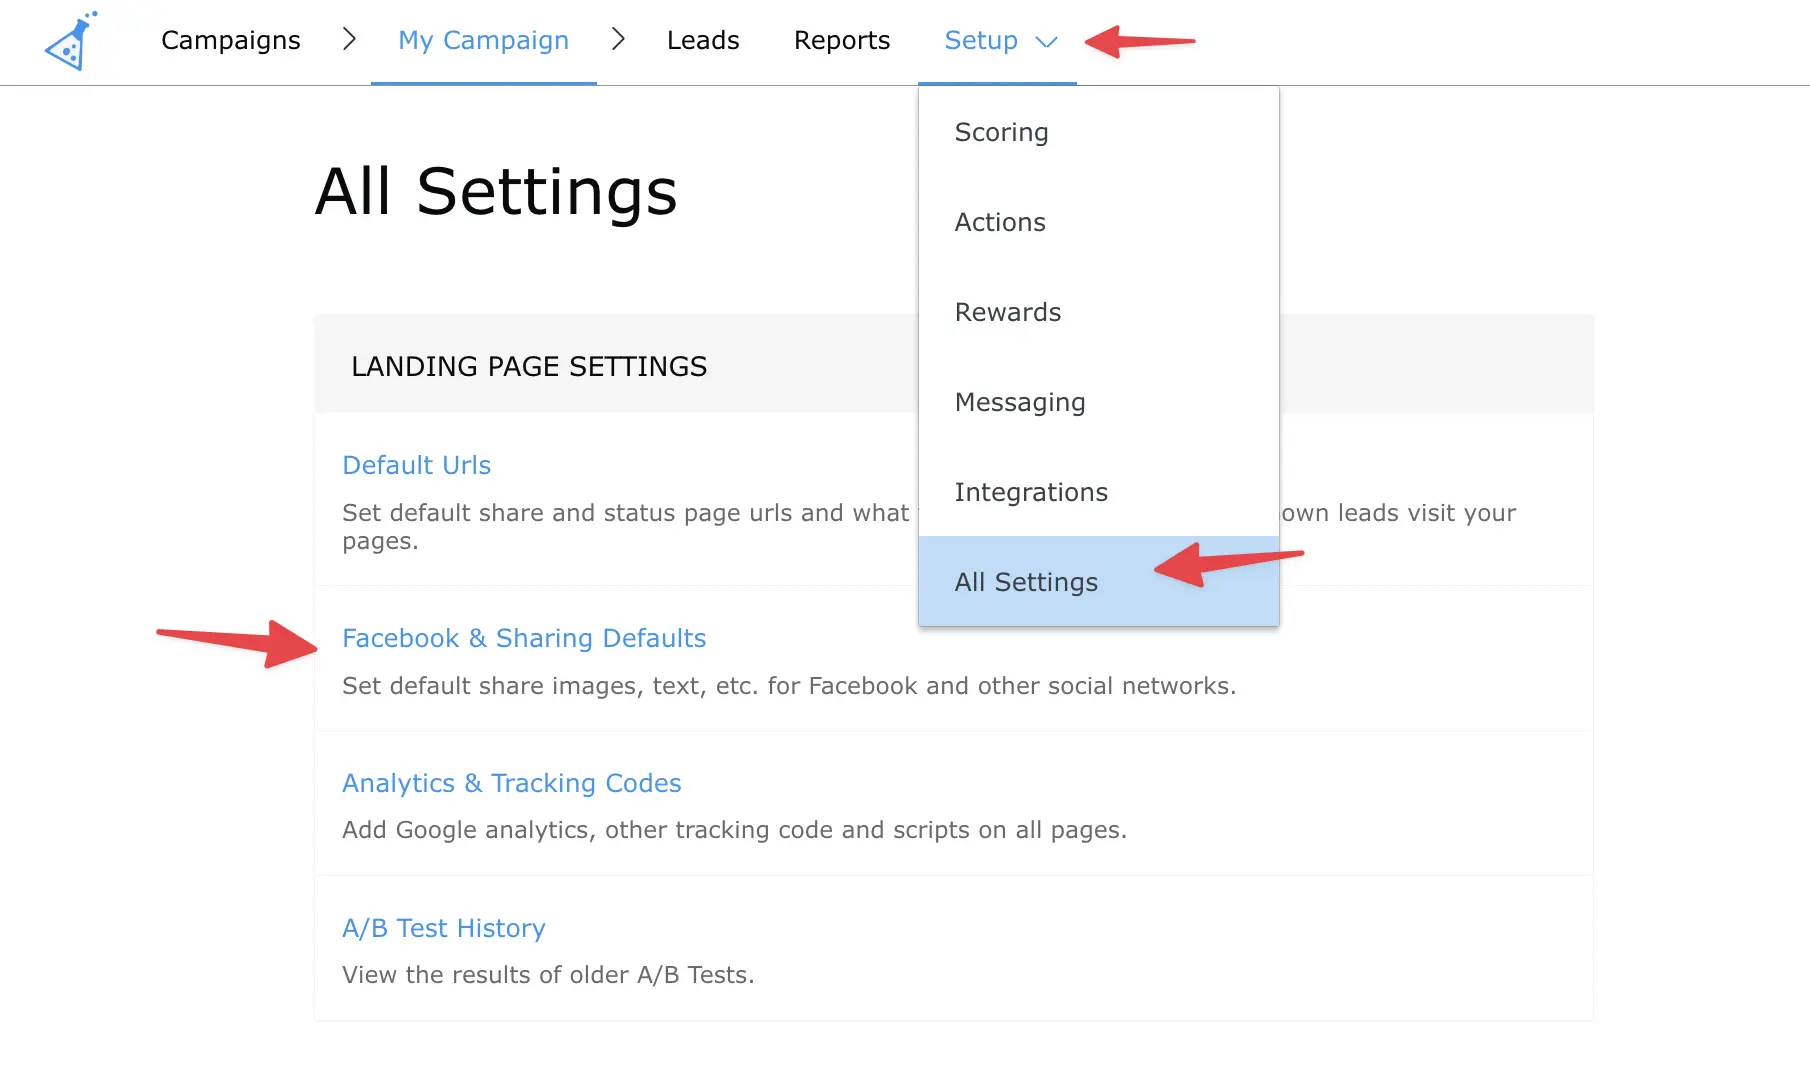
You can also add additional actions for leads to complete from the actions editor in your capaign dashboard. Some examples include: visiting an Instagram profile, watching a TikTok video, visiting a website, or making a Shopify purchase! Learn more about how to setup and customize your actions here.
The Emails
Don’t neglect your signups after they’ve converted. Email reminds people what they signed up for and instigates action. Not to mention it’s proven that email has the highest ROI out of all marketing channels. The first email that Robinhood sent out was a simple text-based email (no fancy templates necessary) that reinforces “priority access” and the chance to get access sooner.
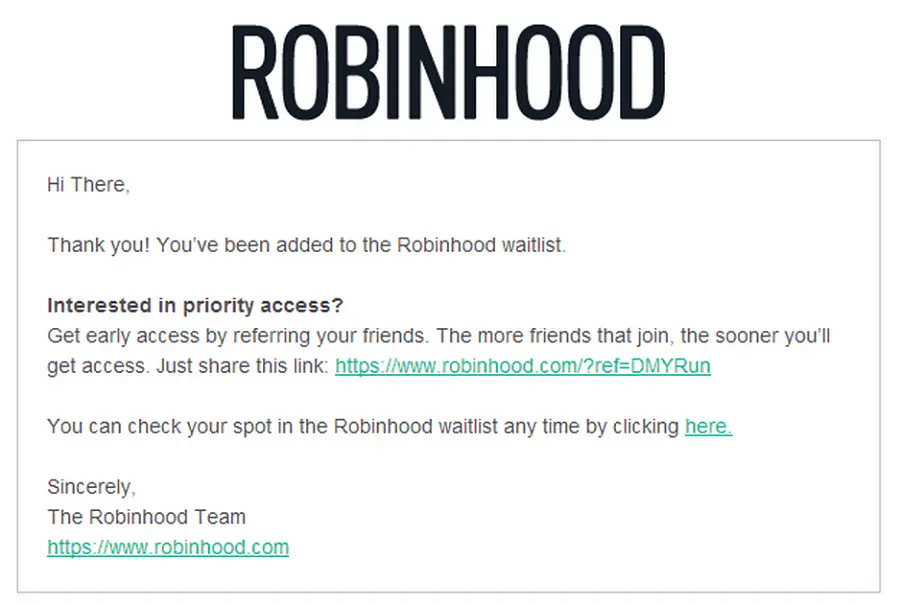
Notice how the email also includes a link back to the thank you page with “check your spot”.
Strategy
The series of emails Robinhood sent at different times are:
-
AutoReply – the initial email response reminding people about the incentive for sharing.
-
Reward Level Emails (a KickoffLabs exclusive) –** use these Emails to notify people once they’ve hit a referral threshold and unlocked an incentive.
Setup with KickoffLabs
**A. Instant thank you email (AutoReply)**
1. From your Campaign Dashboard, select ‘”Auto Reply Email” from the Messaging settings.
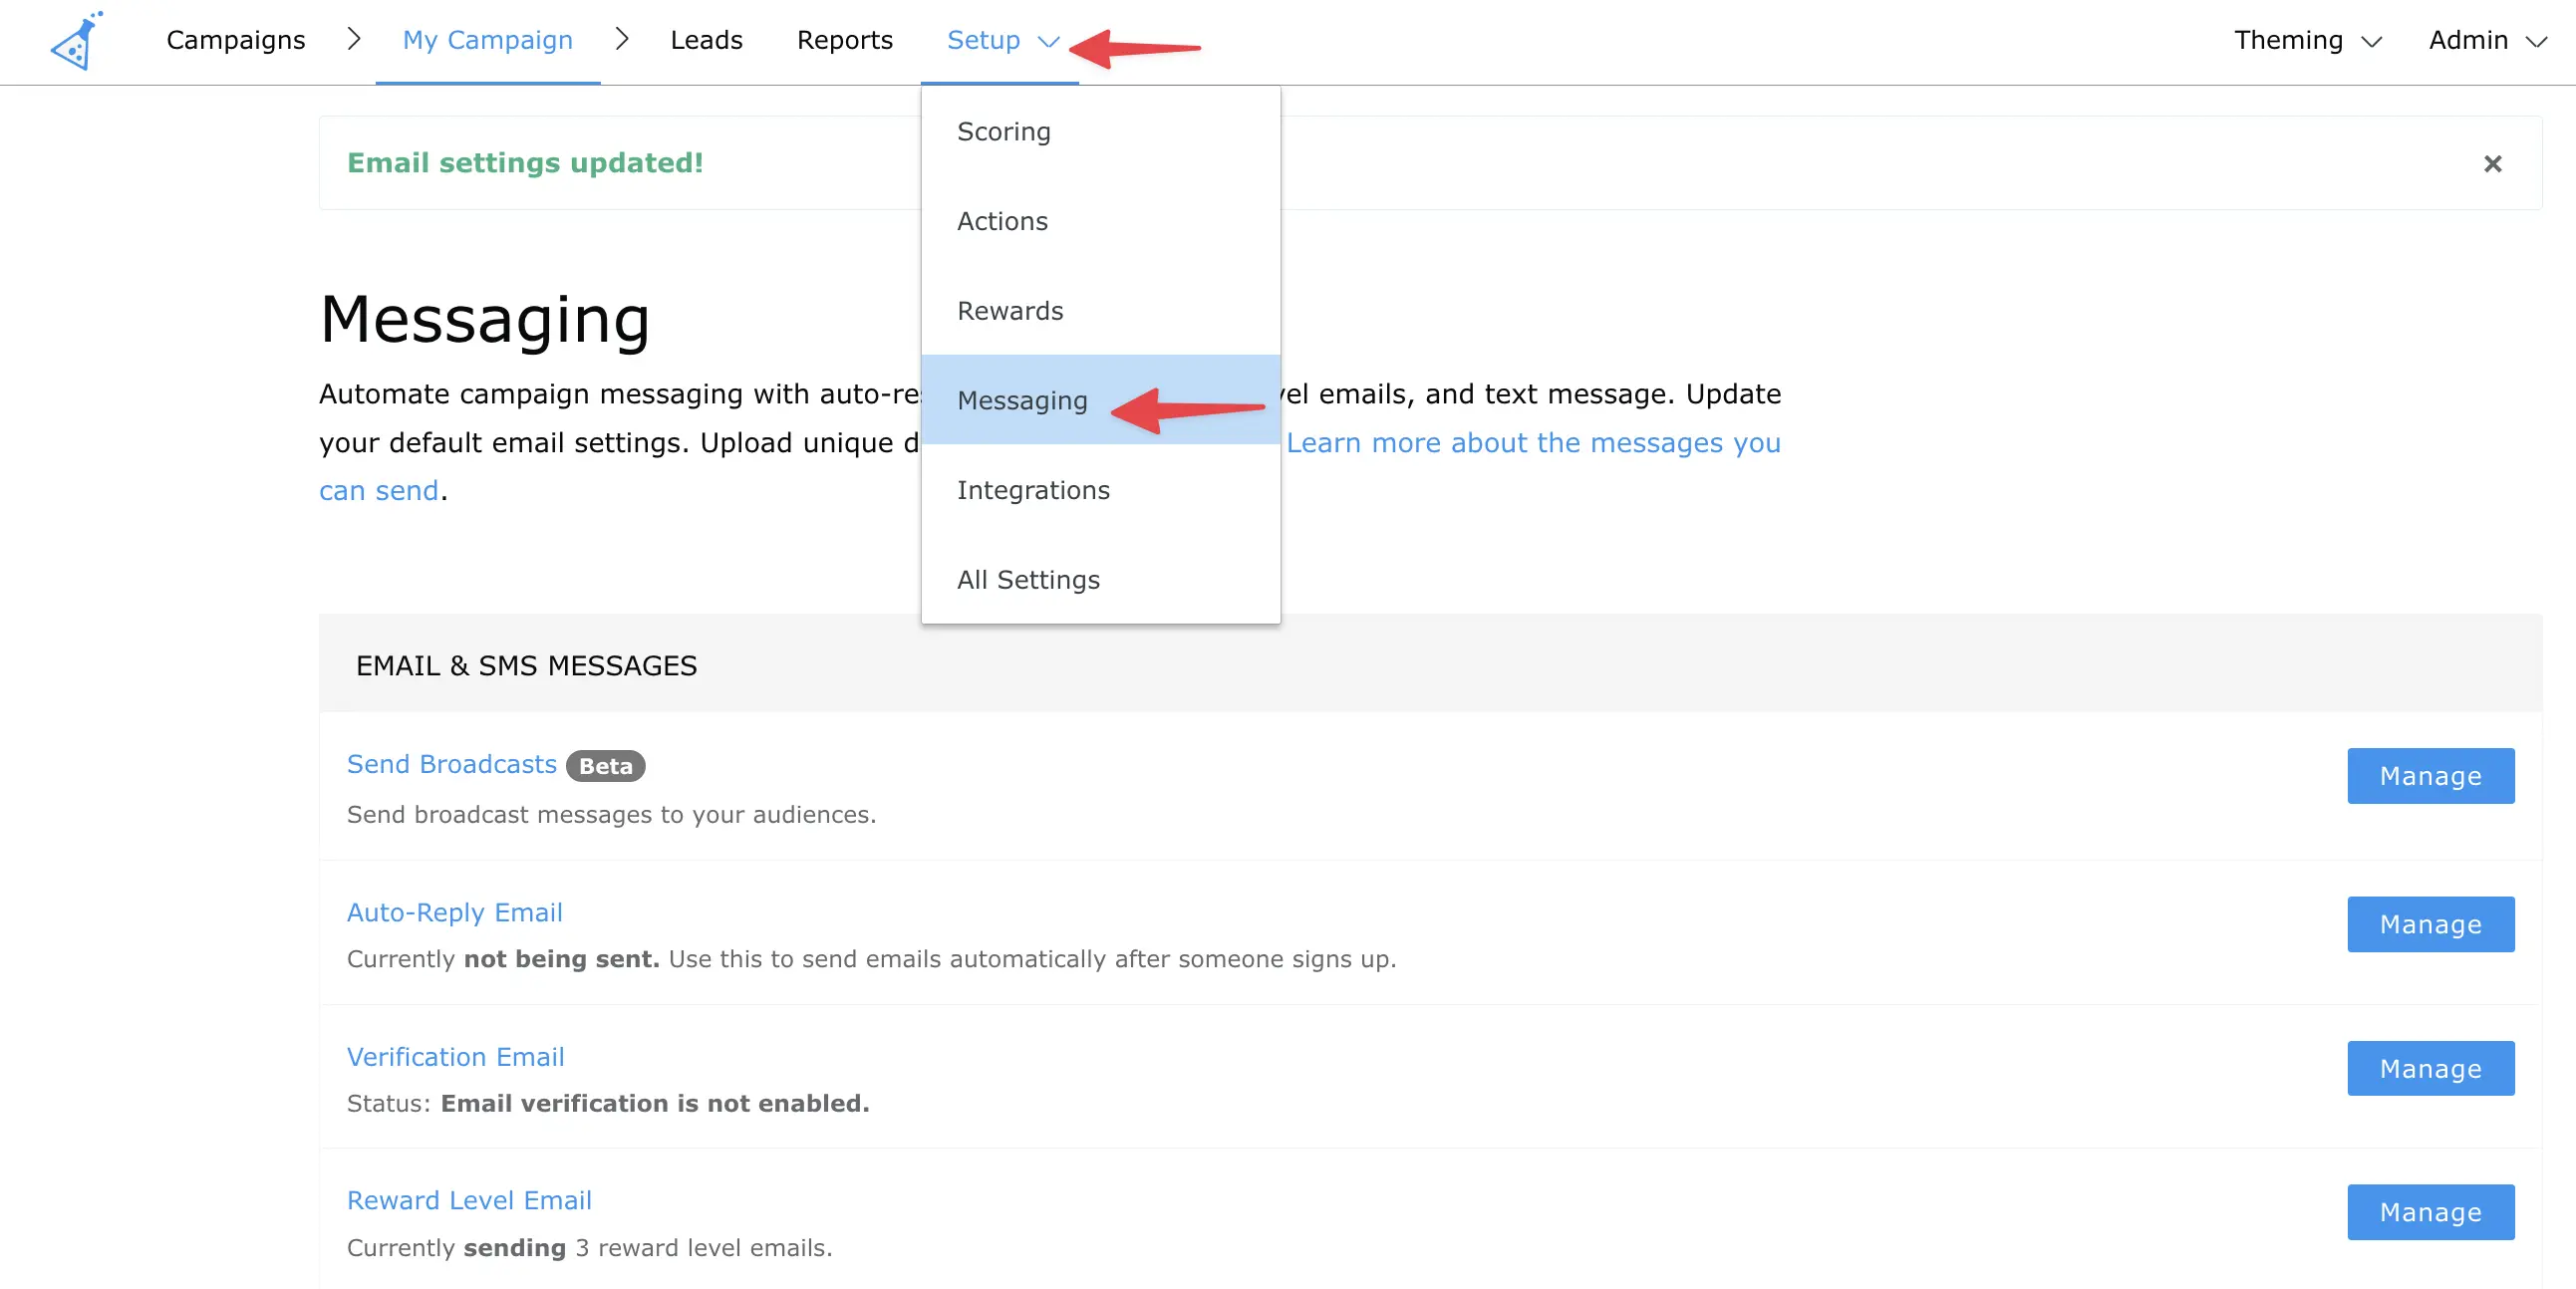
2. If you’ve not yet set up your Email Settings for the campaign, you will immediately be prompted to do so. This is where you can update your “From” name, your “From Email Address”, postal address (required under the CAN-SPAM Act), unsubscribe message, as well as set a custom unsubscribe page. If you’ve already set up your Email Settings, you will be taken to the Email editor where you can configure your email. Add in a logo, customize the text, and more.
However you customize the email, we highly recommend you use the Email tokens we provide to autogenerate the social referral and sharing links – do not type out your own links, as we will not be able to track referrals properly.
3. When you’re done editing the Auto Reply email, scroll down and click ‘Save Auto Reply Settings’.

All set configuring the initial email autoresponse!
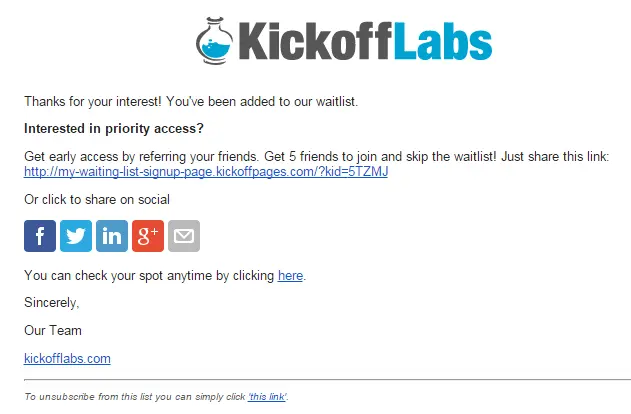
Click here to find our full guide on editing your Auto Reply Email.
B. Reward Level emails (a KickoffLabs exclusive)
1. From the campaign dashboard, select ‘Messages’ from the set-up dropdown. You can create separate Emails for multiple referral goals.
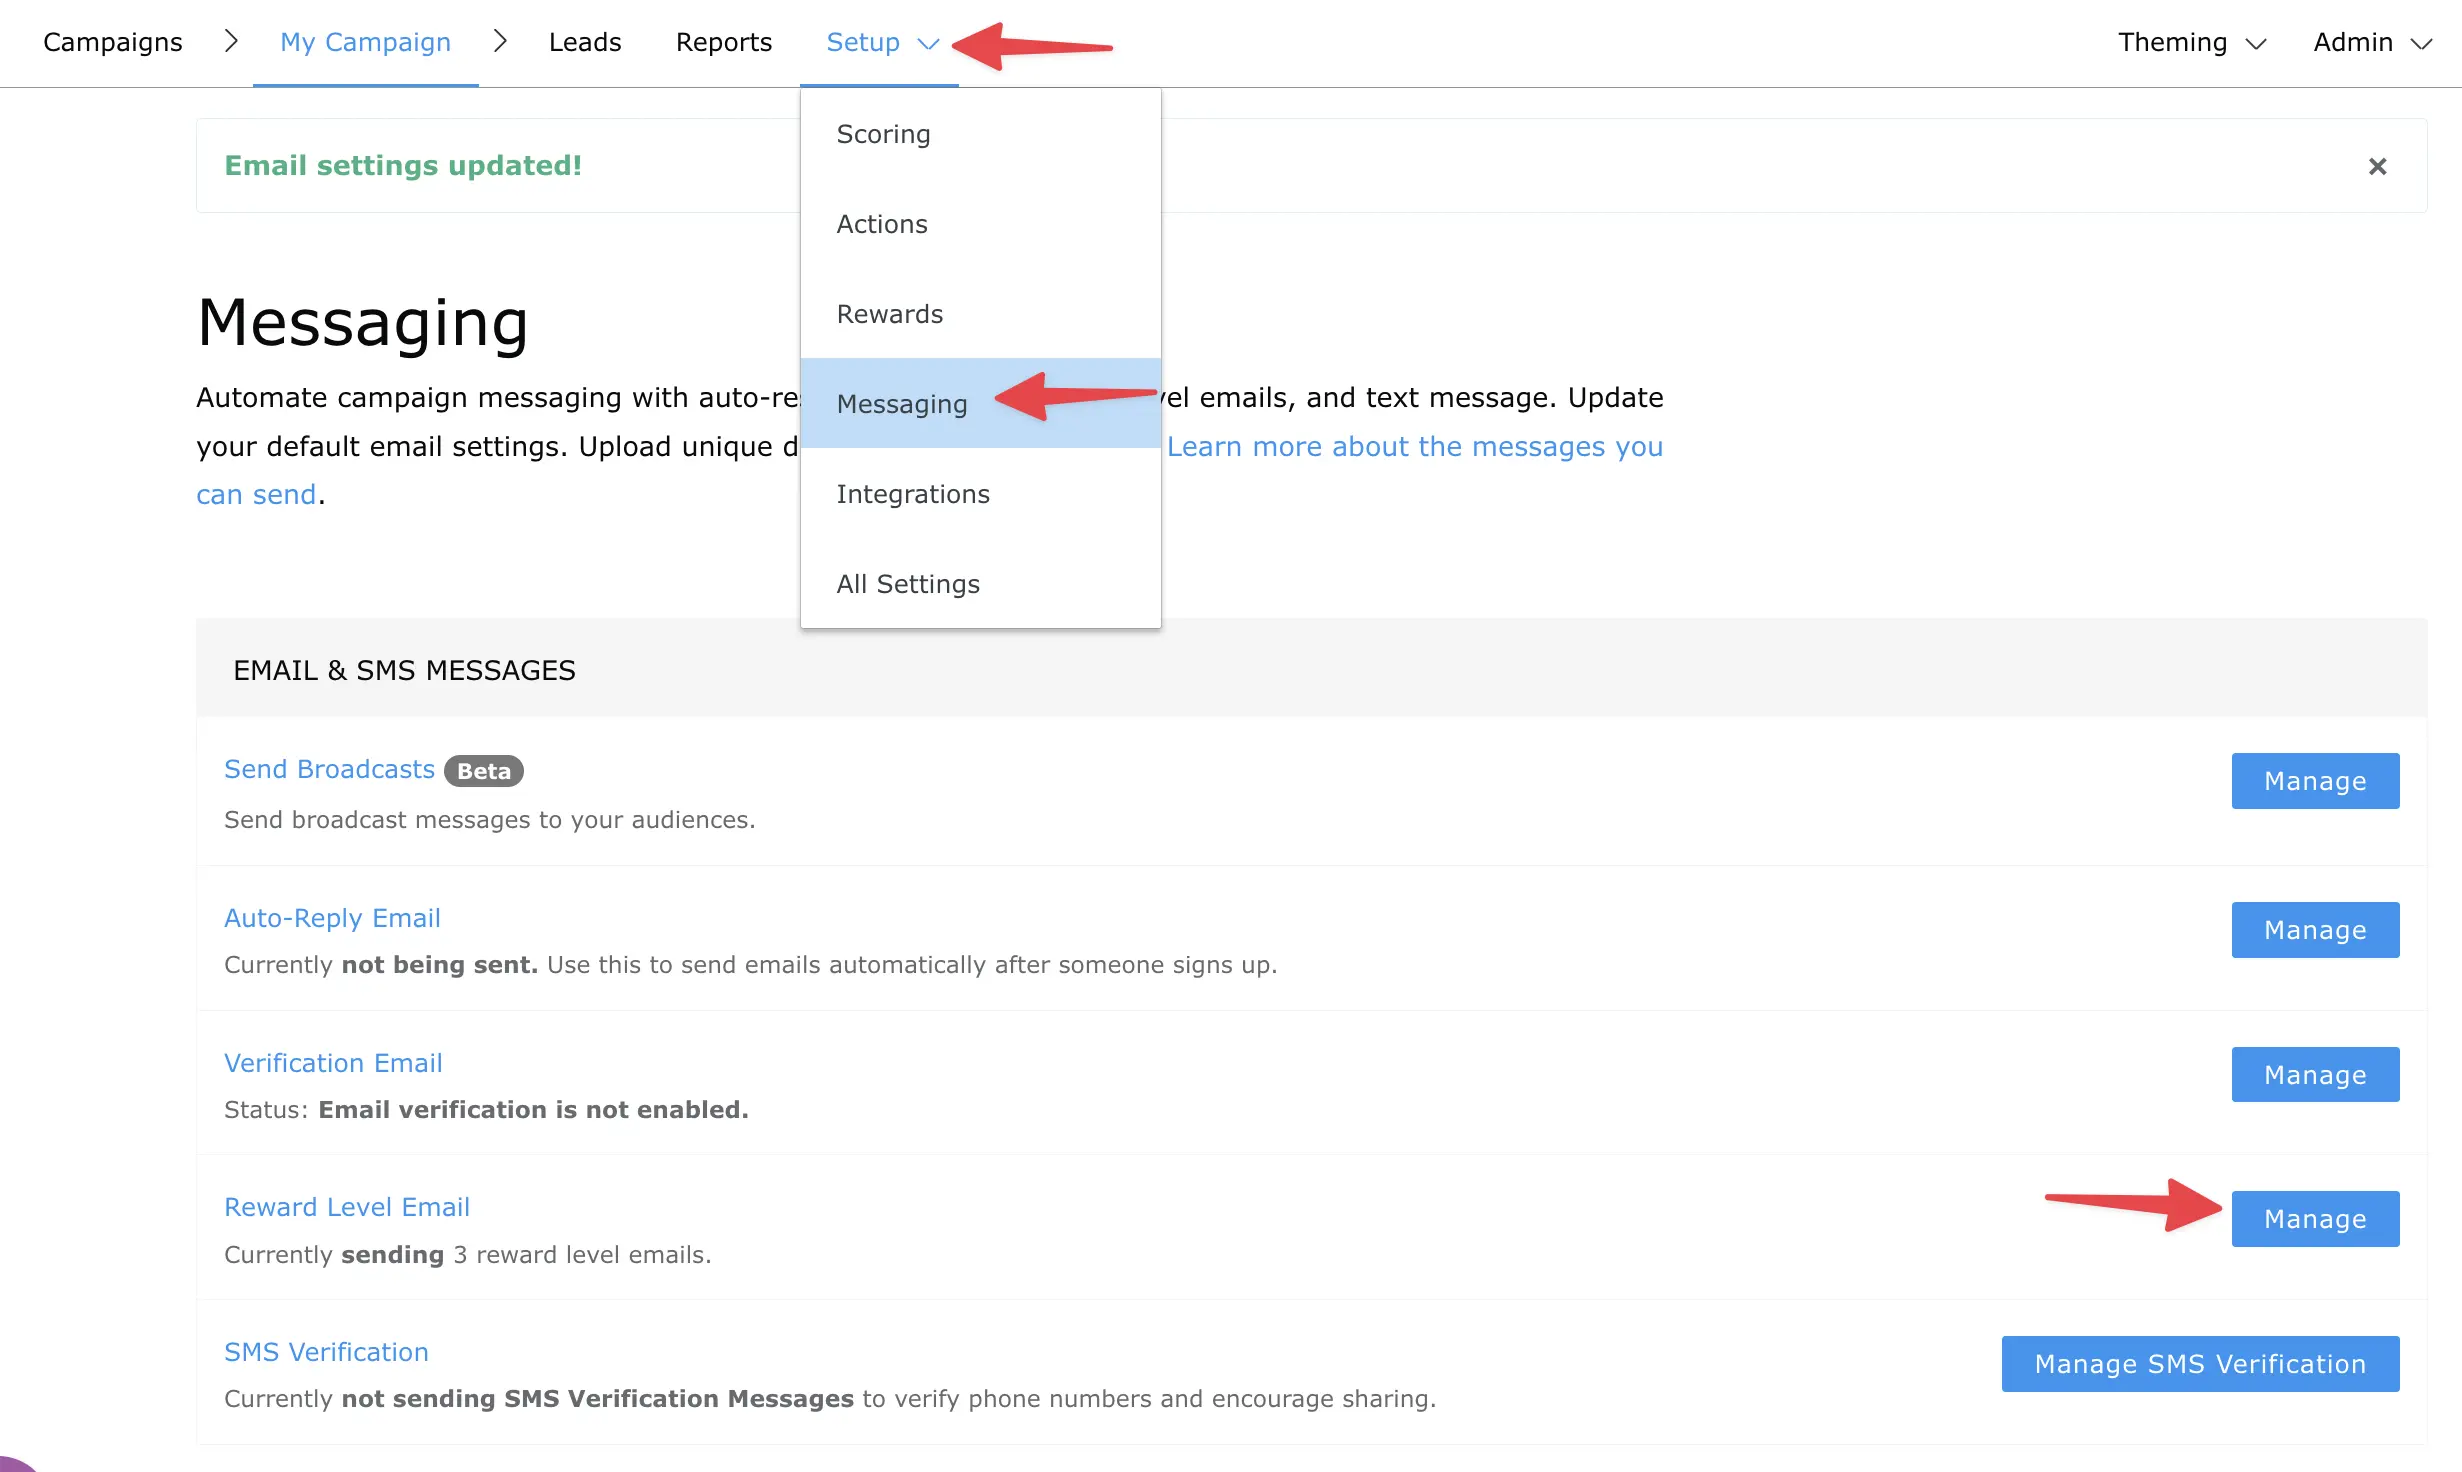
2. If this is your first reward, you will first need to click “Add Another Reward Level,” otherwise, select “Manage Email.”
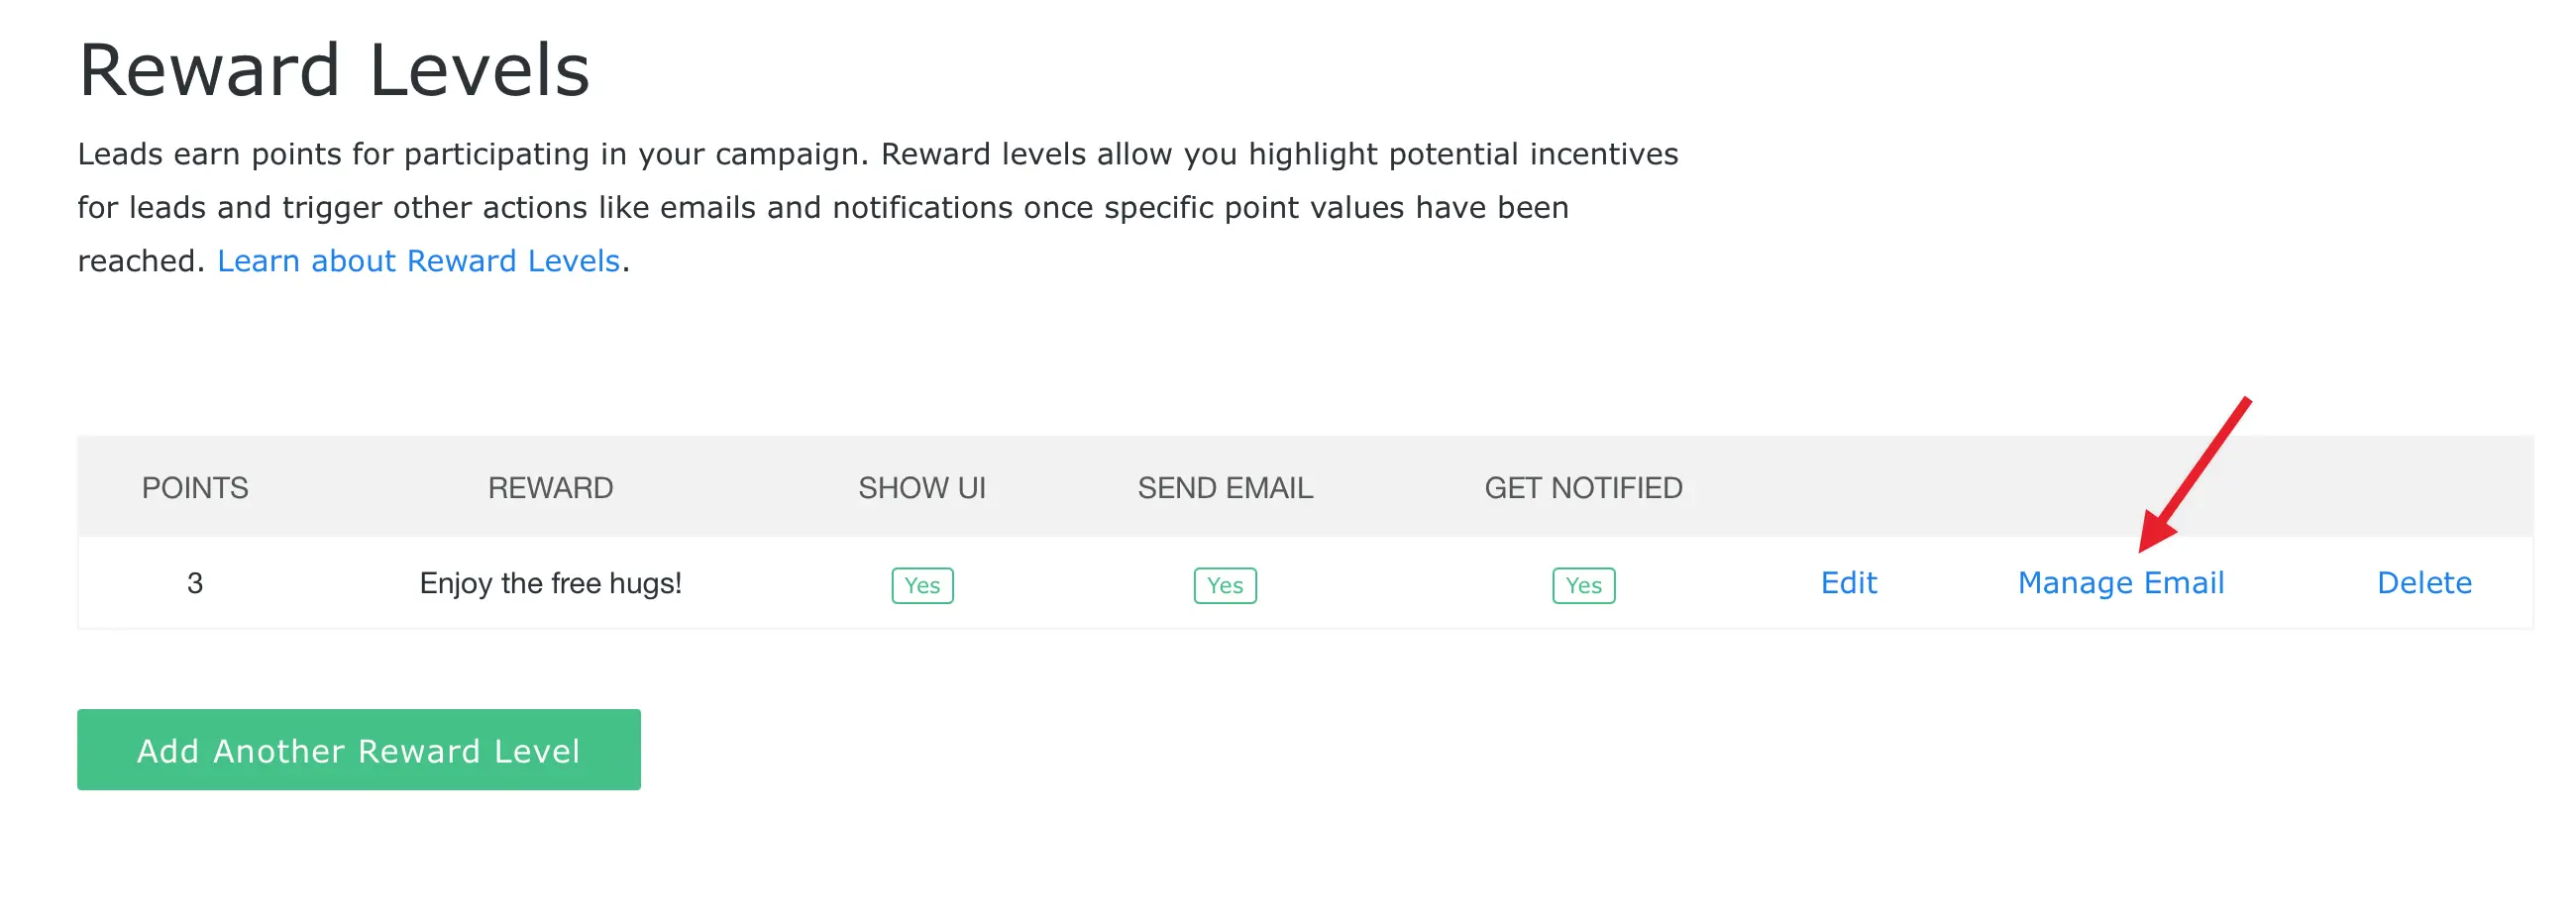
3. Make sure the email is enabled.
In this example, I’m linking to a potential special link that people can use to gain access. But you can include a direct link to your app download, product sales page… whatever the conversion goal is.
It’s really up to you how you use KickoffLabs Reward Level Mails. Feel free to get creative. We’d love to see what you come up with!
4. When you’re done editing the reward email make sure to select ‘Save Email’.

The cool thing about KickoffLabs Reward Emails is that you can create as many reward levels as you need. Want to create more? Click ‘Add Another Reward Level”. Find our full guide to setting up Reward Level (Incentive) Emails here!
Additional steps
- We can send real-time Email alerts anytime someone signs up to your campaign. You can enable/disable these messages from the “Messaging” settings in your campaign dashboard.
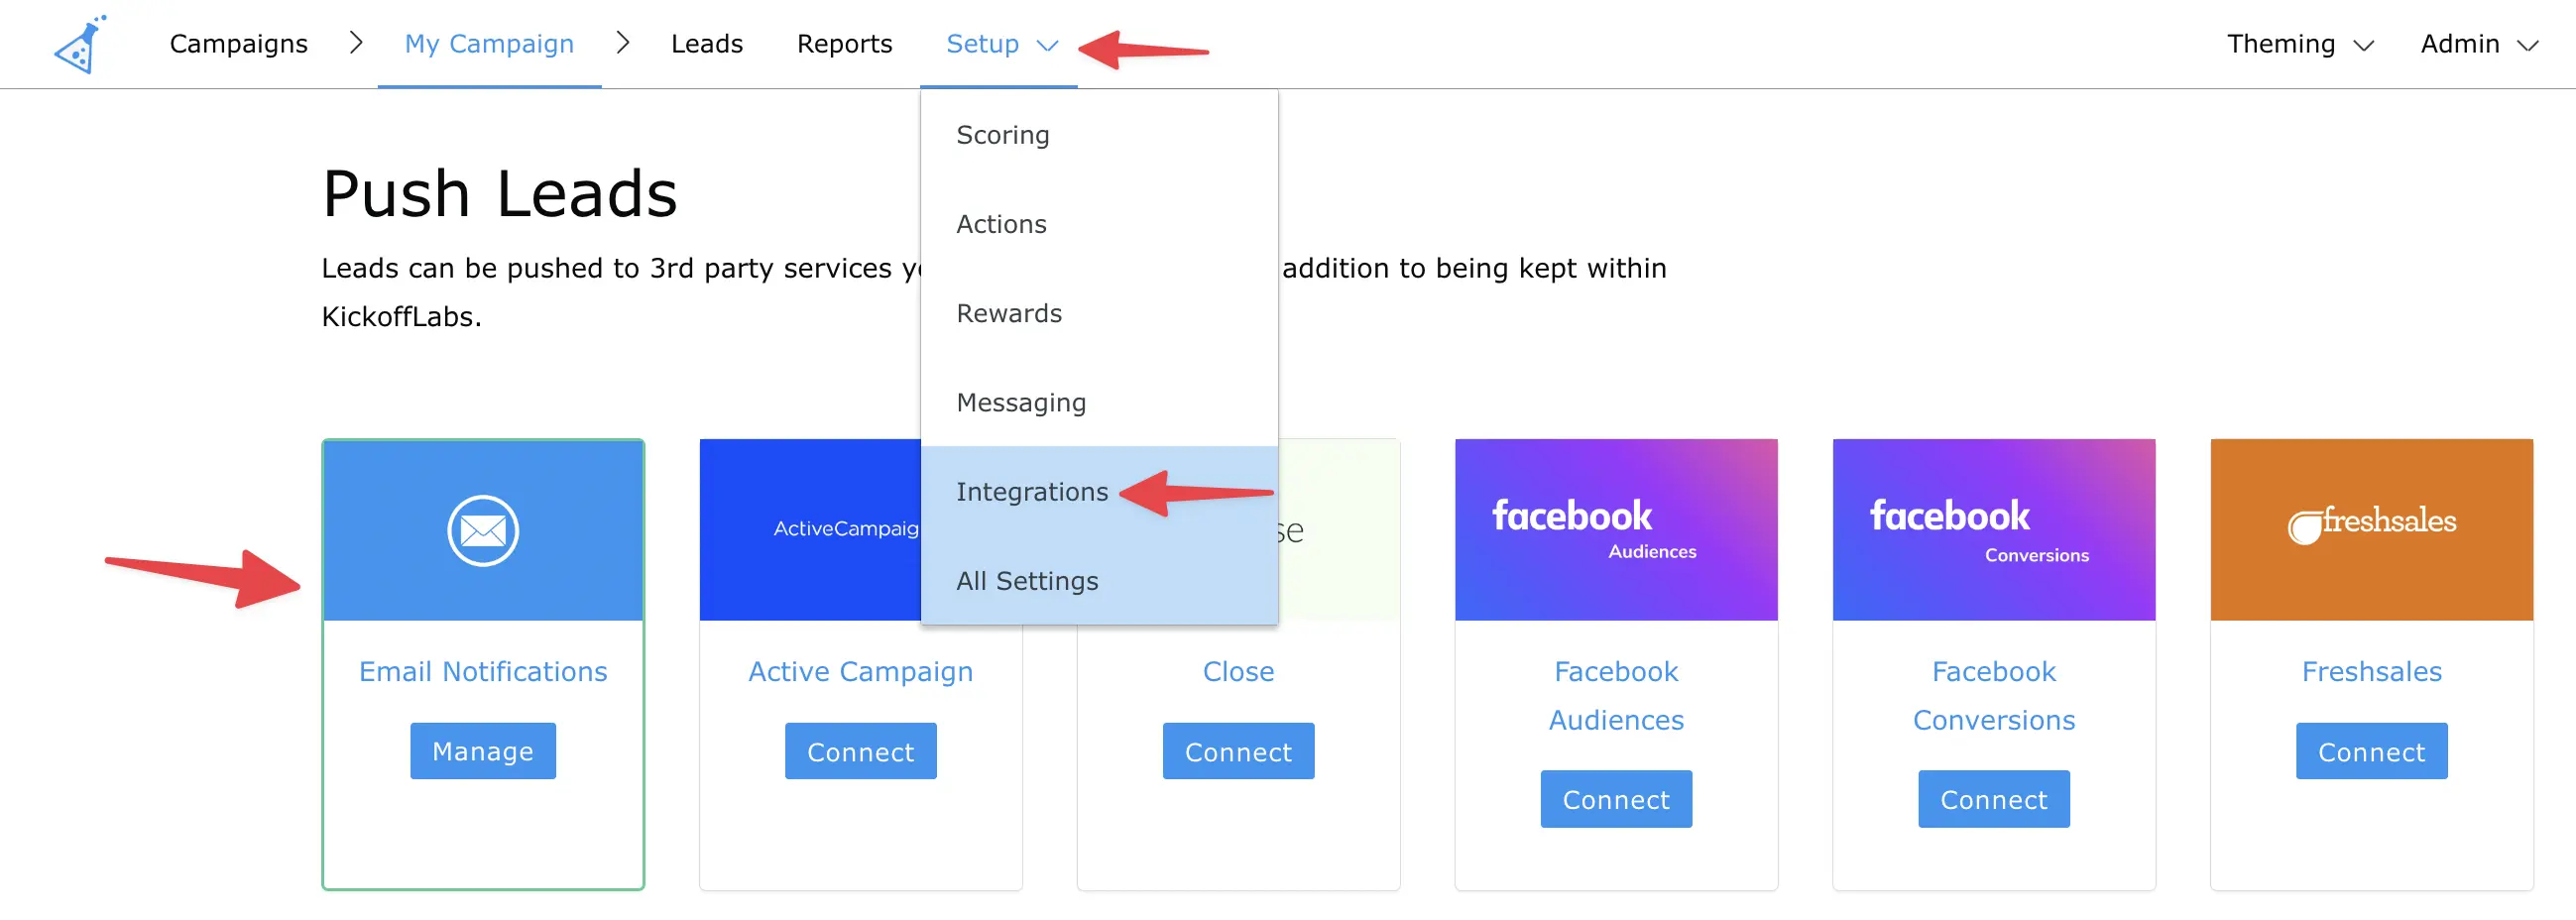
Publish Your Campaign
When you are ready to start collecting signups, it’s time to publish your campaign to the live web. When you publish your page, you get a URL link that can be shared and advertised. While you can always publish pages to our free kickoffpages.com domain – this is generally meant as a testing domain for your landing pages. It’s best to use a custom domain so visitors don’t get confused if they see kickoffpages.com in your domain name. For the best results (and highest conversion rate), we recommend using your own custom domain with KickoffLabs. For detailed instructions on using your own custom domain name please refer to our guide on Publishing to a Custom Domain and General Custom Domain Setup guide.
Recommended Next Steps
Ready to launch your viral waitlist campaign? Explore these helpful resources:
- Waitlist Campaign Types - Choose the perfect waitlist strategy for your launch
- Waitlist with Leaderboard - Add competitive elements to drive sharing
- Referral Tracking - Monitor and optimize your viral growth
- Email Marketing - Engage and nurture your waitlist subscribers
- Waitlist Strategies Guide - Learn proven tactics for waitlist success
- Pre-launch Promotion Strategies - Build maximum hype before launch
Get Viral!
We hope this quick guide helps you in building the perfect fully-featured waiting list campaign. If you require any assistance, feel free to drop us a line at support@kickofflabs.com If you’ve gotten this far and still don’t have a KickoffLabs account…
Read more Building a Waitlist with the next chapter:
4. Waitlist Reporting
Unlock the full potential of your waitlist with our in-depth guide on how to use to the reporting to ensure success post-launch.
