- Facebook Conversion Ads Explained
- Before we get started
- 1. Open Facebook Ads Manager
- 2. Select Campaign Objective
- 3. Name Ad Campaign
- 4. Create and Name Ad Set
- 5. The Dynamic Creative Feature Is Your Friend
- 6. Set Ad Budget (and Schedule)
- 7. Filter Target Audience
- 8. Select Ad Placement
- 9. Name the Ad
- 10. Identify Social Accounts
- 11. Select Format
- 12. Upload Media
- 13. Insert Copy
- 14. Submit for Review
Here’s a hard truth that savvy Facebook marketers are well aware of: Facebook ads aren’t getting any cheaper. In fact, they’re just going to keep getting more expensive.
So whether you’re a newbie just starting out or haven’t quite worked up the courage to dip your toe in the busily churning Facebook ads pool, know this:
The perfect time to start with Facebook ads is today.
And the best way to specifically generate new leads is with a conversion oriented campaign, optimized for generating leads. Sounds obvious, right?
So how exactly can you set that up without spending too much time on the details that don’t matter? Read on to find out.
Facebook Conversion Ads Explained
Facebook is one of the most sophisticated advertising platforms of our time. You can use Facebook Advertising to increase engagement on your Facebook Page, get more videos views, increase traffic to your landing page, generate more purchases, and many more.
When launching a Facebook Advertising Campaign, a lot of business owners make a mistake of using a Traffic objective. It’s an honest mistake — more website traffic is always good, right?
But more traffic doesn’t always mean more conversions. That’s why when creating a Facebook Campaign, you also have an option of launching a Conversion campaign, where you specify what “Conversion” is.
It can be anything, from a Purchase to a Lead. Today, let’s talk about how to generate more leads.
All you need to start generating more leads today is a Facebook Advertising account and a landing page to collect leads from (we recommend creating a simple giveaway) - and then it’s just 14 steps to launching your own conversion campaign. Stick with us and we’ll guide you through the process step by step.
Before we get started
If you want to successfully optimize for generating more conversions with Facebook Ads, we need to tell Facebook what a Conversion is.
This is easier than it sounds and only requires a few steps that can be performed in just a few minutes.
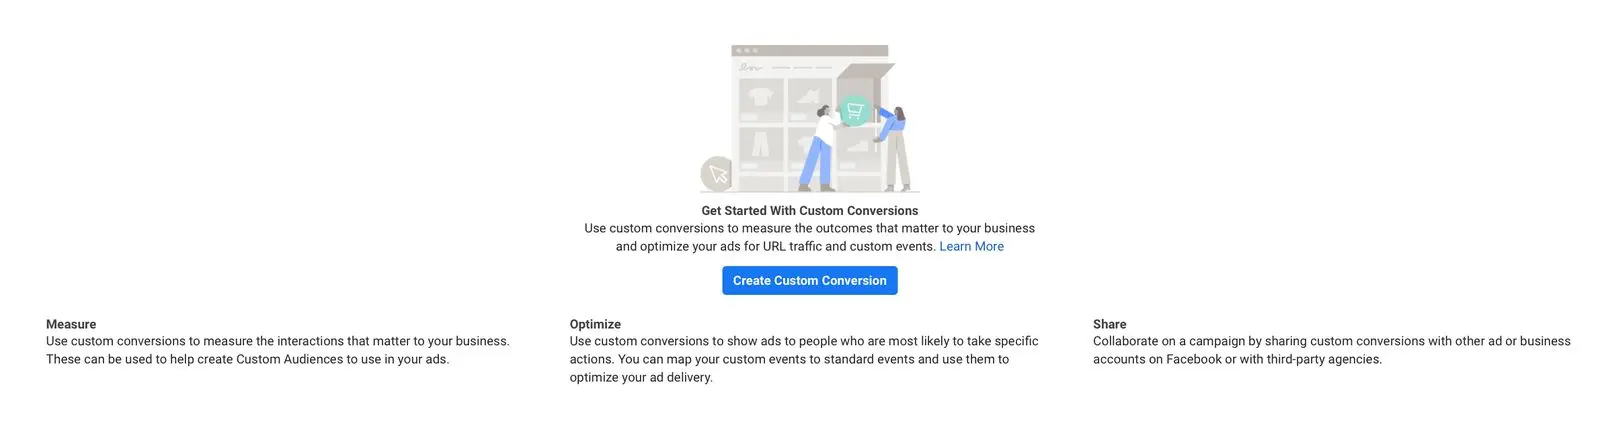
Step 1: Create a Facebook Pixel if you don’t have it already. Step 2: Implement that Pixel onto your giveaway page. Important: It has to be embedded onto your Thank You page as well. That’s the Thank You page that someone sees after submitting their lead. Follow this KickoffLabs tutorial on how to do it yourself. Step 3: Create a Custom Conversion on Facebook using that Thank You page link. That will let Facebook know that when someone visits that Thank You page from your Facebook campaign, Facebook should count that as a conversion.
Now, let‘s get the real party started.
1. Open Facebook Ads Manager
Log into Facebook and open your Ads Manager, then click “Create”. Easy peasy. From here, you’ll be guided through the setup of your ad, which takes your through three different levels:
- Ad Campaign
- Ad Set
- Ad
You set up different parameters in each level, which the Ads Manager takes you through automatically. Don’t worry: You can always still go back to a previous level and edit (most things) if you realize you should have selected something different to make the ad perform better.
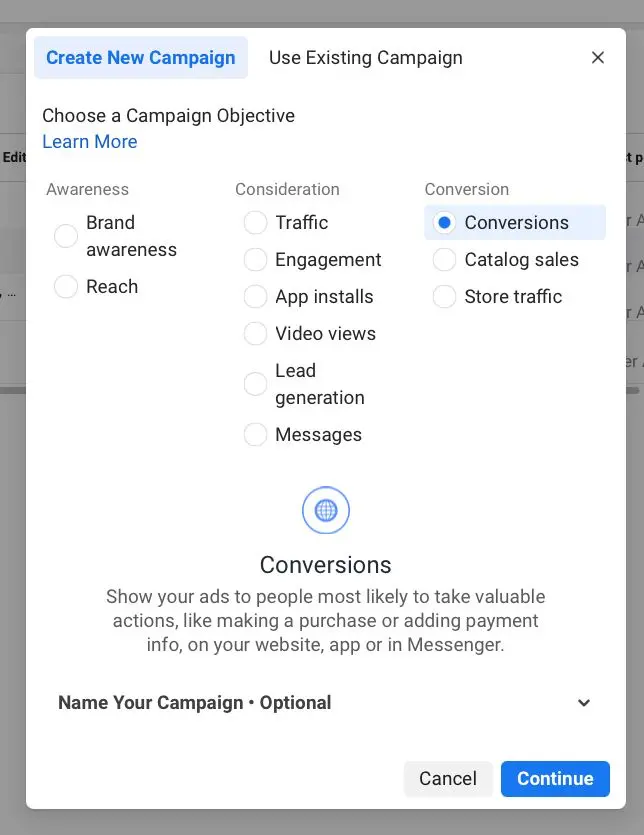
2. Select Campaign Objective
You’ll be asked to select your ad campaign objective. In this case, select “Conversions”.

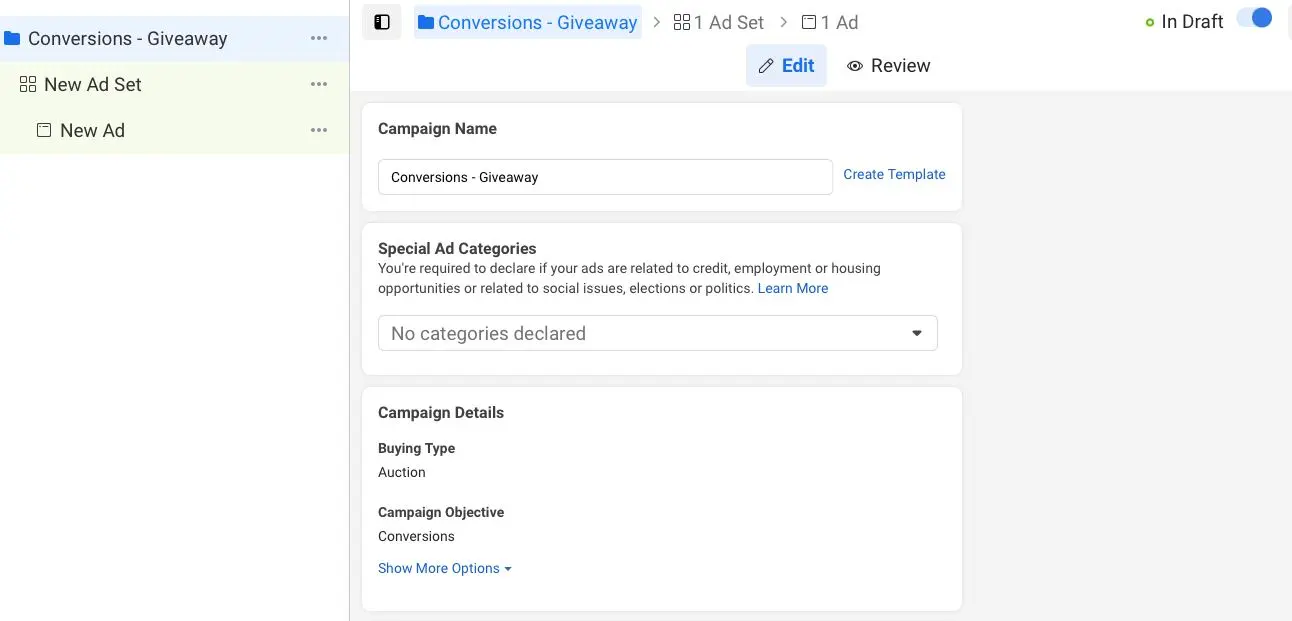
3. Name Ad Campaign
It’s a good idea to be detailed here. The more campaigns you set up, the more difficult it will be to tell one from the other - unless you develop your own system of naming conventions. Without such naming conventions, your ad account can get very confusing very quickly. Our tip is to always include at least the campaign objective, so you’re able to compare results to original goals.
Tony Does Ads has a great guide on how to name not just your Facebook ad campaigns but ad sets and ads themselves here.
4. Create and Name Ad Set
The next step takes you to the ad set level, where you select demographic details about your target audience and buyer persona. Here too, naming the ad set properly from the get-go can save you a lot of hassle and confusion down the road, so don’t scrimp on the descriptors.
We recommend a straightforward naming - describe exactly who you’re targeting in that Ad Set so that you’ll know exactly who you’re targeting later when looking at the analytics.
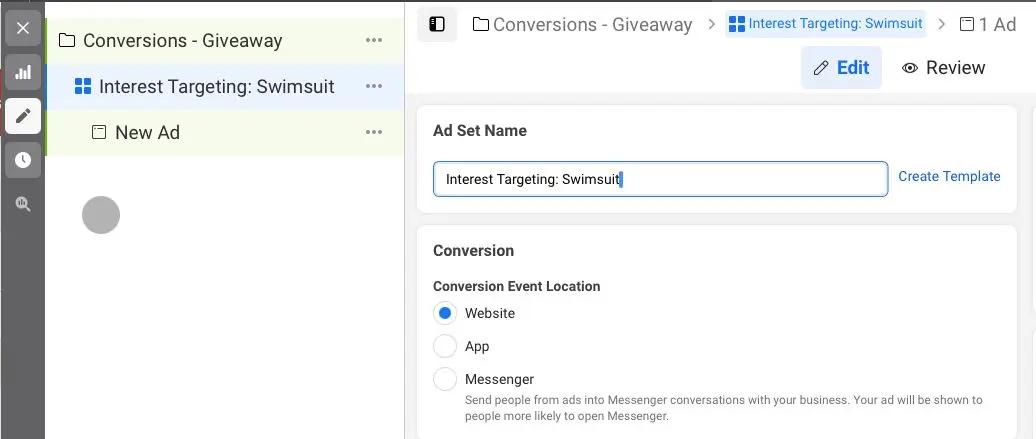
Don’t forget to choose the Conversion you want to optimize for at this stage too! You’ll choose the one you set up for your giveaway using the Thank You page.
5. The Dynamic Creative Feature Is Your Friend
We suggest you take advantage of this option, especially if you’re new to creating Facebook ads in general. The Dynamic Creative Feature lets you upload a variety of creative data (like images, headlines, text, CTA) separately, which Facebook then uses to automatically generate different combinations of that data and other components.
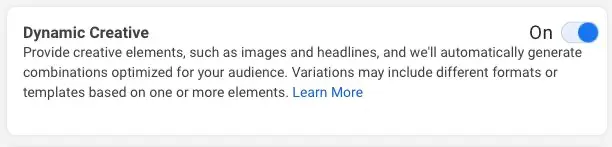
These are then shown to different subsegments of your audience and help Facebook determine the combination that garners the best results for your campaign objective and that particular audience. This is a great and easy alternative to creating a complete ad image and split testing it yourself.
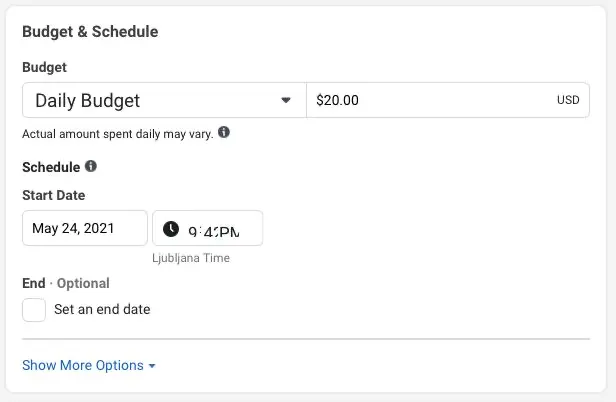
6. Set Ad Budget (and Schedule)
Now it’s time to determine how much money you want to spend on your ad and in what time frame. You have two choices:
- A total budget is the maximum amount you set to spend on an ad until it stops running. If you set your total budget at $100, you’ll be charged up to $100 and not a cent more (though potentially less).
- A daily budget is the average amount per day you’ll spend on your ad. If you set your daily budget at $10 over the course of ten days, you’ll be charged up to $100 total.
To determine what might work best for you, it helps to understand that Facebook ads are based on an auction system. This means that, based on your bid, Facebook estimates how likely it is that people convert when they see your ad. This makes the bid comparable with the bids of other advertisers targeting the same user. The highest bid wins the auction, which means the winner’s ad is shown to the user.
To make sure yours is the winning ad, you need to choose a reasonable budget based on prior experience or research. Like with target audience and placement, don’t despair if you don’t get it right immediately. Even the best Facebook ads marketers have to continuously test, analyze, and optimize, to get the best return on their ad spend.
That’s it for your ad set. Time to set up your ad.
7. Filter Target Audience
Here it is, the reason why Facebook is such a popular marketing platform. It’s because Facebook ads are one of the best ways to target exactly the people who are interested in your service or product. Provided you get the targeting right.
In this section, you select your audience based on their interests, location, behaviors, and age, to name a few. What’s more, you can exclude people based on certain criteria. For example, depending on your product or service, it might be useful to be able to exclude people who’ve purchased something from your website in the past 30 days. No need showing them an ad for a product or service they just bought.
You can also select connections based on people’s interactions with your business in the past, which can be helpful as well.
Overall, there are four segments to choose from, which give you an unlimited amount of combinations to set up your target audience for your ad campaign:
- Location
- Demographics (age, gender, languages)
- Detailed targeting (interests and behaviors), and
- Connections.
You can select them all in this audience interface:
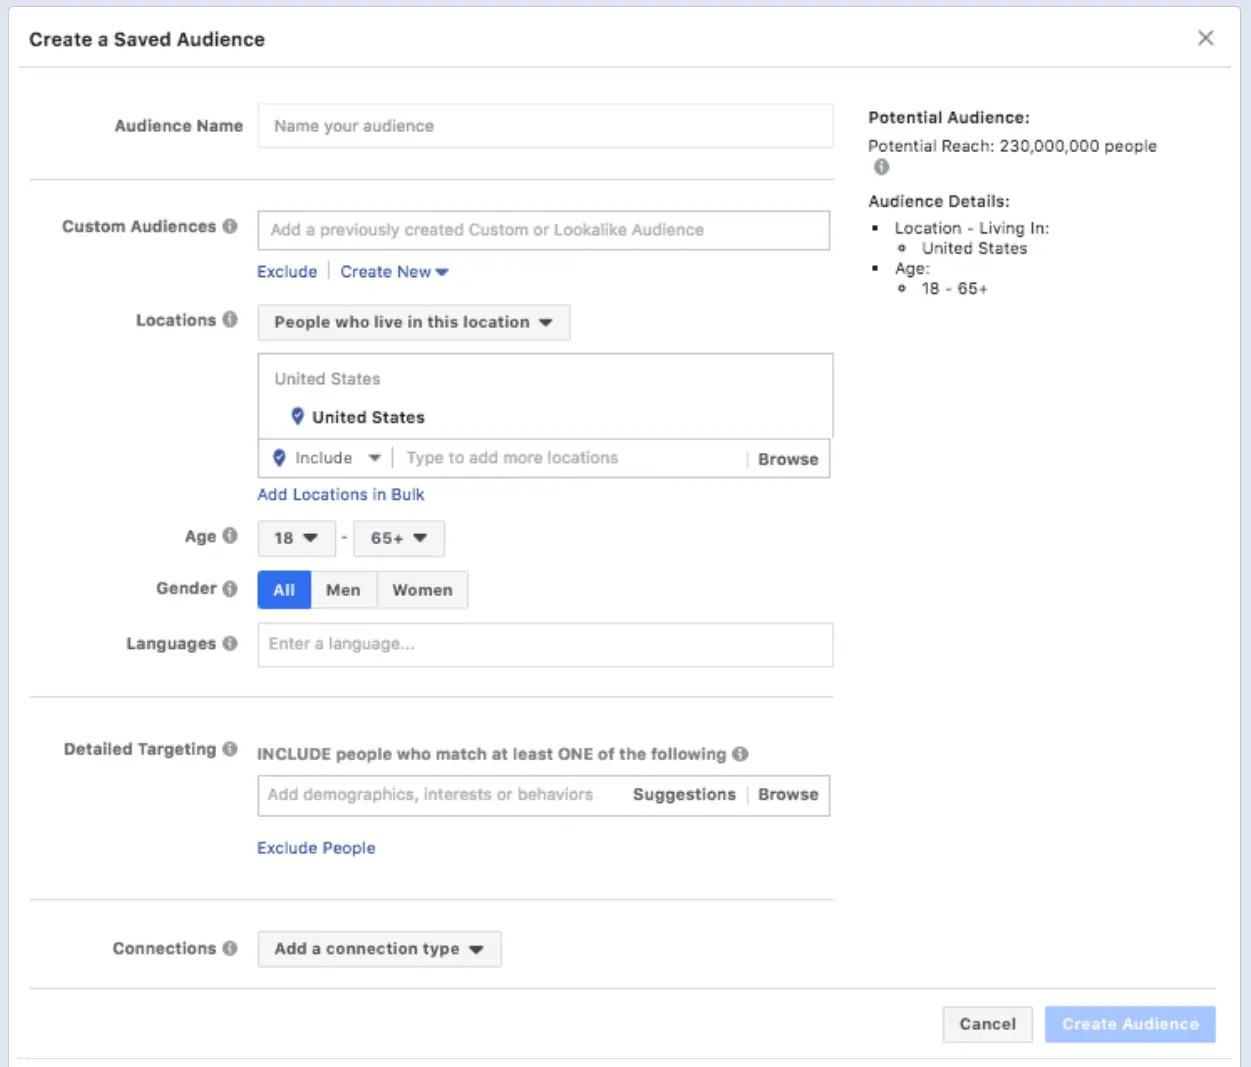
As before, naming your audience based on some sort of system is a good idea. You might end up using this specific audience for several ad sets or even ad campaigns (in which case you can set it as “Custom Audience” and simply select it for the next ad set). For example, if you’re basing this audience on a buyer persona profile, you could name it after this persona.
Pro Tip: The “Audience Size” needle on the right will show you the size and potential reach of your audience, adjusting to “specific” or “broad” as you add different targeting features. Facebook uses this information to choose which users to show your ad to, leading (hopefully) to the most bang for your buck.

Try to keep the needle in the “green” middle. Too broad an audience means you’ll likely waste ad spend on users who aren’t really interested in your product or website. Too specific, and there are too few audience members to make much of a dent in lead numbers, even if every one of them converts (which is highly unlikely).
Now, let’s get into the nitty-gritty of this all-important feature of your Facebook ads.
Location
With this setting, you can target users by things like
- their location of residence,
- places they’ve visited, or
- places they’re traveling.
It also allows you to include other specific locations outside of these areas, or exclude places that fall outside of your criteria within them. You want to focus on areas where your potential customers are, spend time, or plan to go, while excluding the rest.
Let’s assume, for example, that your retail store is located in England and you’re willing to ship to Wales and Scotland. Don’t waste your budget on ads that target people in Ireland. Of course, if you run an ecommerce store, you’re probably set up to ship to a lot of different locations, so you should definitely widen your parameters to those places.
Demographics
Facebook allows you to narrow down your target audience according to the following demographic data:
- Age
- Gender
- Language
- Education
- Work
- Income level
- Political affiliation
- Relationship status
The better a picture you have of your target audience and buyer persona(s), the closer you can focus on the right characteristics. Because the closer you get and the more you can narrow down users to fit your criteria, the higher your return on ad spend.
Interests and Behaviors
Under “Detailed Targeting”, you can choose users’ interests, which will help you focus on people who have shown interest in the product or service you’re marketing. For example, if you sell toys for babies, you can target people who’ve shown interest in baby clothing. Check out The Complete Facebook Interests List (2021) here.
Users’ behaviors are particularly interesting for lead generation campaigns. Behaviours let’s you target actions people take on Facebook or away from it. Like targeting travelers, purchasing habits and more.
You can target people by very specific behaviors, such as:
- Internet browser used
- Operating system used
- Mobile device used
- Abandoned your shopping cart
- Purchasing habits
- Recent anniversary
- Travelers
- Console gamers
- Small business owners
- And many more
Connections
You can use the Connections feature to target users who are linked to your business in one way or another. This might be people who
- follow or like your Facebook page,
- use your app, or
- have responded to an event.
You can even choose these users’ friends. This makes it easy to include - or exclude - people who are further down your marketing funnel by already interacting with your business and brand.
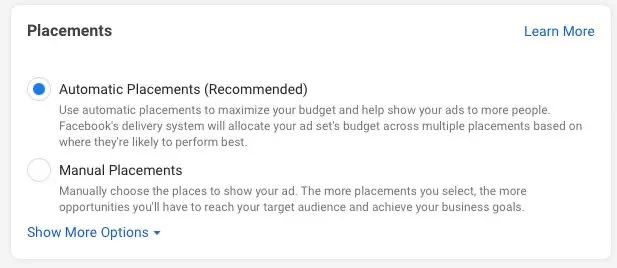
8. Select Ad Placement
In this step you determine where in Facebook your ad will be placed in front of users’ eyes. Again you have a myriad of choices, for example:
- Desktop or mobile (or both)
- In the feed
- In Stories
- Messenger
- On the side column
- In-article
You can even select the “Automatic placements” option, which lets Facebook determine where to place your ad based on its performance.
If you want to do it yourself but don’t know where your ad will perform best, try a wider approach first and narrow it down as results trickle in. For example, set placement to five different options, see where the ad performs well, then place it there more consistently. This is possible by either
- first setting up automatic placement for a set period of time, then optimizing based on results, or
- selecting the placement that matches your target audience the closest; for example, a younger audience spends a lot of time on mobile, whereas older demographics might spend more time on desktop.
Don’t fret if the best placement isn’t immediately apparent. Make your best guess, then keep testing, analyzing, and optimizing. You’ll get there.
That’s it for your ad set. Time to set up your ad.
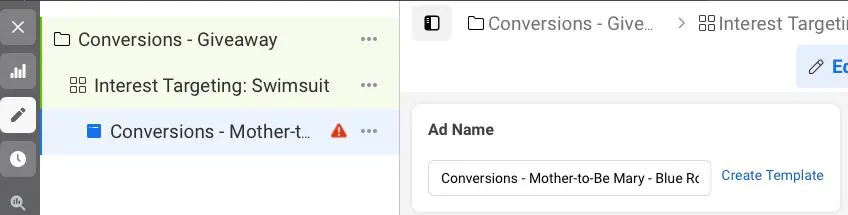
9. Name the Ad
Again, finding the right naming system for your ads can save you a lot of frustration down the road, making it easy to keep track as you build out different ads within your ad set. We recommend including at least
- campaign type,
- audience, and
- descriptor
of the ad, for example “Conversions - Mother-to-Be Mary - Blue Romper”.
10. Identify Social Accounts
In the drop-down menu, select the Facebook business page this ad set belongs to. If you only have one business page, it should already be selected.
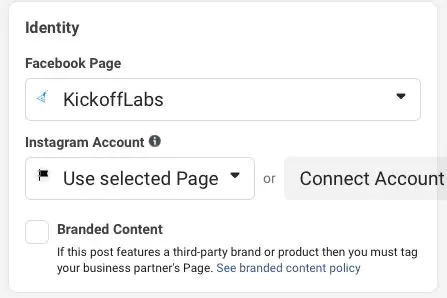
If you want to show the same ad on Instagram, you’ll be asked to select the respective Instagram account now.
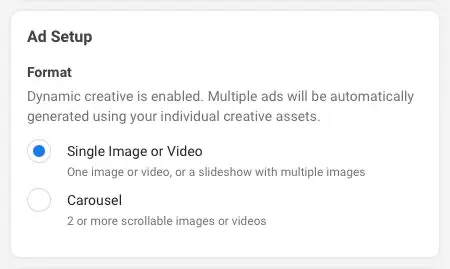
11. Select Format
You have two options: Single image/video or carousel. A single image is just that - one image or video that will be shown to all users who are served the ad.
Carousel gives you the option of two or more scrollable images with a variation of headlines. This is a great option if, for example, you’re displaying several products or want to display steps or parts of an image.
12. Upload Media
It’s time to upload your image(s) or video(s). In the spirit of split testing to find out which type of ad converts best, you’re allowed to upload up to six versions of your ad to be displayed with six different images or videos.
Find out more about split testing Facebook ads here.
13. Insert Copy
The next step is all about the written word. Enter ad text, headline, link description, and URL in the appropriate fields.
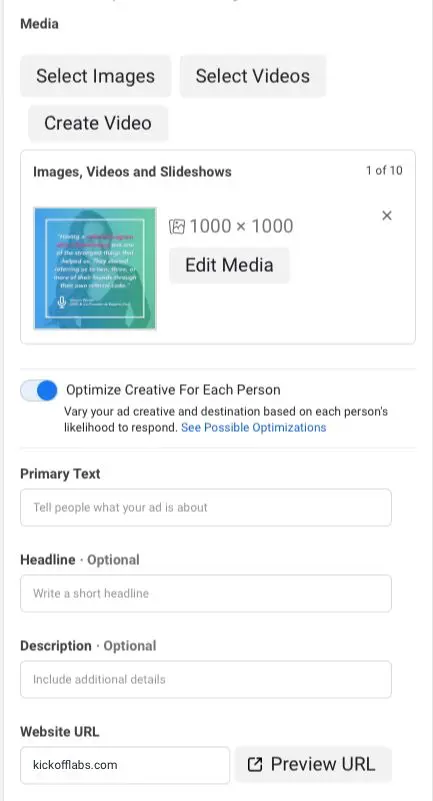
With what you’ve uploaded and input now, Facebook will generate a preview of your ad, displaying how it will show up in various placements.
14. Submit for Review
Finally, you’ll be able to first review your ad campaign yourself, and then submit it for review to Facebook. Once the ad is approved, it will start running - and hopefully collecting precious leads. Don’t expect your campaign to perform spectacularly right out of the gate - always keep testing, analyzing, and optimizing!